Unique decoration for Easter
This Easter, we wanted to do something different than the years before. Something fun, something clever, and something that isn’t too time-consuming to make, although the results are so cool it looks as if it was time-consuming. We delved deep into the inner of our DIY know-how and tried to come up with something new and exciting. It’s fair to say we achieved that. And you can too! All you need to do is read on and see how we made a wide range of different Easter decorations that all stem from one origin. Or as we like to call it, the Spherical Easter Mobiles project.
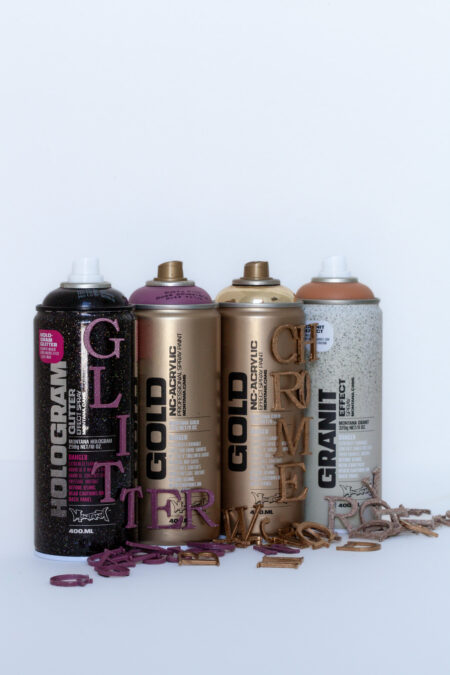
The Spherical Easter Mobile project bases its beauty around the shape of the sphere. One part is wooden spherical beads, and the other is wooden rings that can be varied in size as long as they are big enough to be able to put flowers on them. The other materials you will need are the Montana Universal PRIMER spray, Montana MARBLE spray in white, a can of Montana Shock Black colored spray, and 2 sets of Montana GOLD spray colors in colorways you like.
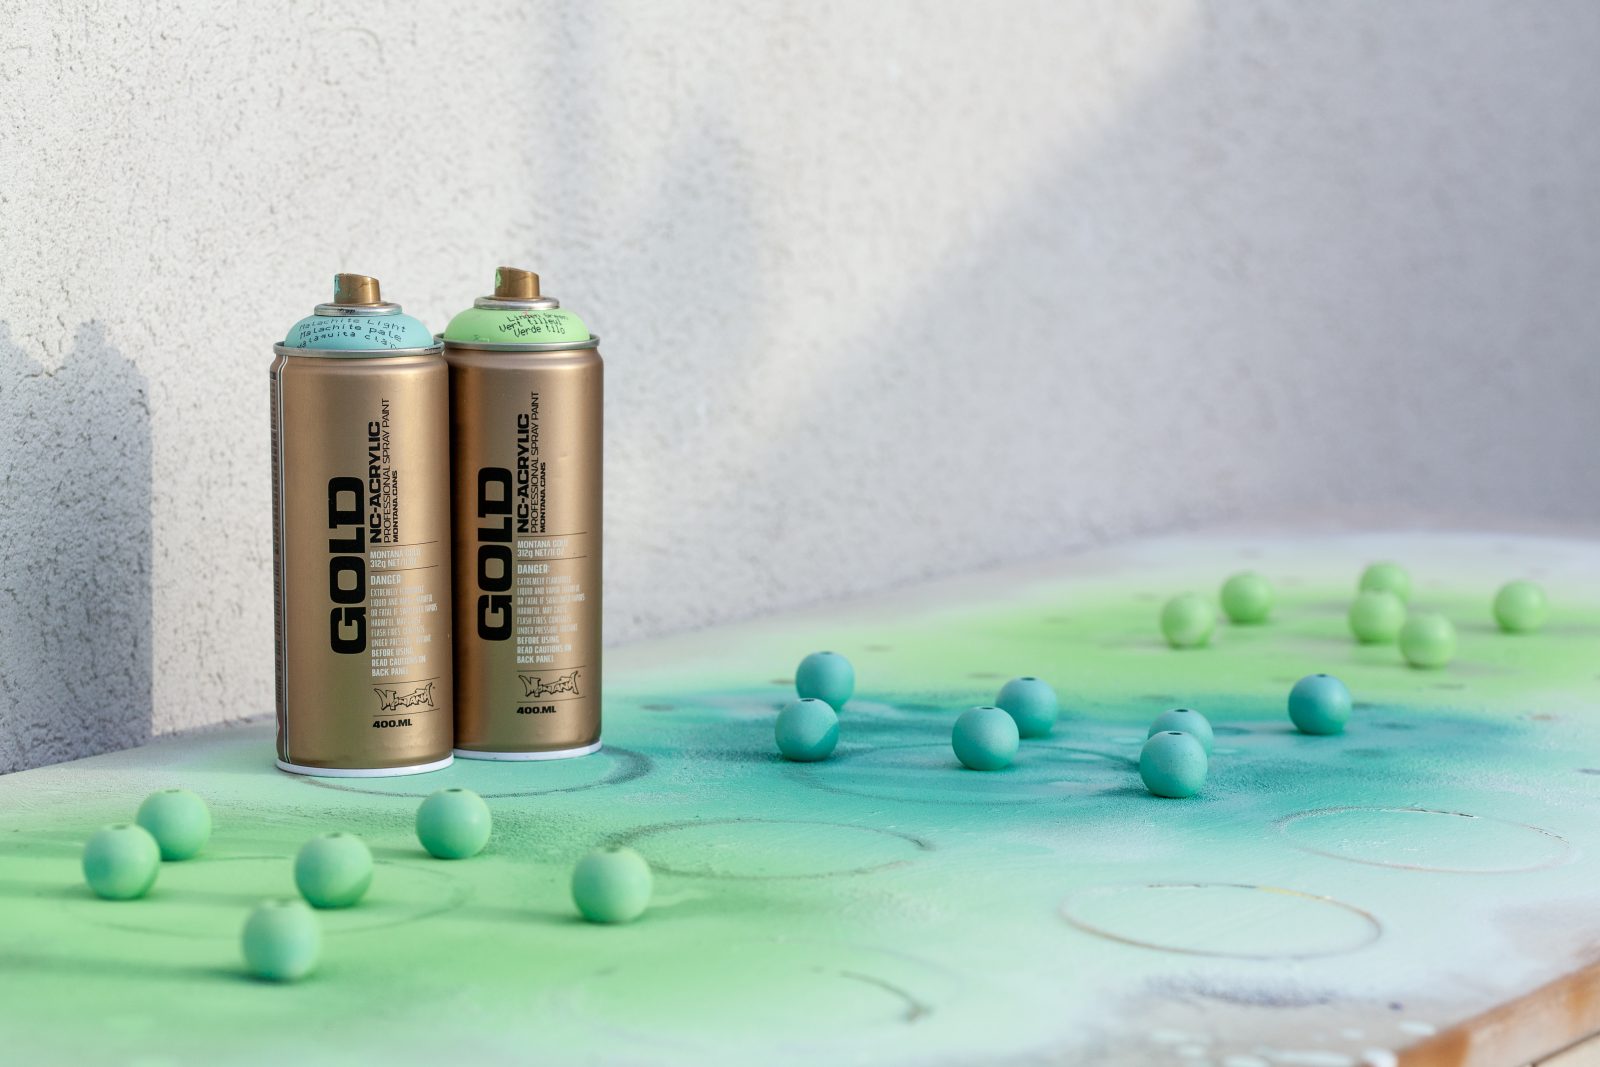
We chose one set in a group of pastel greens and the color Easter Yellow, and another set in a variation of a pastel pink, purple, and again the Easter Yellow. Add some natural and some clear string or thread, a mask, gloves, and a drop sheet and you are ready to create.
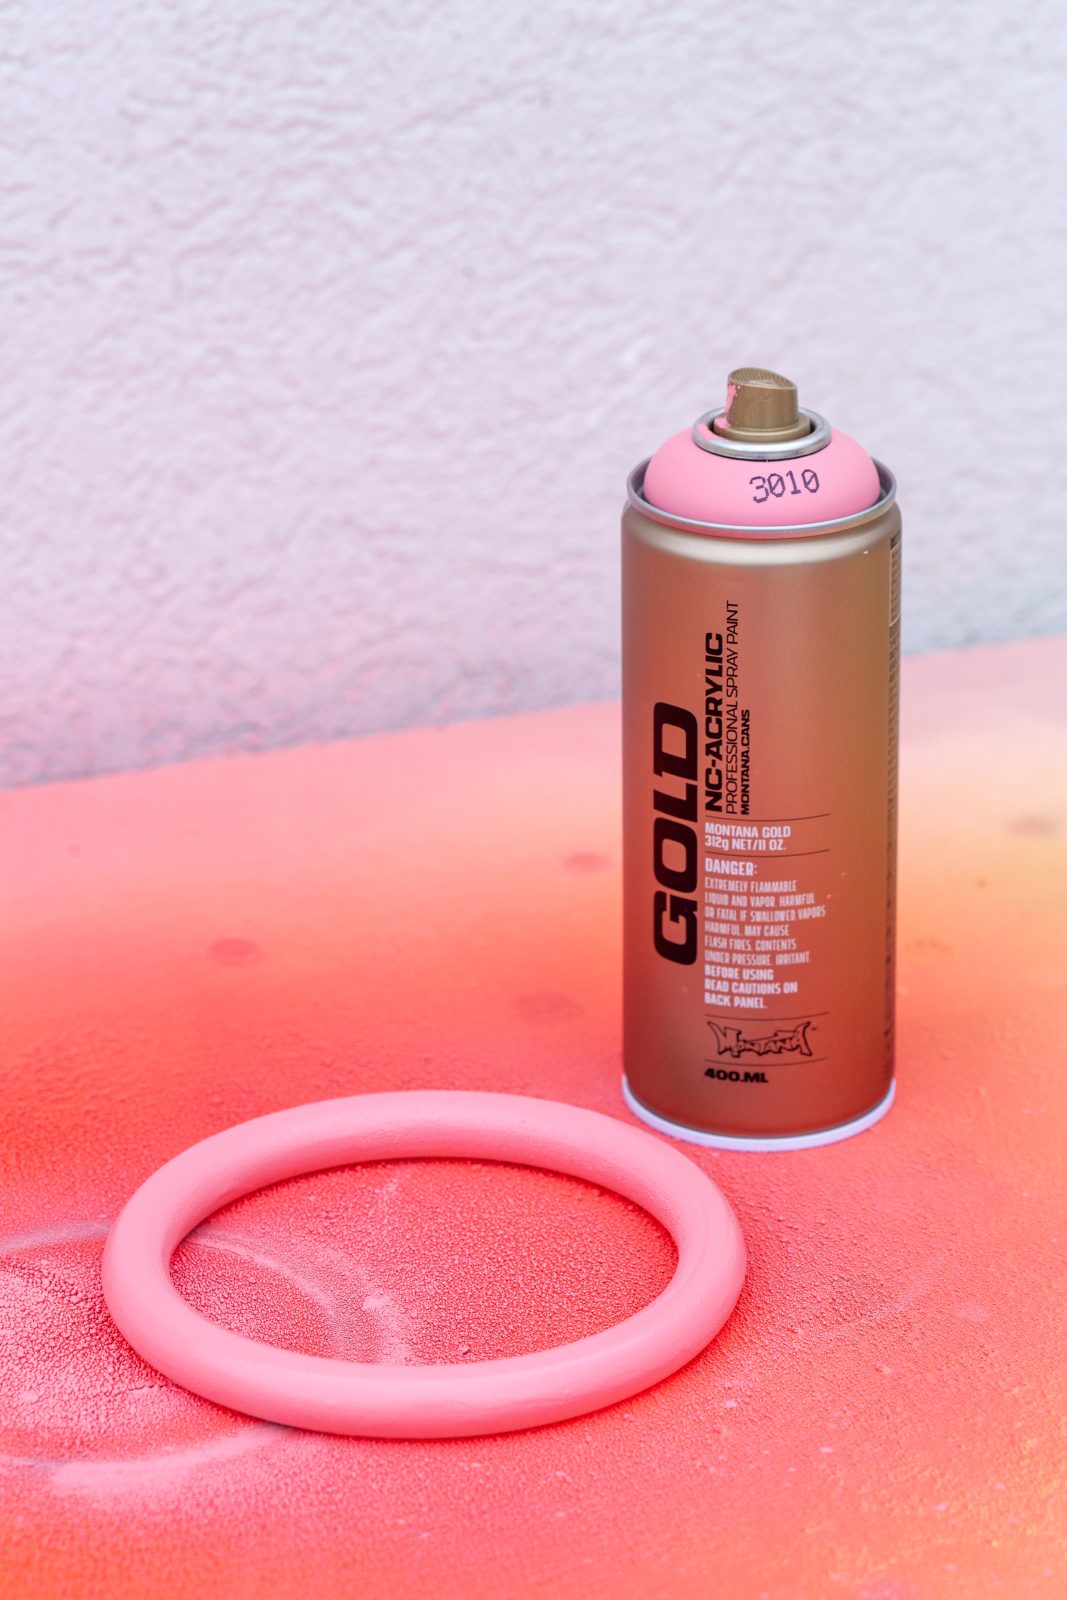

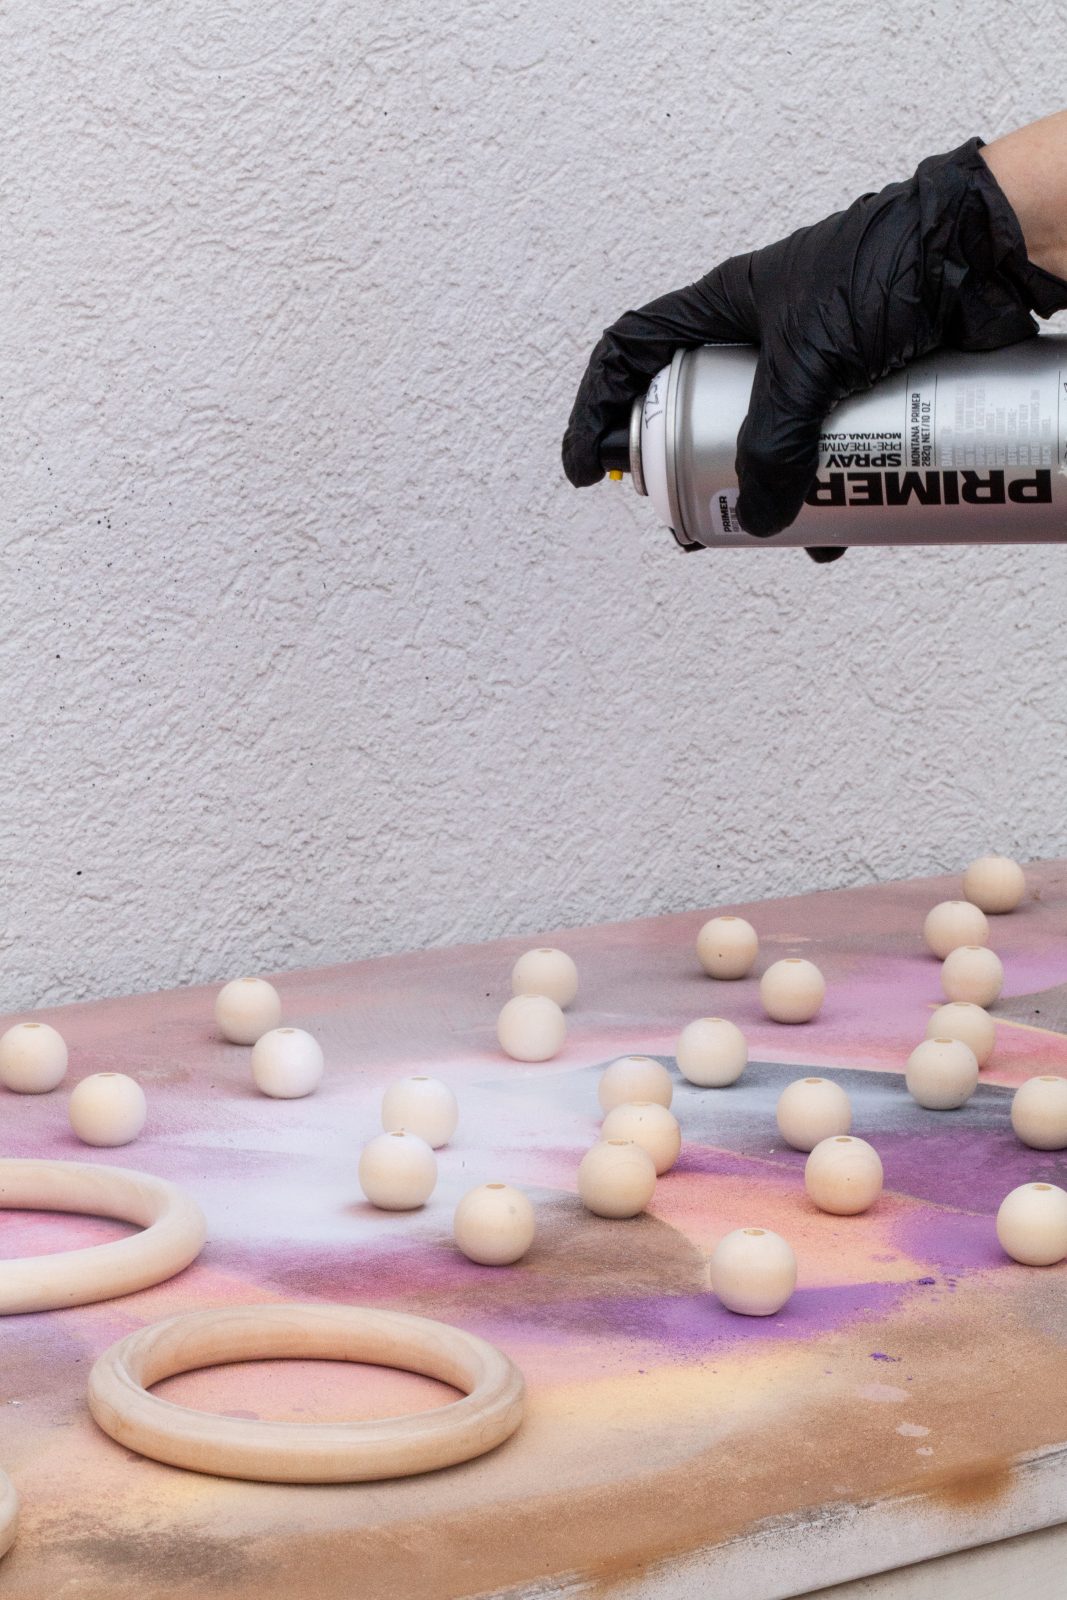
Starting with your wooden beads, place them in your protected painting area and apply one coat of Montana Universal PRIMER to each bead. Allow them to dry and do the same to your wooden rings. Once all are done, turn them over and apply PRIMER to the remaining unpainted surfaces. In this process, you will need to repeat the same way when applying single colors for each bead and ring. We had greens and yellows for the beds, and pink, purple, and yellow for the rings. Let them dry, flip them over, and VOILA! Alternate the colors so you have a relatively even number of each color.
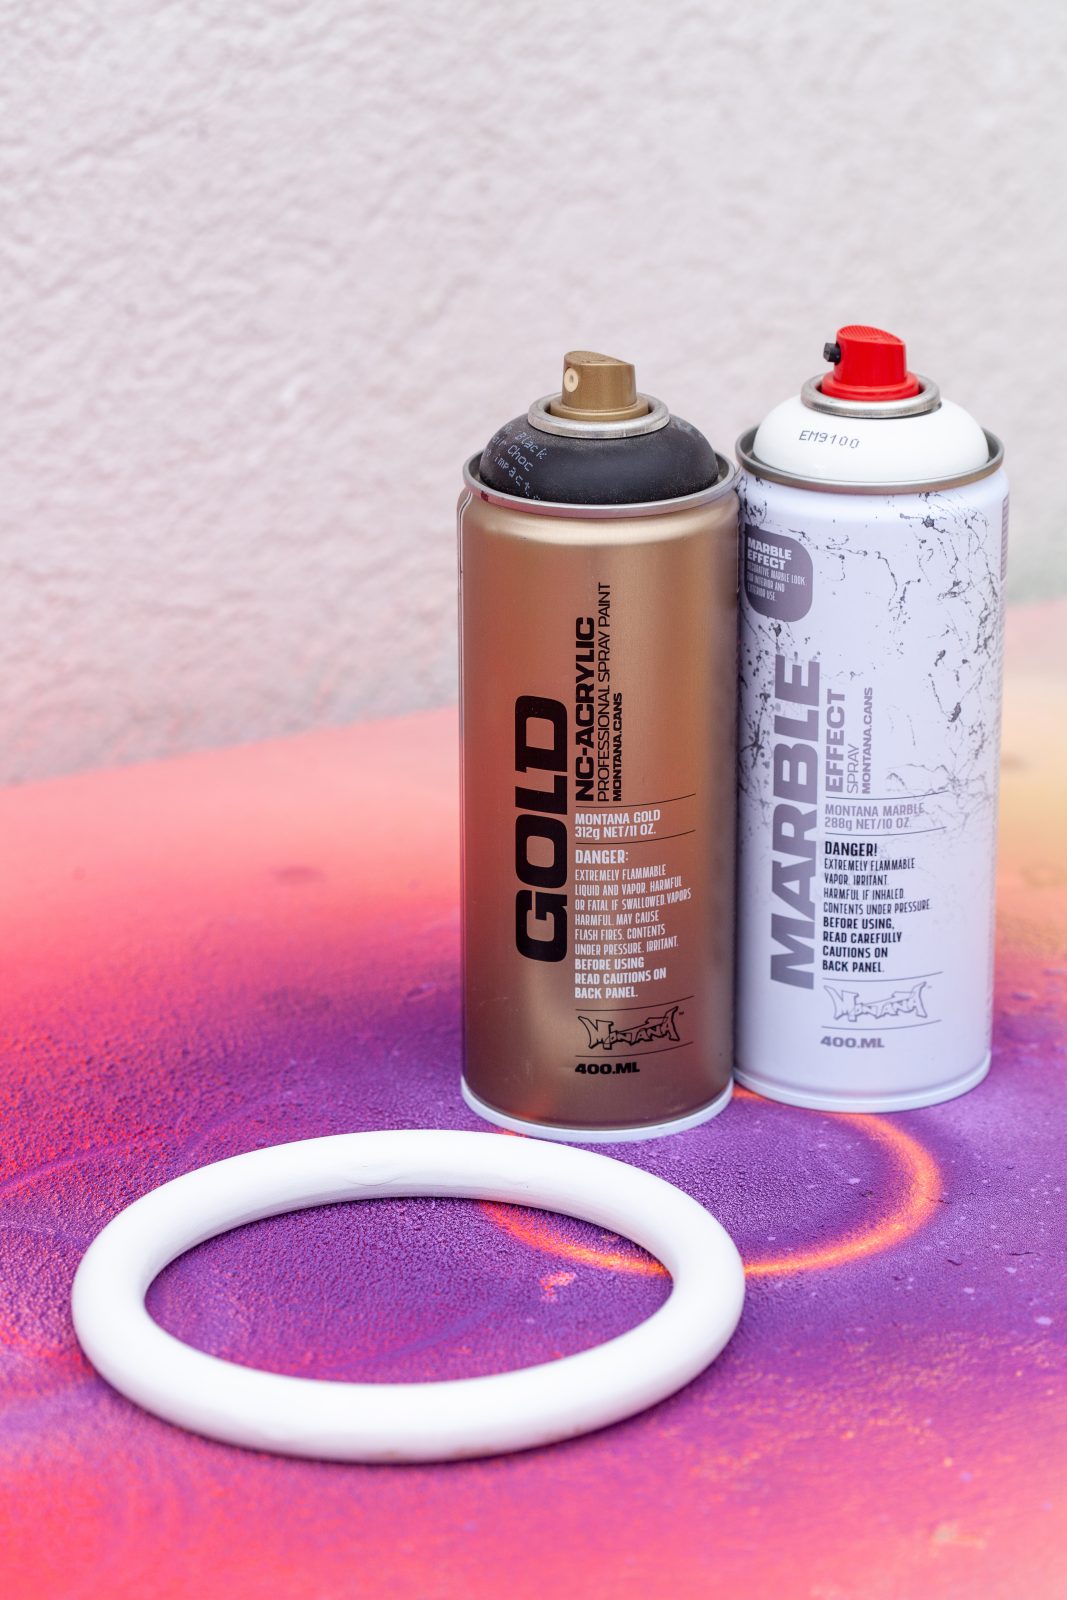
Save some of the wooden rings for a MARBLE effect version. The same process as above applies, however, we just painted these rings black first without priming them. Once both sides are coated, then, at a distance of 20cm or more away, spray your Montana MARBLE Effect color white on them allowing the color strands to land organically on the rings.


Once dry, flip them over and repeat. Before painting anything, always remember to shake all your cans vigorously for 2-3 minutes. Where applicable, remove the nozzle from the cans, turn them upside down allowing the black safety ring to fall out, and then reattach the nozzle and trigger the cans away from any objects.
The fundamentals and all the hard work are done. The remaining part is to find some flowers from your region that either look good, are in bloom, or are traditional for this time of year wherever you live. We found some tulips, mimosa, and anything else that nature was flaunting in the park or garden.

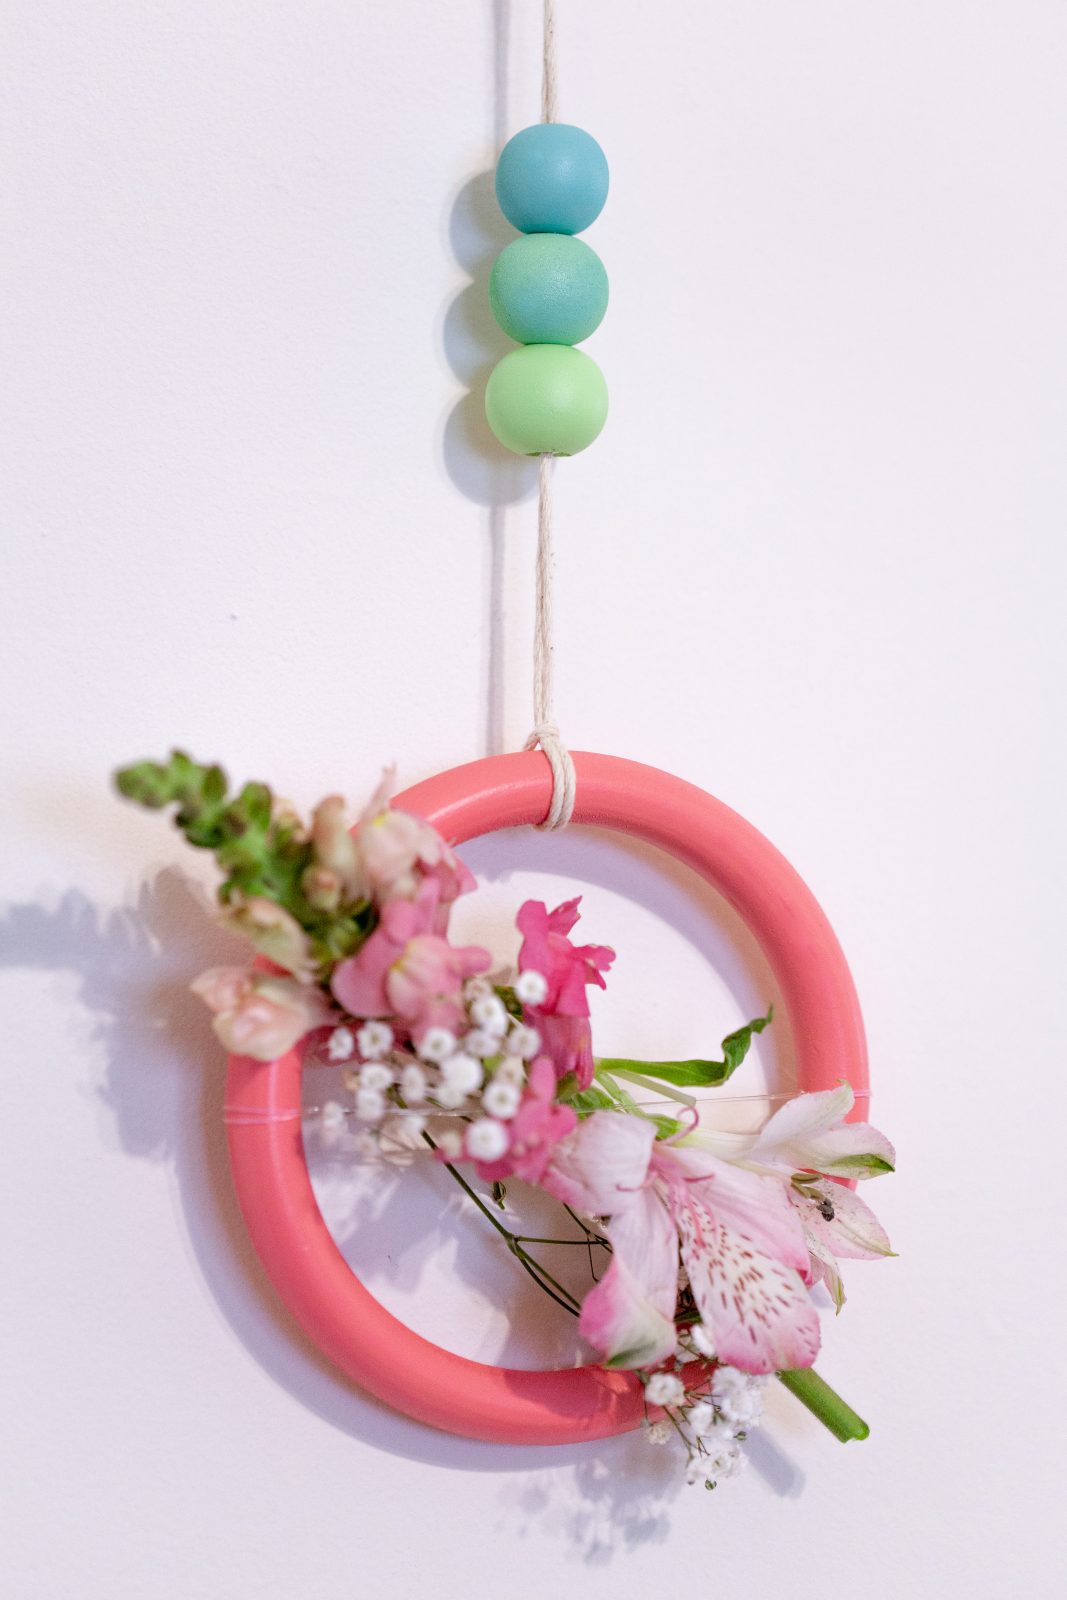

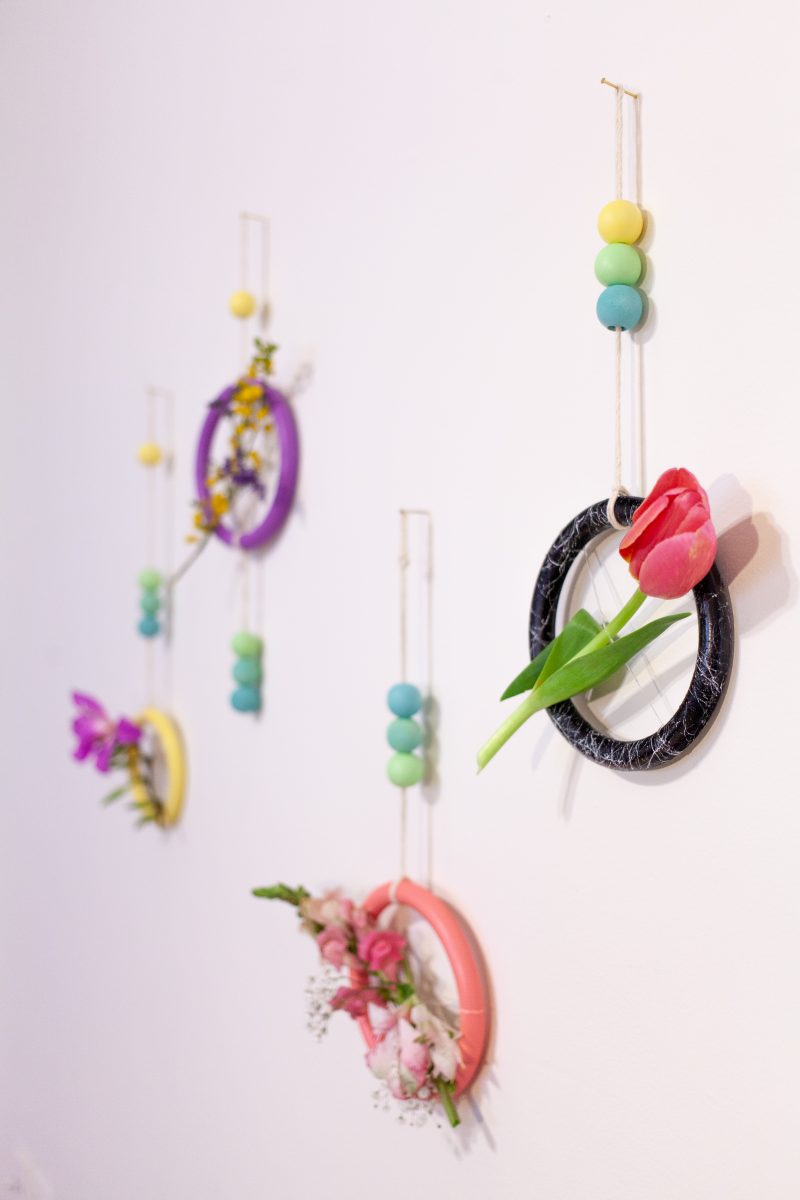
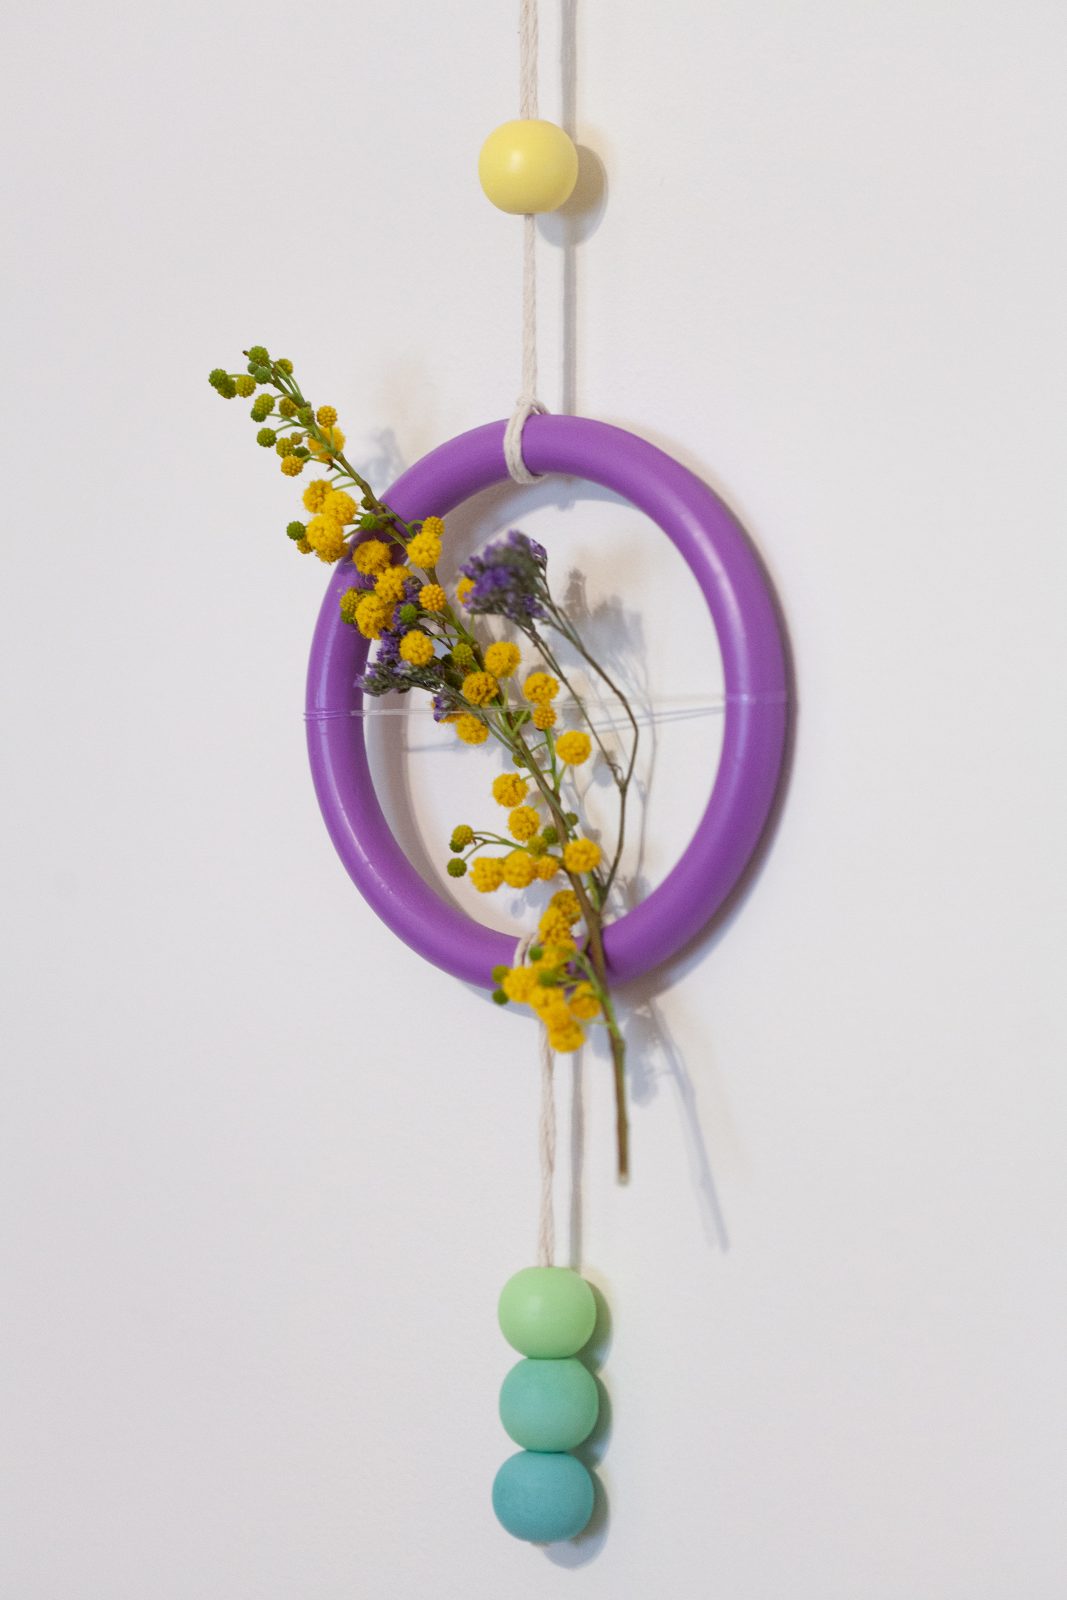
We fed our string or thread through beads in the color sequences we liked, then left some thread going upward to attach our mobiles to the nail or screw in the wall. You can make any variation you like regarding how many beads are above and below the circle. The flowers you find will also help you determine this thanks to their shapes and their colors.

Using your clear string or thread (which could be fishing line or tooth floss), tie a knot at one end of your ring, place your flower in the middle, tie a knot around its stem, and then tie the remainder of the clear thread on the equally opposite side of the ring. This will also give the amazing illusion as if your flower is floating in the ring. Should you have found flowers or foliage that has other tying possibilities, experiment so that you get the result you like.

This is an easy project that only really has 30-40 minutes of working time depending on the number of mobiles you make. One thing is sure though, they look professional even though they are intimate and handmade. And no one will have seen them anywhere before. That is unless they are reading the allspraypainted blog as well. Happy Easter, and Happy Crafting!
Project by Jordan Katz