A new breath of fresh air for an old fan
Ceiling fans are practical instruments to have in your home. They keep you cool in summer, and they circulate air which helps prevent the onset of mold in your house. They use less energy than air conditioners and are a lot healthier when it comes to air quality. But why isn’t more attention paid to how they look? It seems that in little time, most ceiling fans seem to look aged and dated. That is until they get the allspraypainted treatment, which is exactly what we did. Read on and learn how you can get a new bout of fresh air from an old ceiling fan.
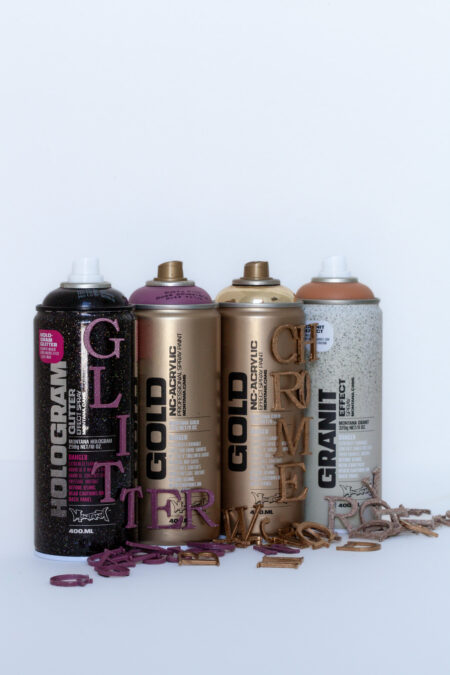
Materials used
- Ceiling fan
- Screwdriver(s)
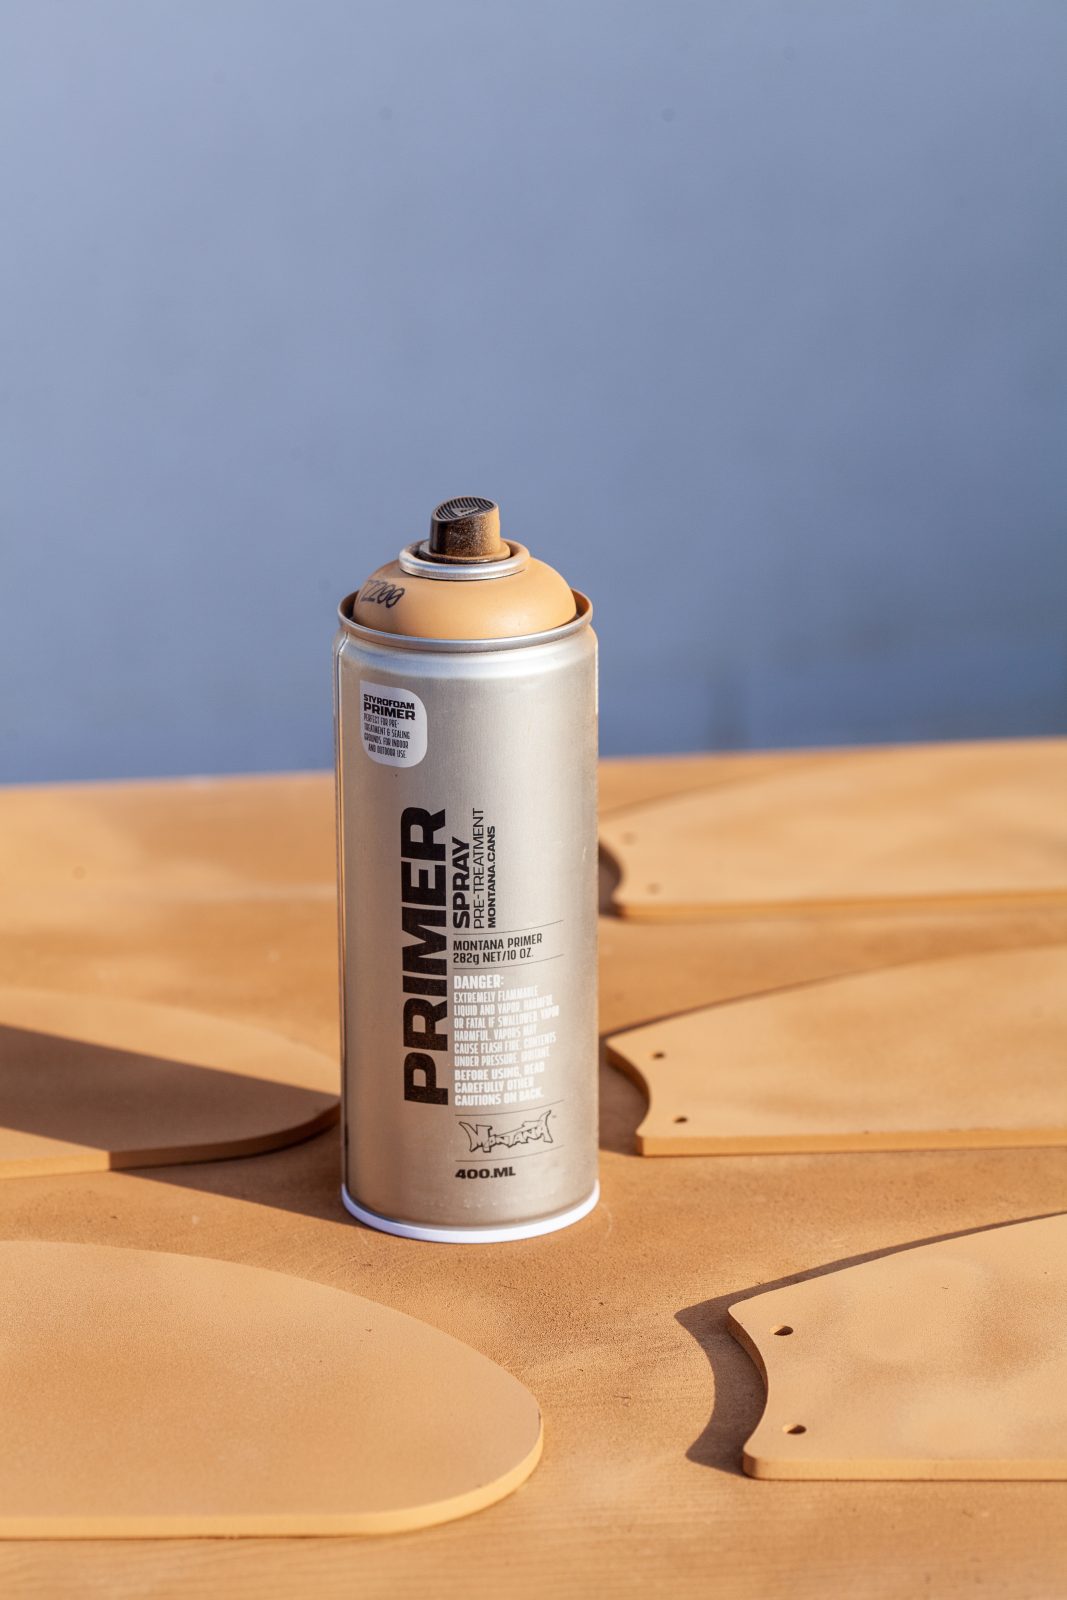
- Montana PRIMER (Universal preferred but others possible)
- Montana GOLD Goldchrome
- Montana GOLD colors of your choice
- Masking tape
- Scrap paper, or thin wrapping paper
- Fine sandpaper (optional)
- Gloves
- Mask
- Drop sheet
How it was done
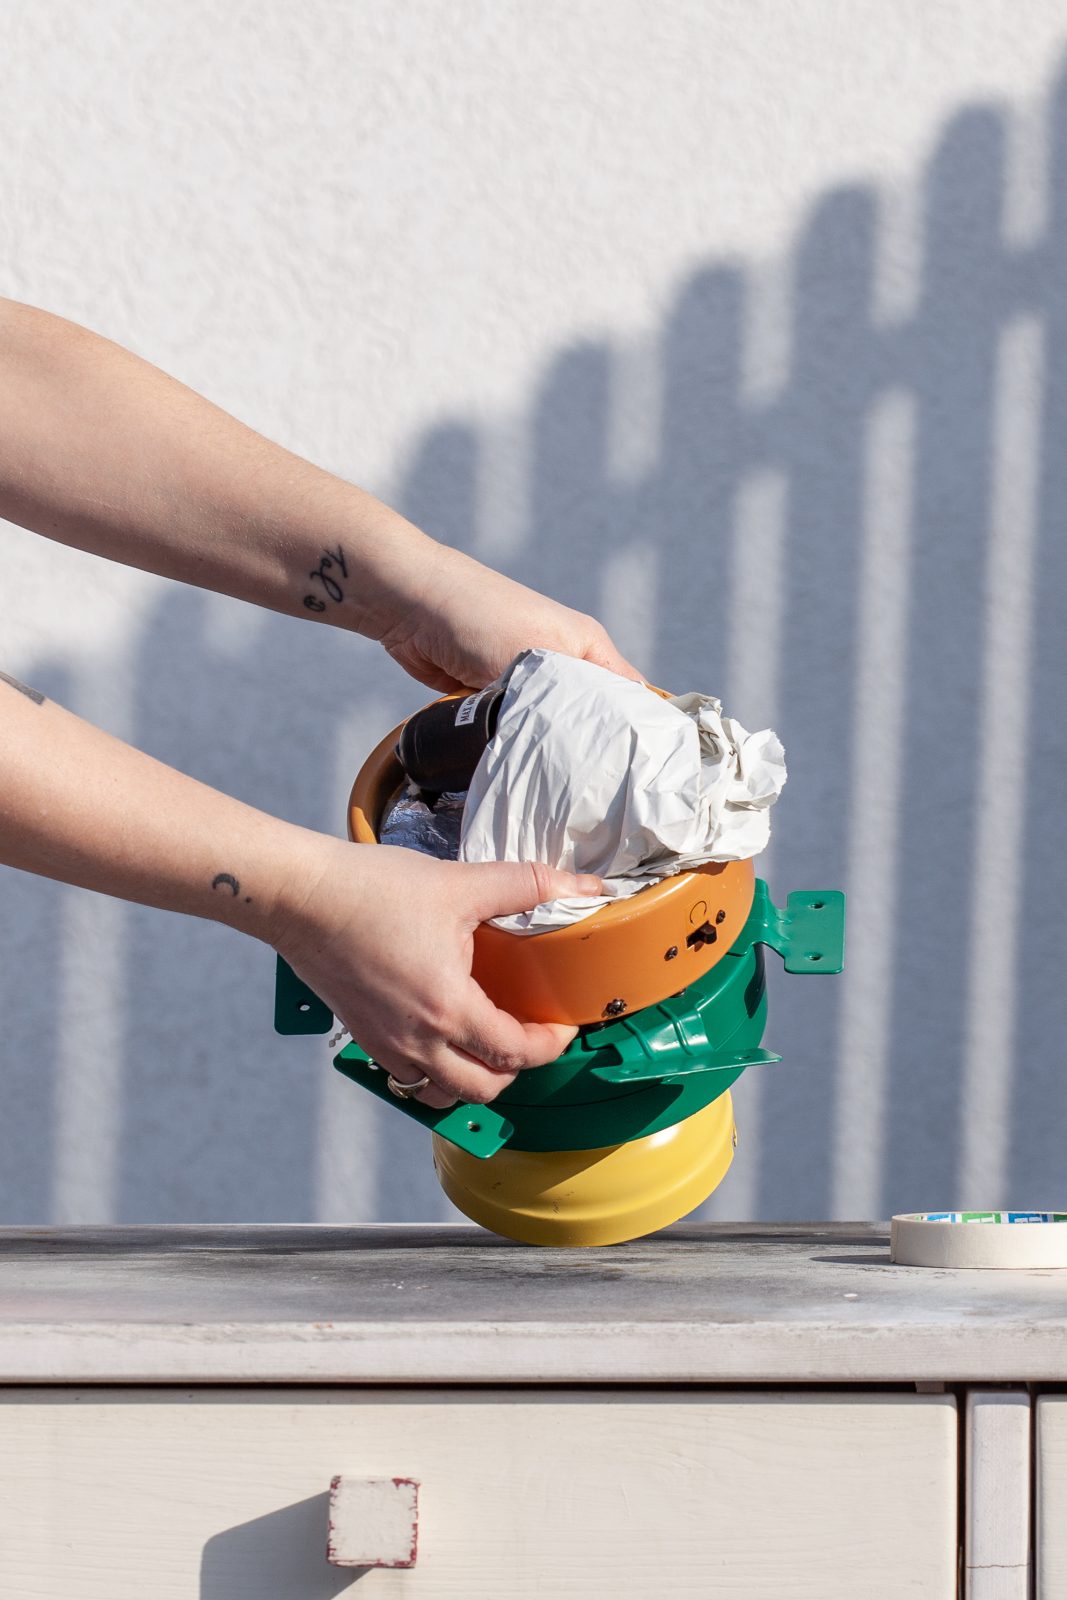
The time is now. You have been looking at that old ceiling fan for ages, using it, but secretly thinking it is an eyesore. With as many DIY projects behind you, as there are, you know that you’ve “got this one”. And you do, at least once someone qualified has removed it safely from the ceiling for you. Once this has happened, clean the fan free of dust and grab the applicable screwdriver to remove the blades and any pieces that are easier to paint attached from the fan body. If this is beyond your abilities, don’t be afraid to be a little cheeky and ask a qualified trade person or the person who removed the fan from the ceiling and dismantle it. Once this is done, you can give it all a clean.
It’s not a must, but it is beneficial to carefully sand down your fan blades and fan body to roughen up the surface a little in preparation for priming and coating. Again, make sure your fan parts are free of dust, and this time ensure free of any dirt or oils as well. Then it is time to prepare for painting.
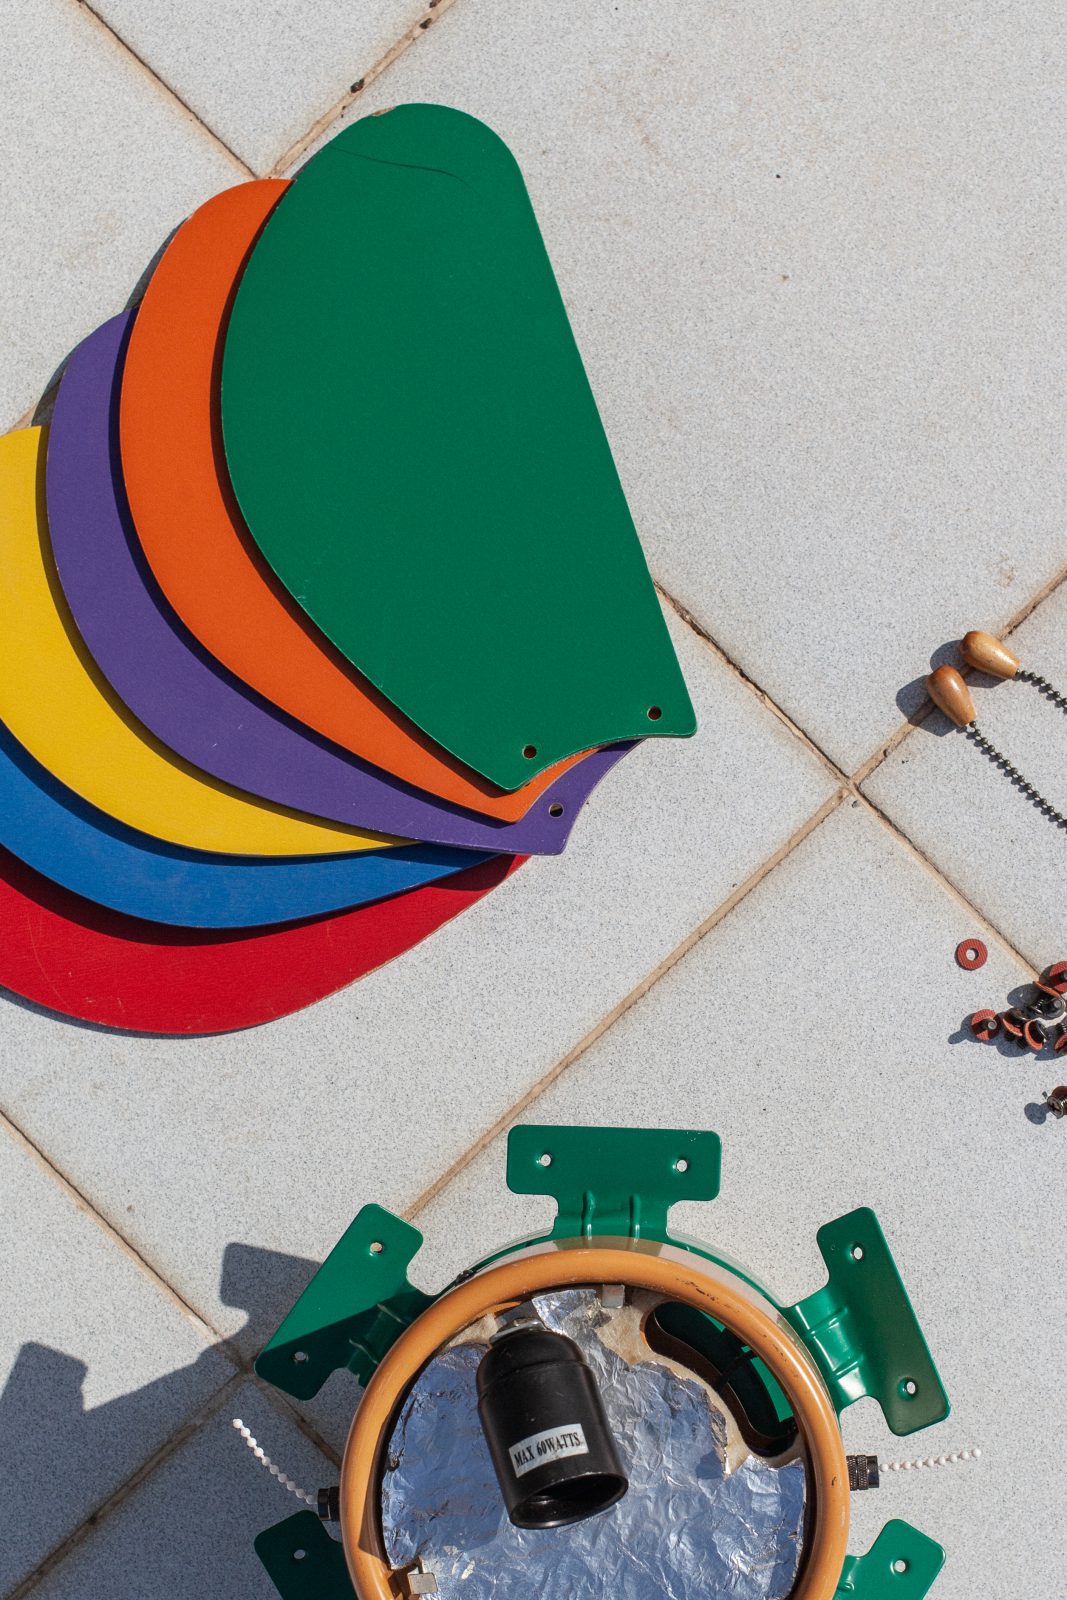
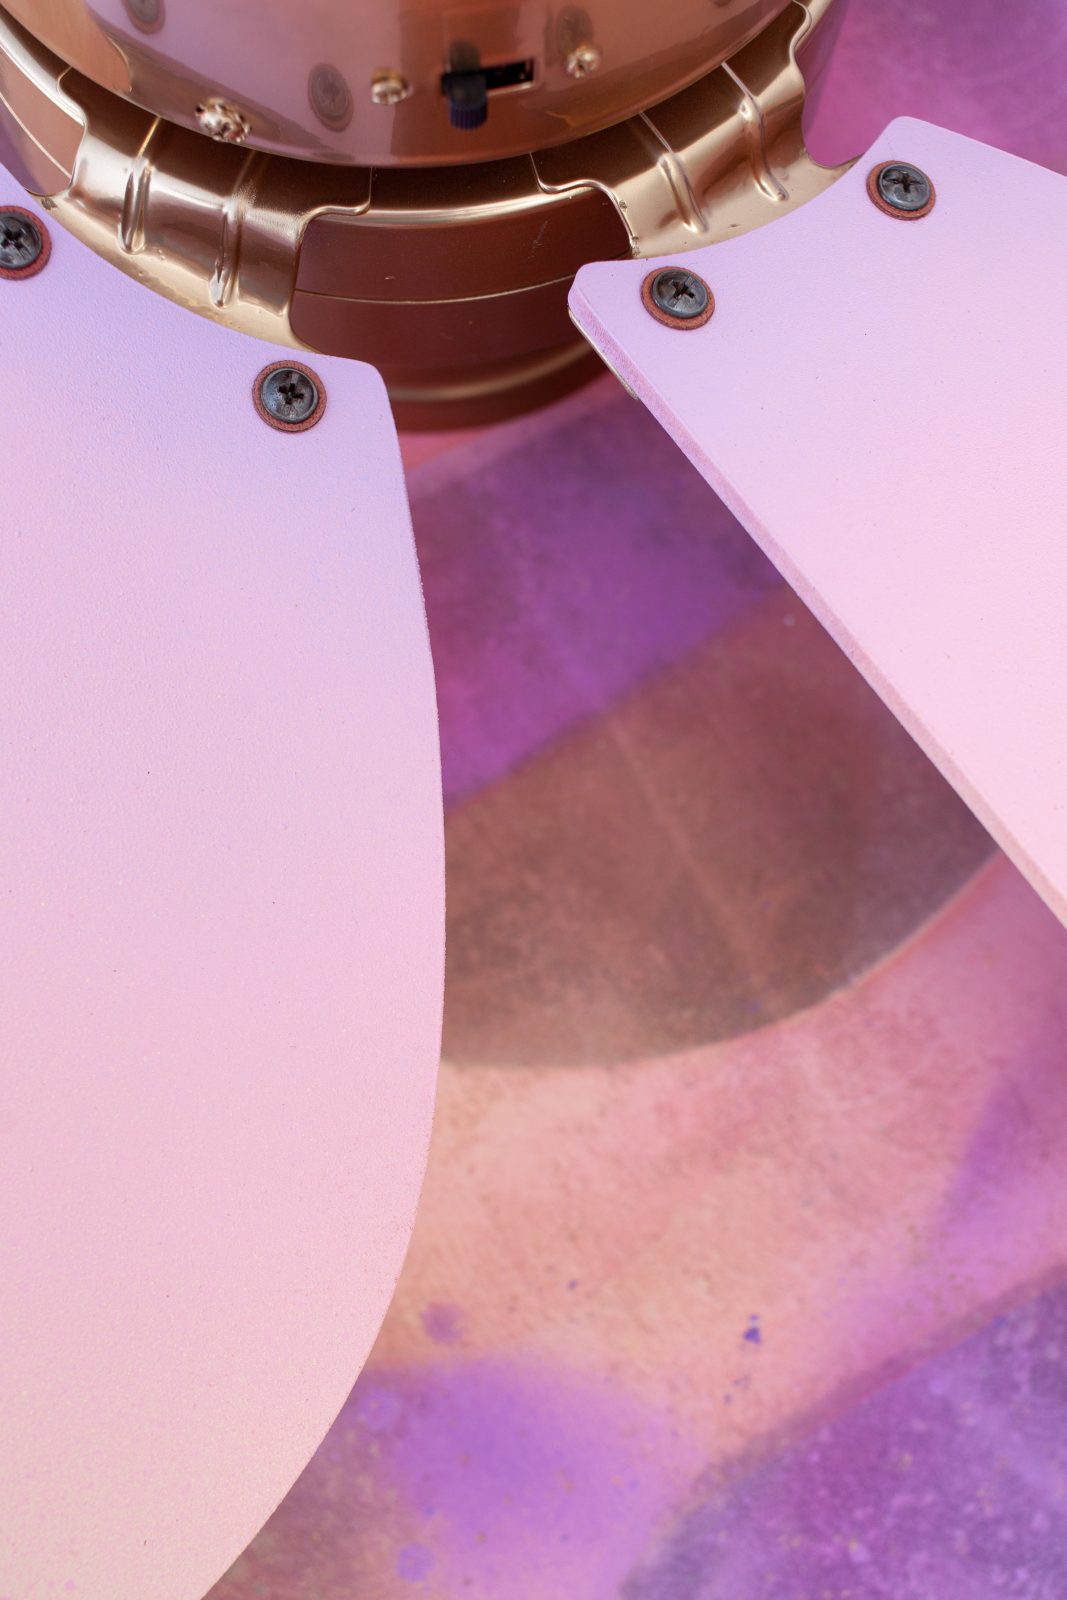
With the masking tape and thin paper, cover all the electrical parts of the fan that shouldn’t be painted and make sure the masking tape has firm contact with each surface. This will ensure no paint seeps in under the masking tape’s edges. Referring back to our age-old technique, make sure all your cans are well-shaken for 2-3 minutes each time before use, remove the nozzle, and turn the cans upside down to release the black safety ring (where applicable).

Then reapply your nozzles and give each can a quick spray away from any objects. Starting with your chosen Montana PRIMER spray, apply thin even coats to cover all the surfaces of your fan that will be coated with color in the next step. That means the blades, body, and base. Allow to dry and proceed to the next step.
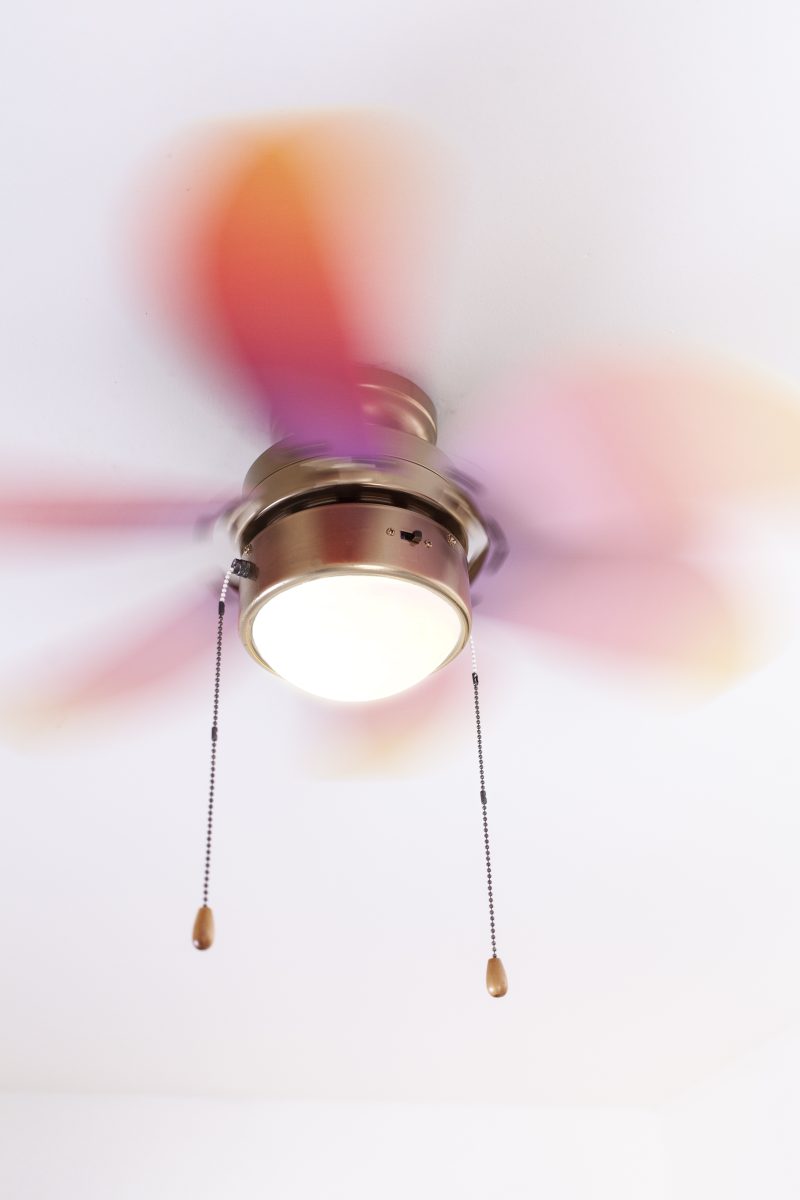
We chose to coat all the parts of the body and base of the fan with Montana GOLD Goldchrome. This is a great color that gives the most deceivingly real metallic chrome effect. However, to achieve this magnificent effect the Goldchrome color has special high-quality reflective metallic pigments that dry on the surface of the paint and are not sealed within it.
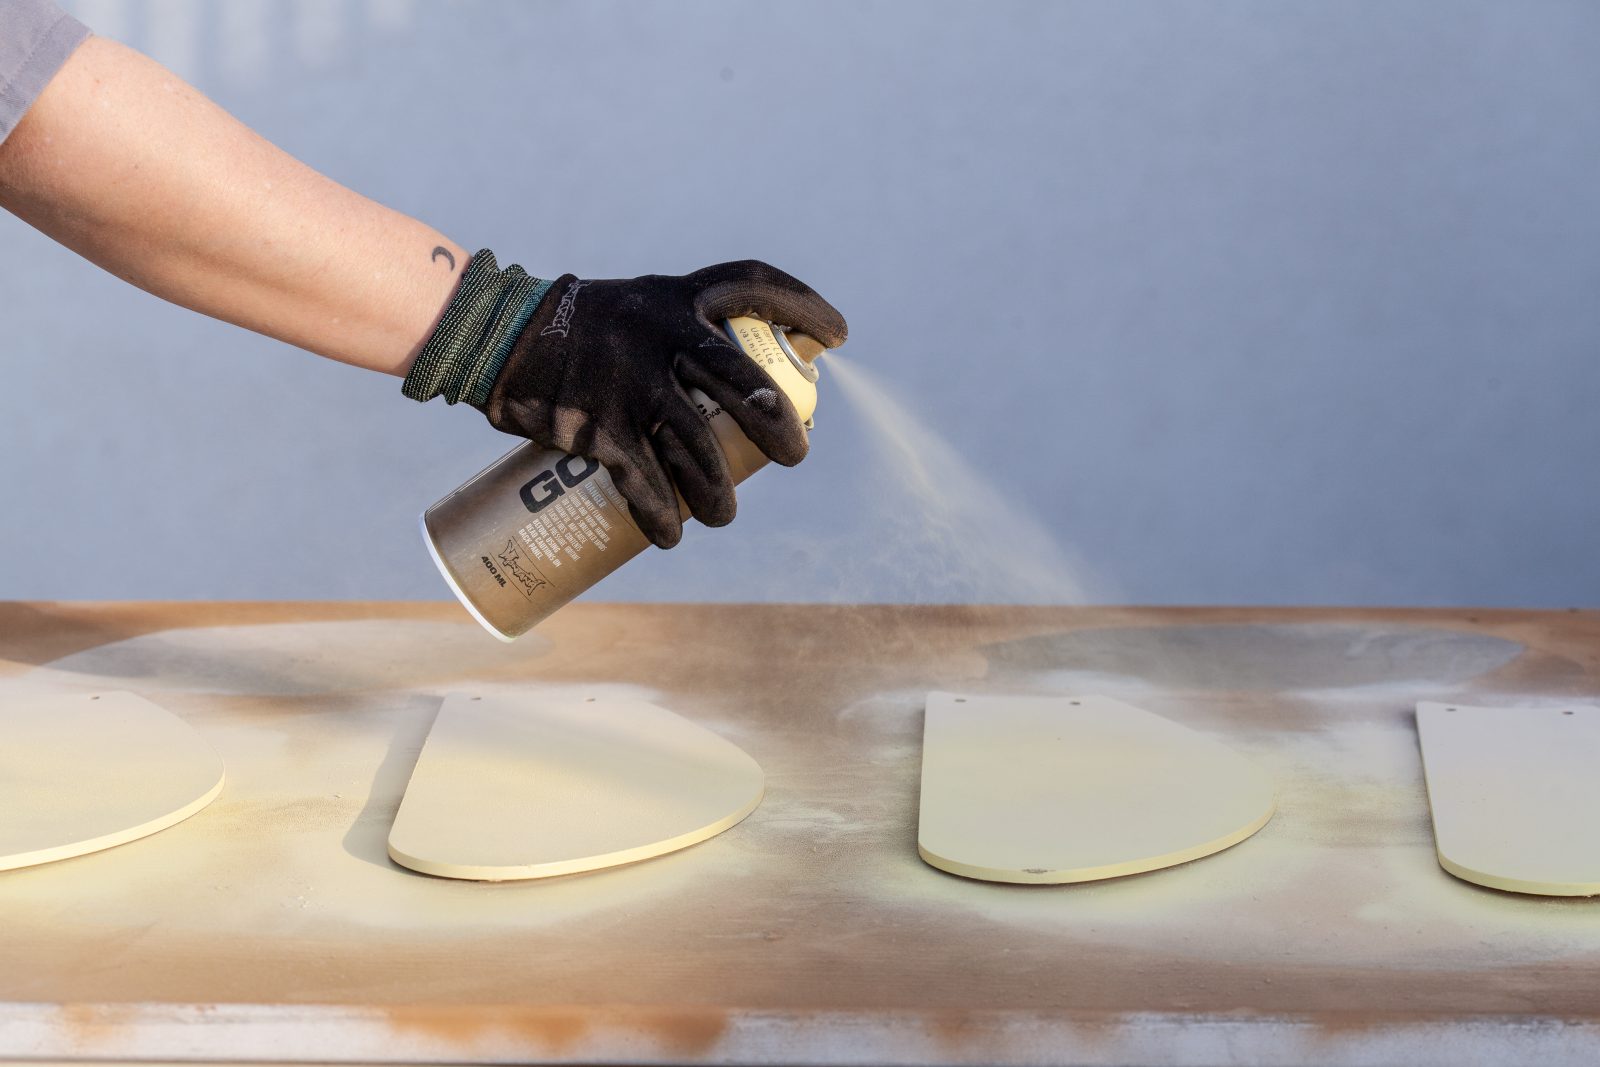
This means once you are done, try not to handle the fan body too much, or wear gloves to avoid leaving fingerprints or marks. Apply smooth even coat(s) as required and allow to dry overnight. You can also apply a Montana VARNISH clear coat (of your choice of finish) the next day to protect the new paint job and make it more durable. However, be aware this may lessen the shine effect that the color has created and dull the shine a little.

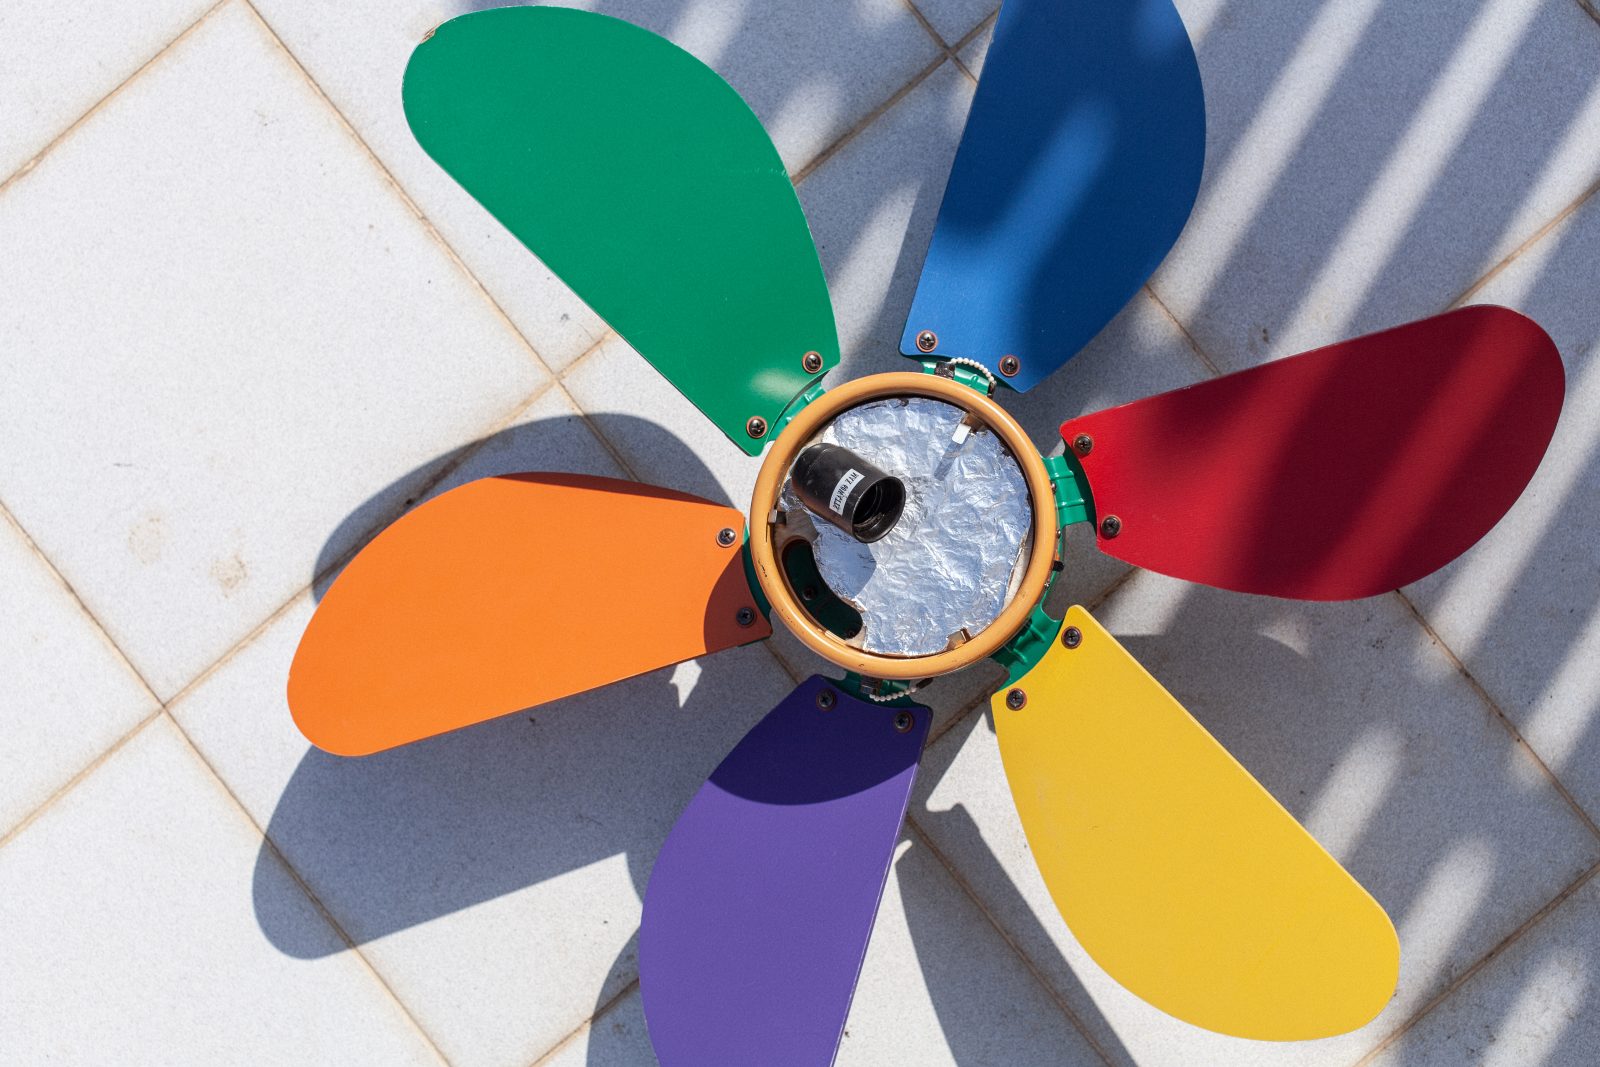
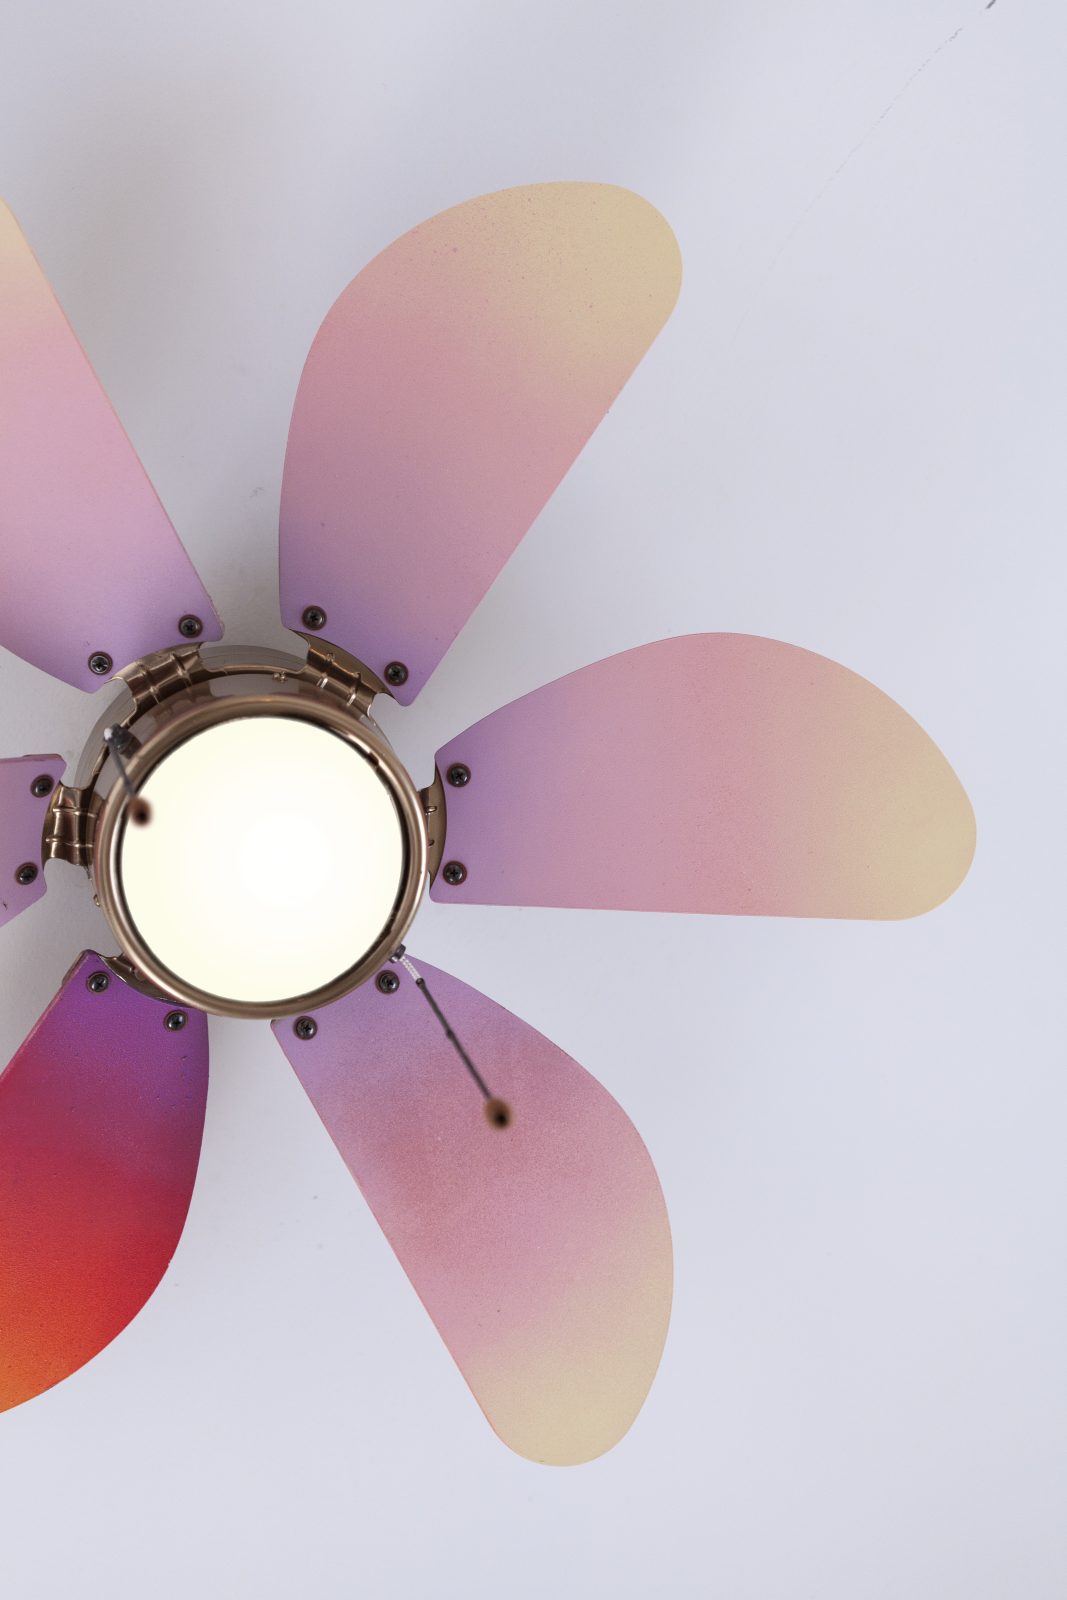
The next step is painting your fan blades. We chose a variation of colors in a faded gradient and one blade with more dynamic colors to create a stunning visual effect when the fan is turning. The blades are a faded variation of soft yellow, pink, and purple. And the feature blade is a stronger variation of purple, magenta, and yellow. All in more dynamic variations to refer back to the soft tones used on the other blades.

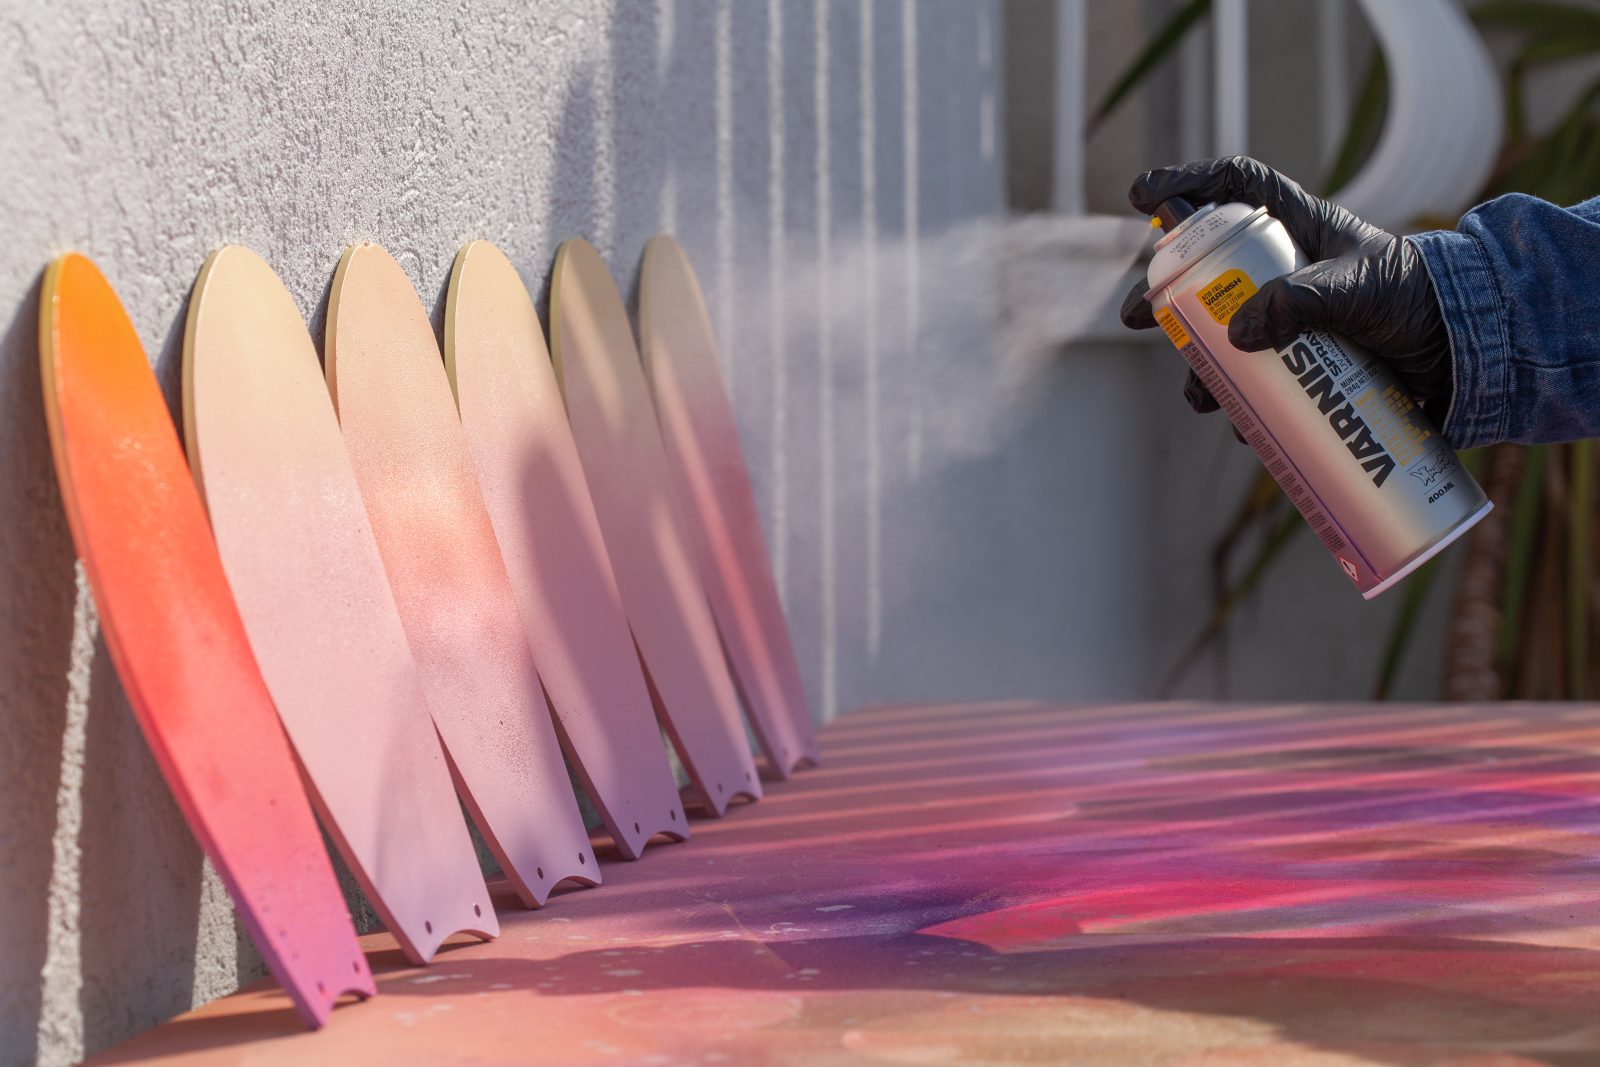
Choosing the colors in order of your choice, fade the three colors as desired. Single coats should be sufficient. Then allow all the parts to dry for 24 hours or more so that the paint is completely cured. Then apply some Montana VARNISH to seal the blades and make them more durable when it comes to cleaning and dusting. We chose Montana Matt VARNISH. Then allow drying overnight again. This is probably a good time to focus on some other things like eating, drinking, and sleeping in case you kind of forgot to do these things while you were deep in fan fever.

Then that magical time has come. The part where you take off all the masking tape and protective paper and put it all back together. Followed by reattaching the reassembled fan to the ceiling and trying it out. If you need your tradesperson or handyperson again for this step, hopefully, you still have some of that food and drink left to lure them back into the house. Once the fan is on and spinning, you will most likely stand and look at it in wonder. Because let’s face it, it looks very cool! Hopefully, you haven’t taken on this project in the dead of winter as this moment may become very cold.
There are probably about 1.5 to 2 hours of actual painting and preparation work excluding drying times. If you are a beginner or not so confident with your skill level, keep it simple and stick to one color for everything, or one color for the blades and one for the fan body. Otherwise, this is an intermediate to experienced-level project and will give you the challenges you have been looking for! Most importantly, make sure the disconnection and dismantling, and the reassembling and reconnection of the fan (where applicable) are done by either a qualified tradesperson or someone you know can do the job safely.

With all the work behind you, it is fair to say that this may be the coolest project you’ve done to date. Congratulations and Happy Crafting!
Project by Jordan Katz