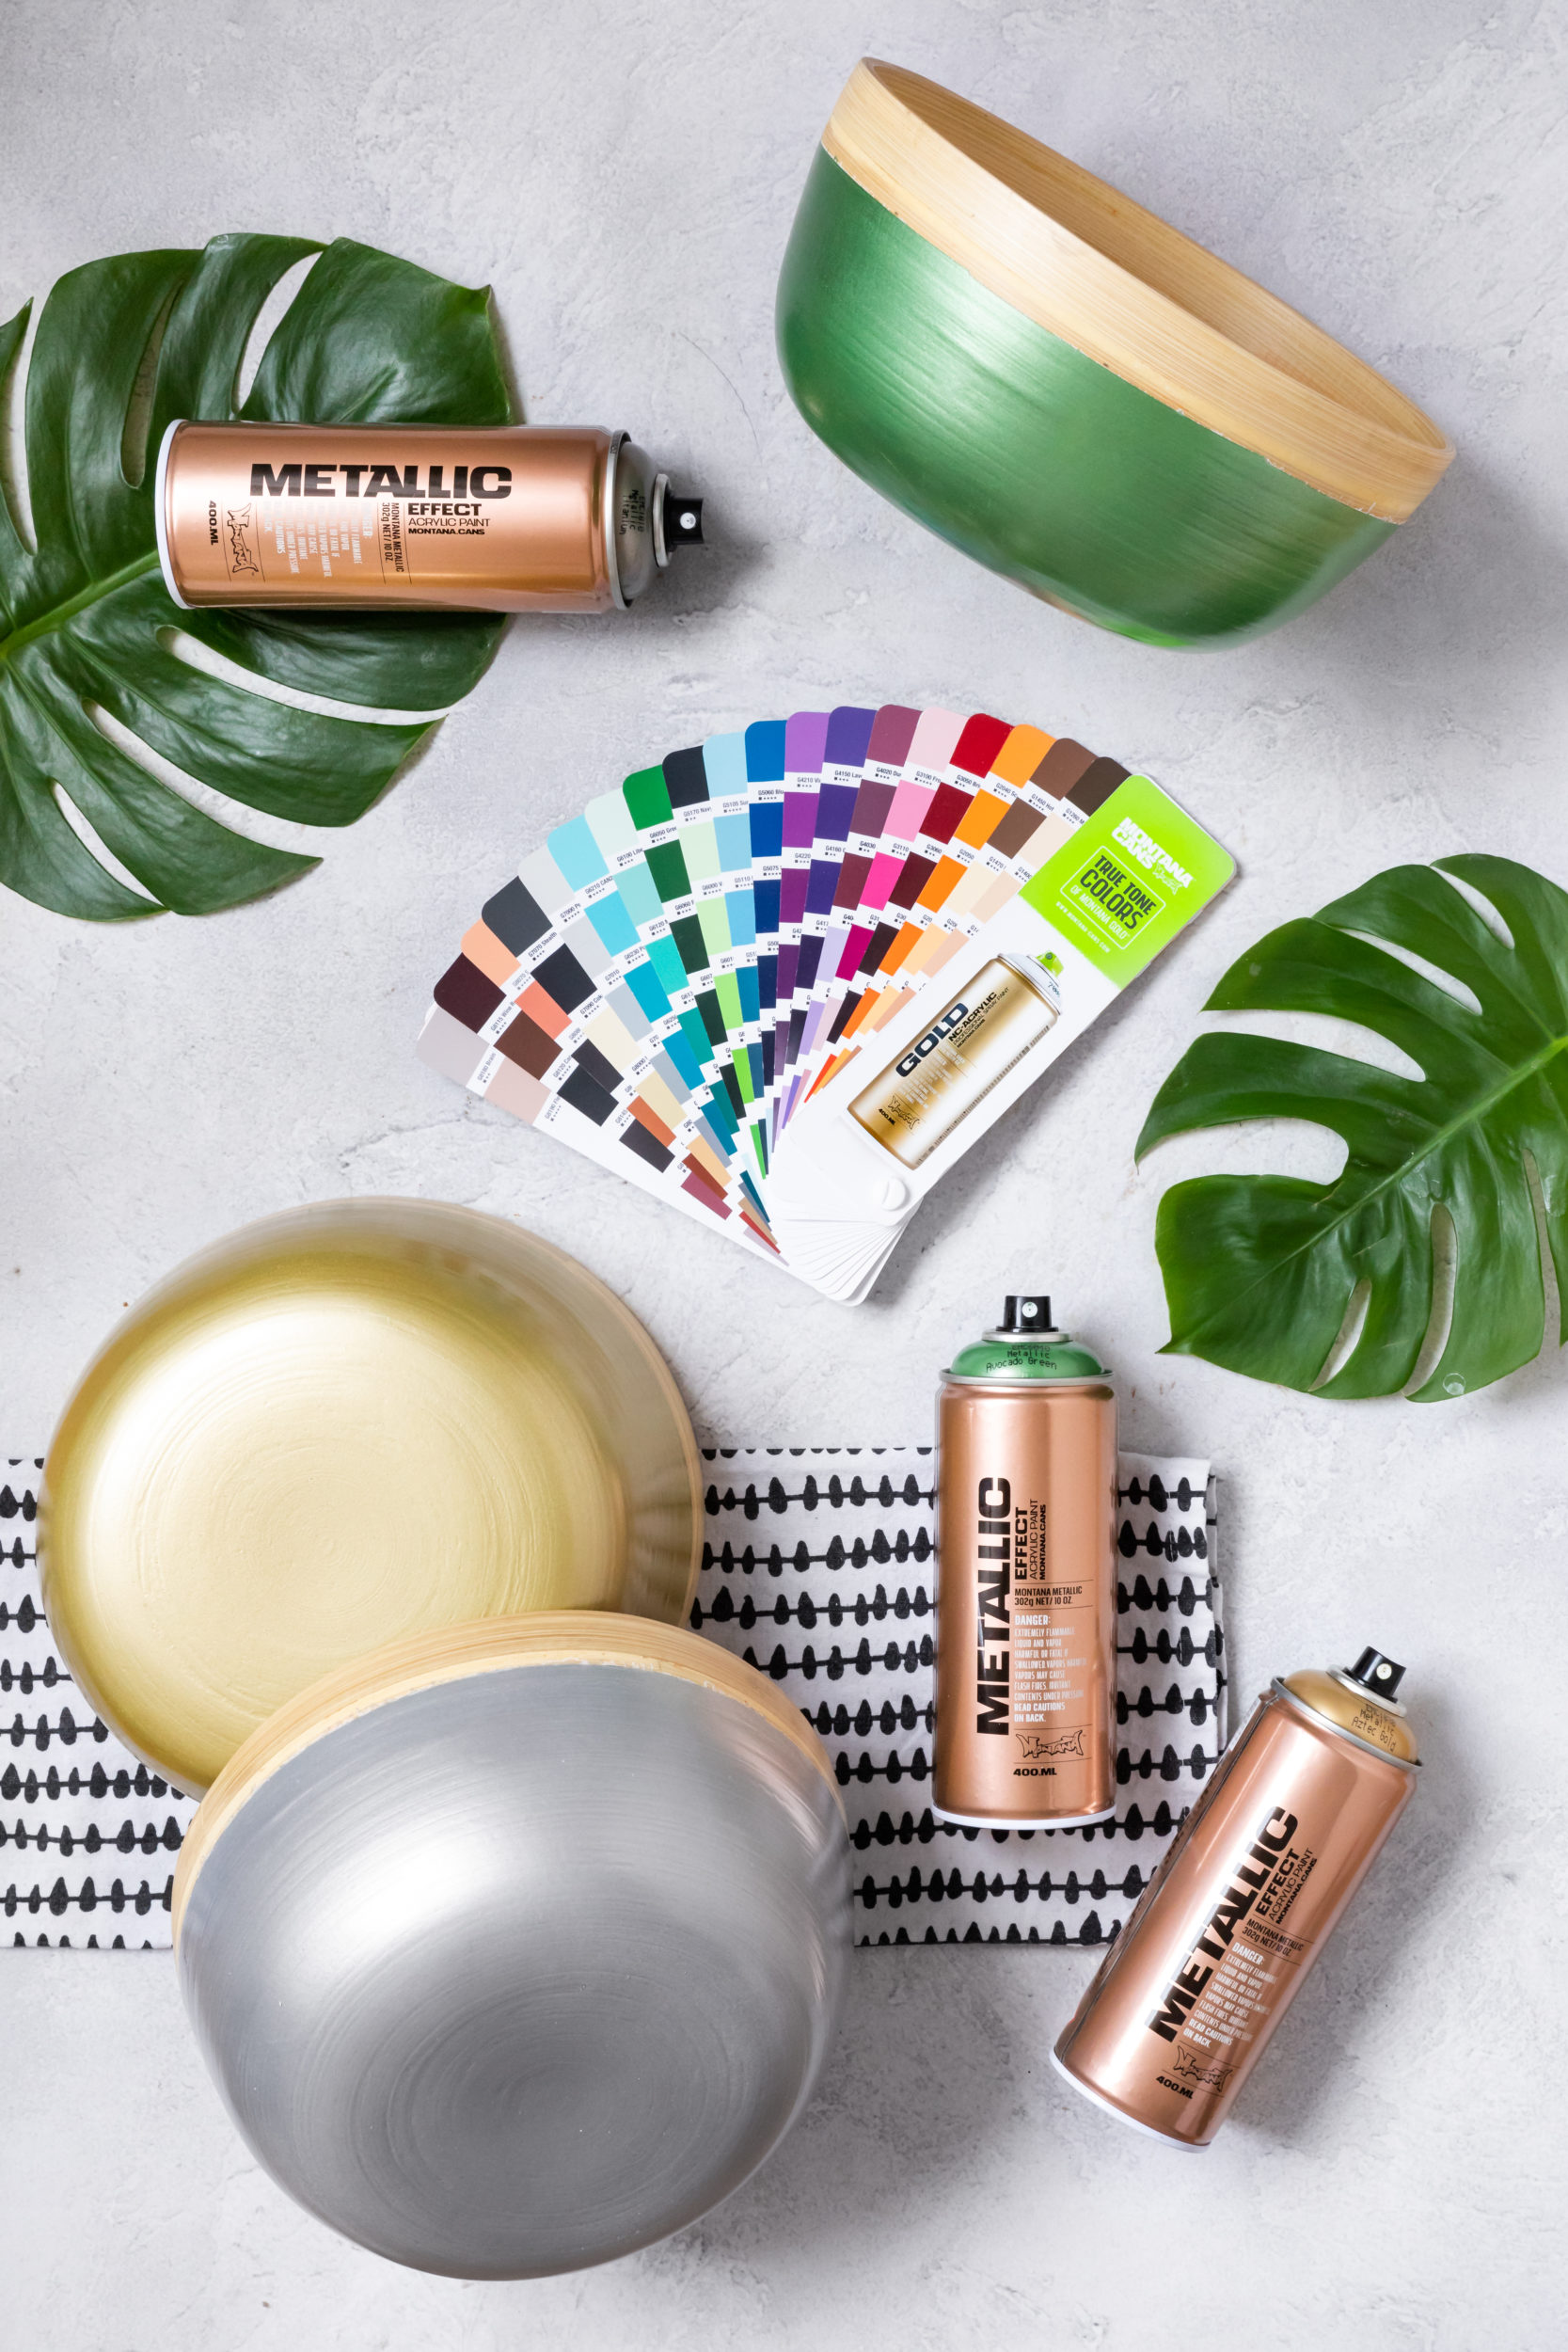
Adding a splash of Metallic color to nature
There is no doubt that mother nature has it all under control when it comes to natural color. Nothing can beat the look of some well worked wood or bamboo. But I’m sure that if she could, she would also appreciate a little splash of metallic color alongs side her precious home grown goodness. And with the array of beautiful wooden and bamboo bowls available these days for in the kitchen, it got us thinking that this was probably going to be a good idea. Thanks to Montana Cans who have metallic color completely under control, it was! And an even bigger bonus is that we got to try the three new METALLIC Effect colors Titanium, Avocado and Aztec Gold. Here is how we did it.
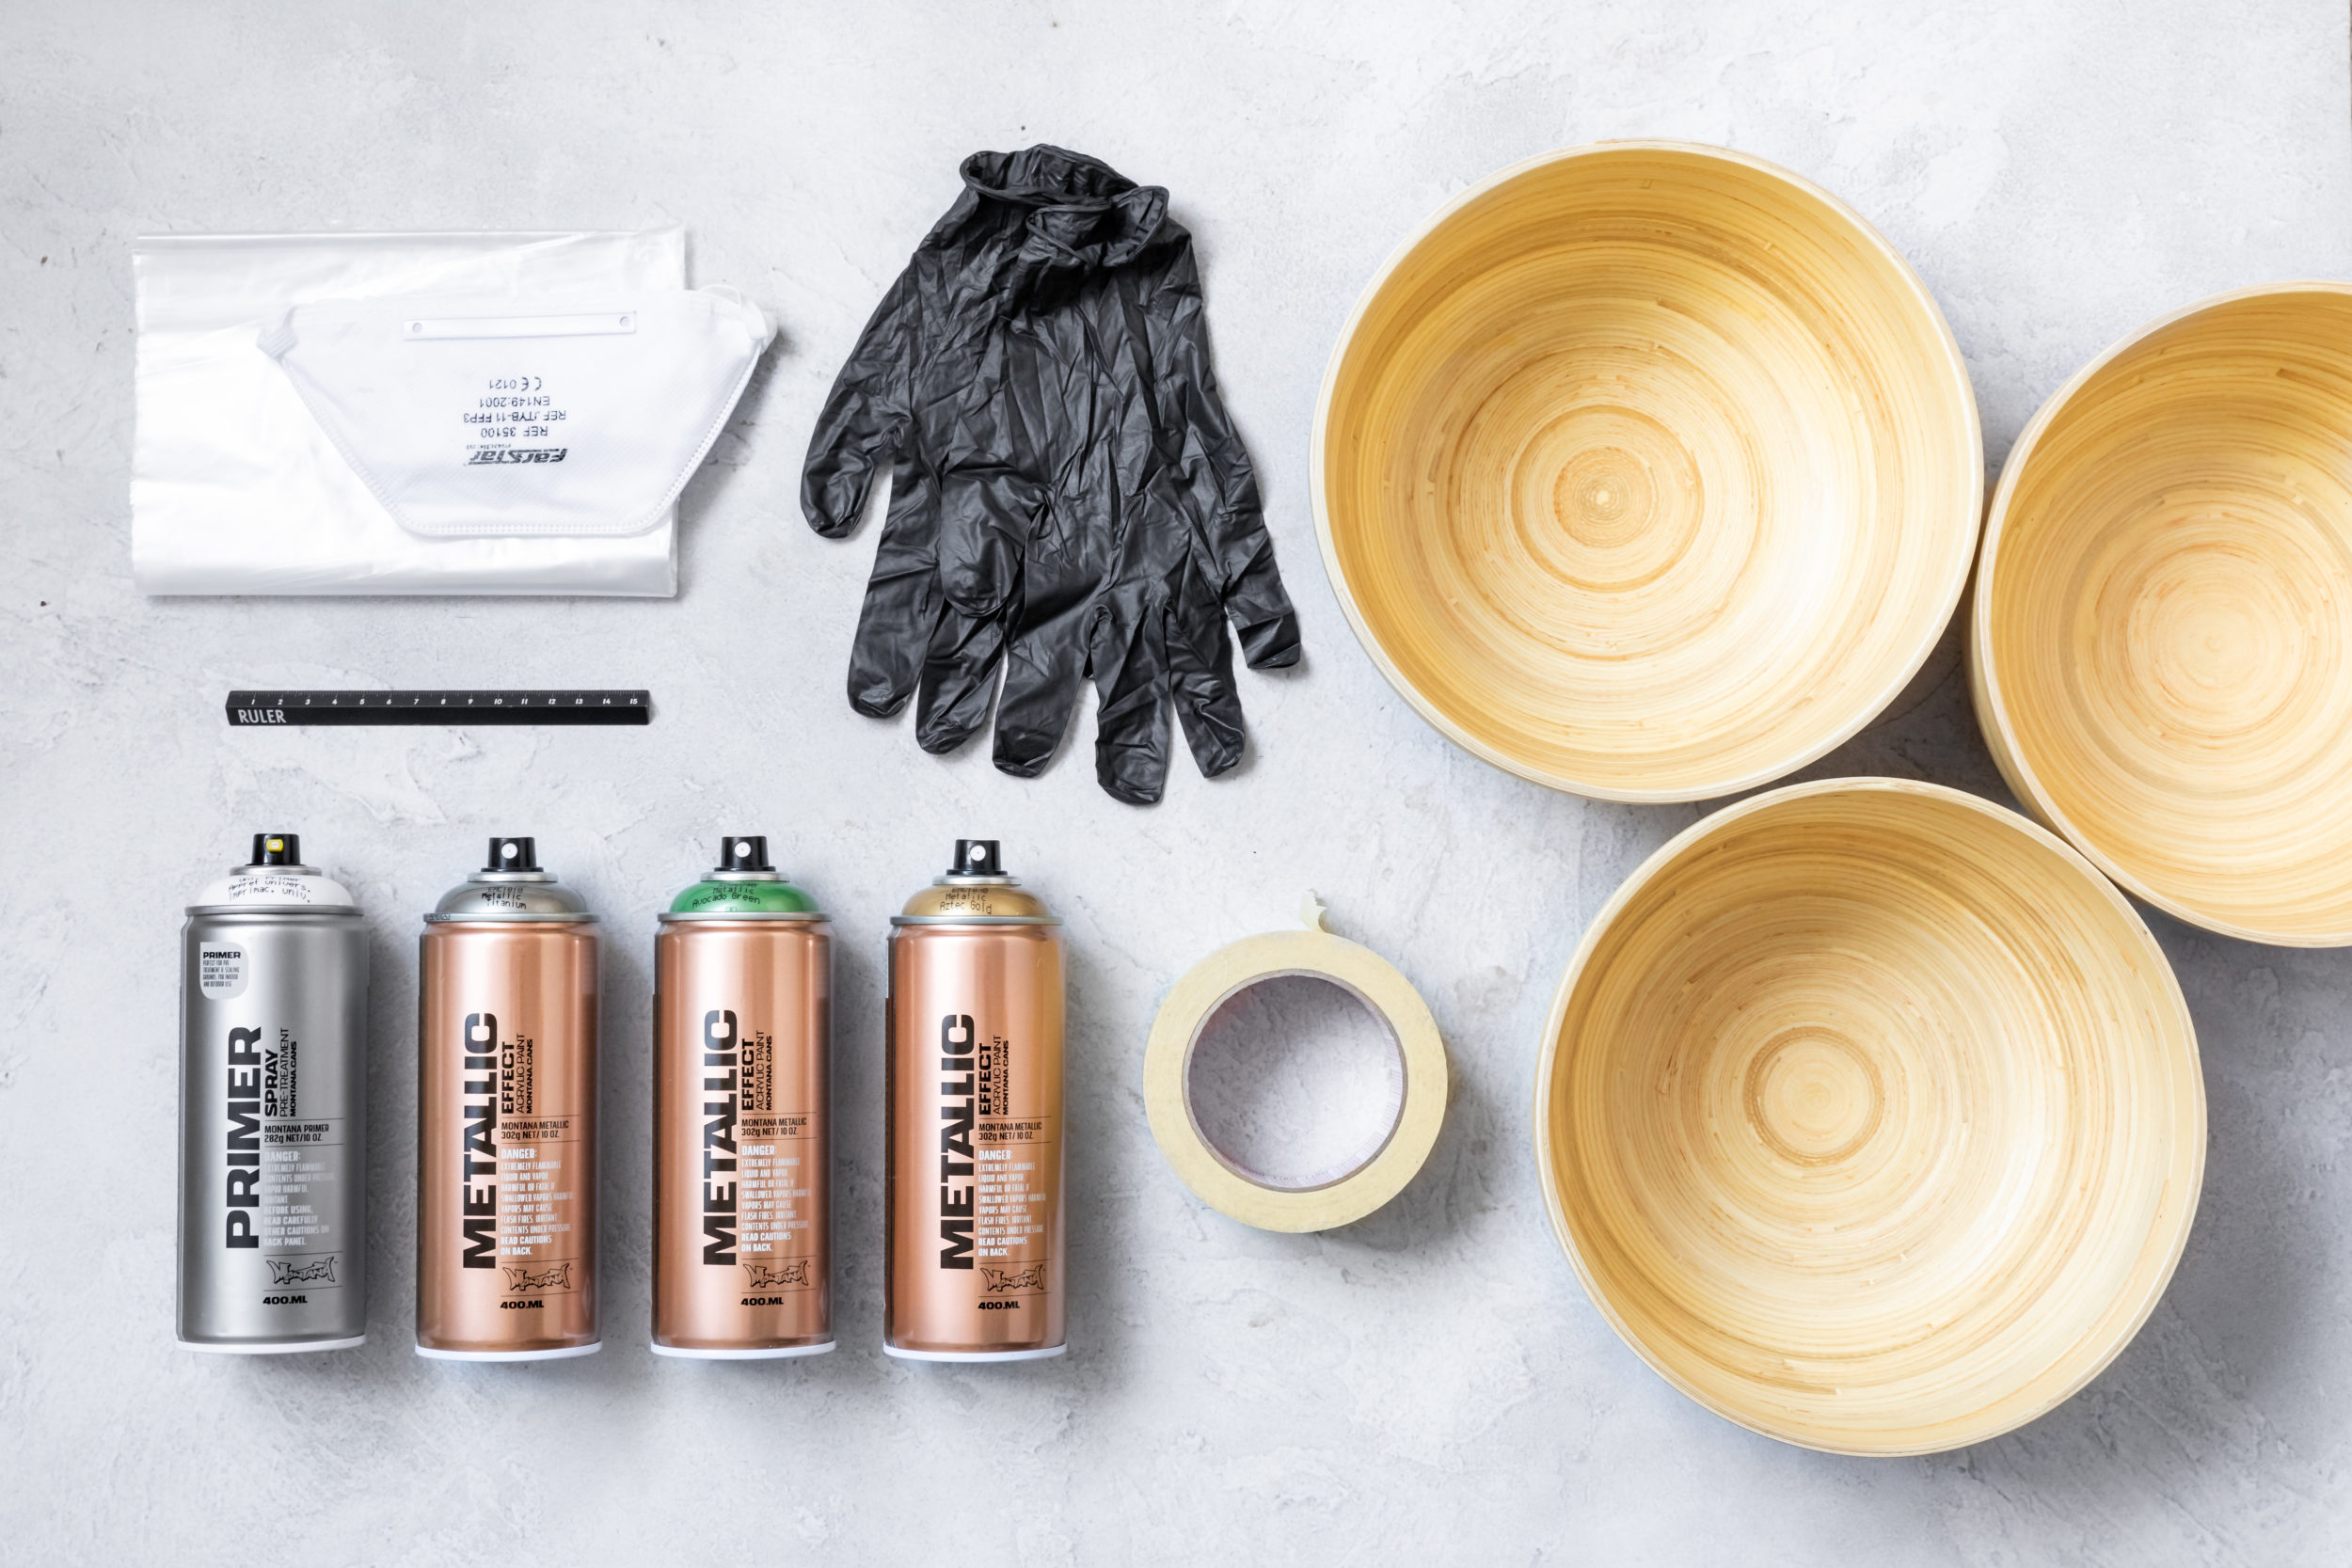
Materials Used
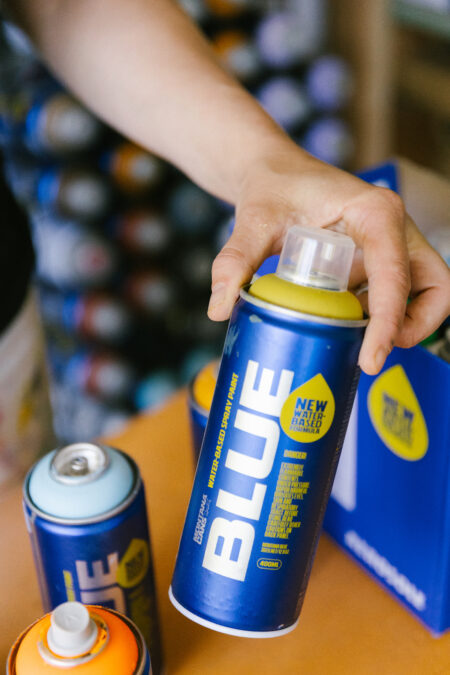
- Montana METALLIC Effect colors Titanium, Avocado and Aztec Gold
- Montana UNIVERSAL Primer
- Masking tape
- Paper or material to cover the rest of the bowl
- Some fine sand paper
- Gloves
- Mask
- Drop sheet
How it was done
If you are lucky enough to have wooden or bamboo bowls in your cupboards at home and you think they could use a fresh new look, then you are already a step ahead. Make sure they are clean and free of dust and oils. Then let them dry out completely. If you don’t have any, then try your local homewares store, look online or even try your local thrift store for some used ones. We found some gorgeous bamboo bowls online that were not expensive yet made from bamboo.
Once you have them, again make sure they are clean and free of dusts and oils. Once dry, you can then give them a light sanding with very fine sand paper. This will give some tooth for the paint to stick too and fine out any scratches or small marks should you be working with older bowls. Take your masking tape and and apply it below the top of the bowls rim.
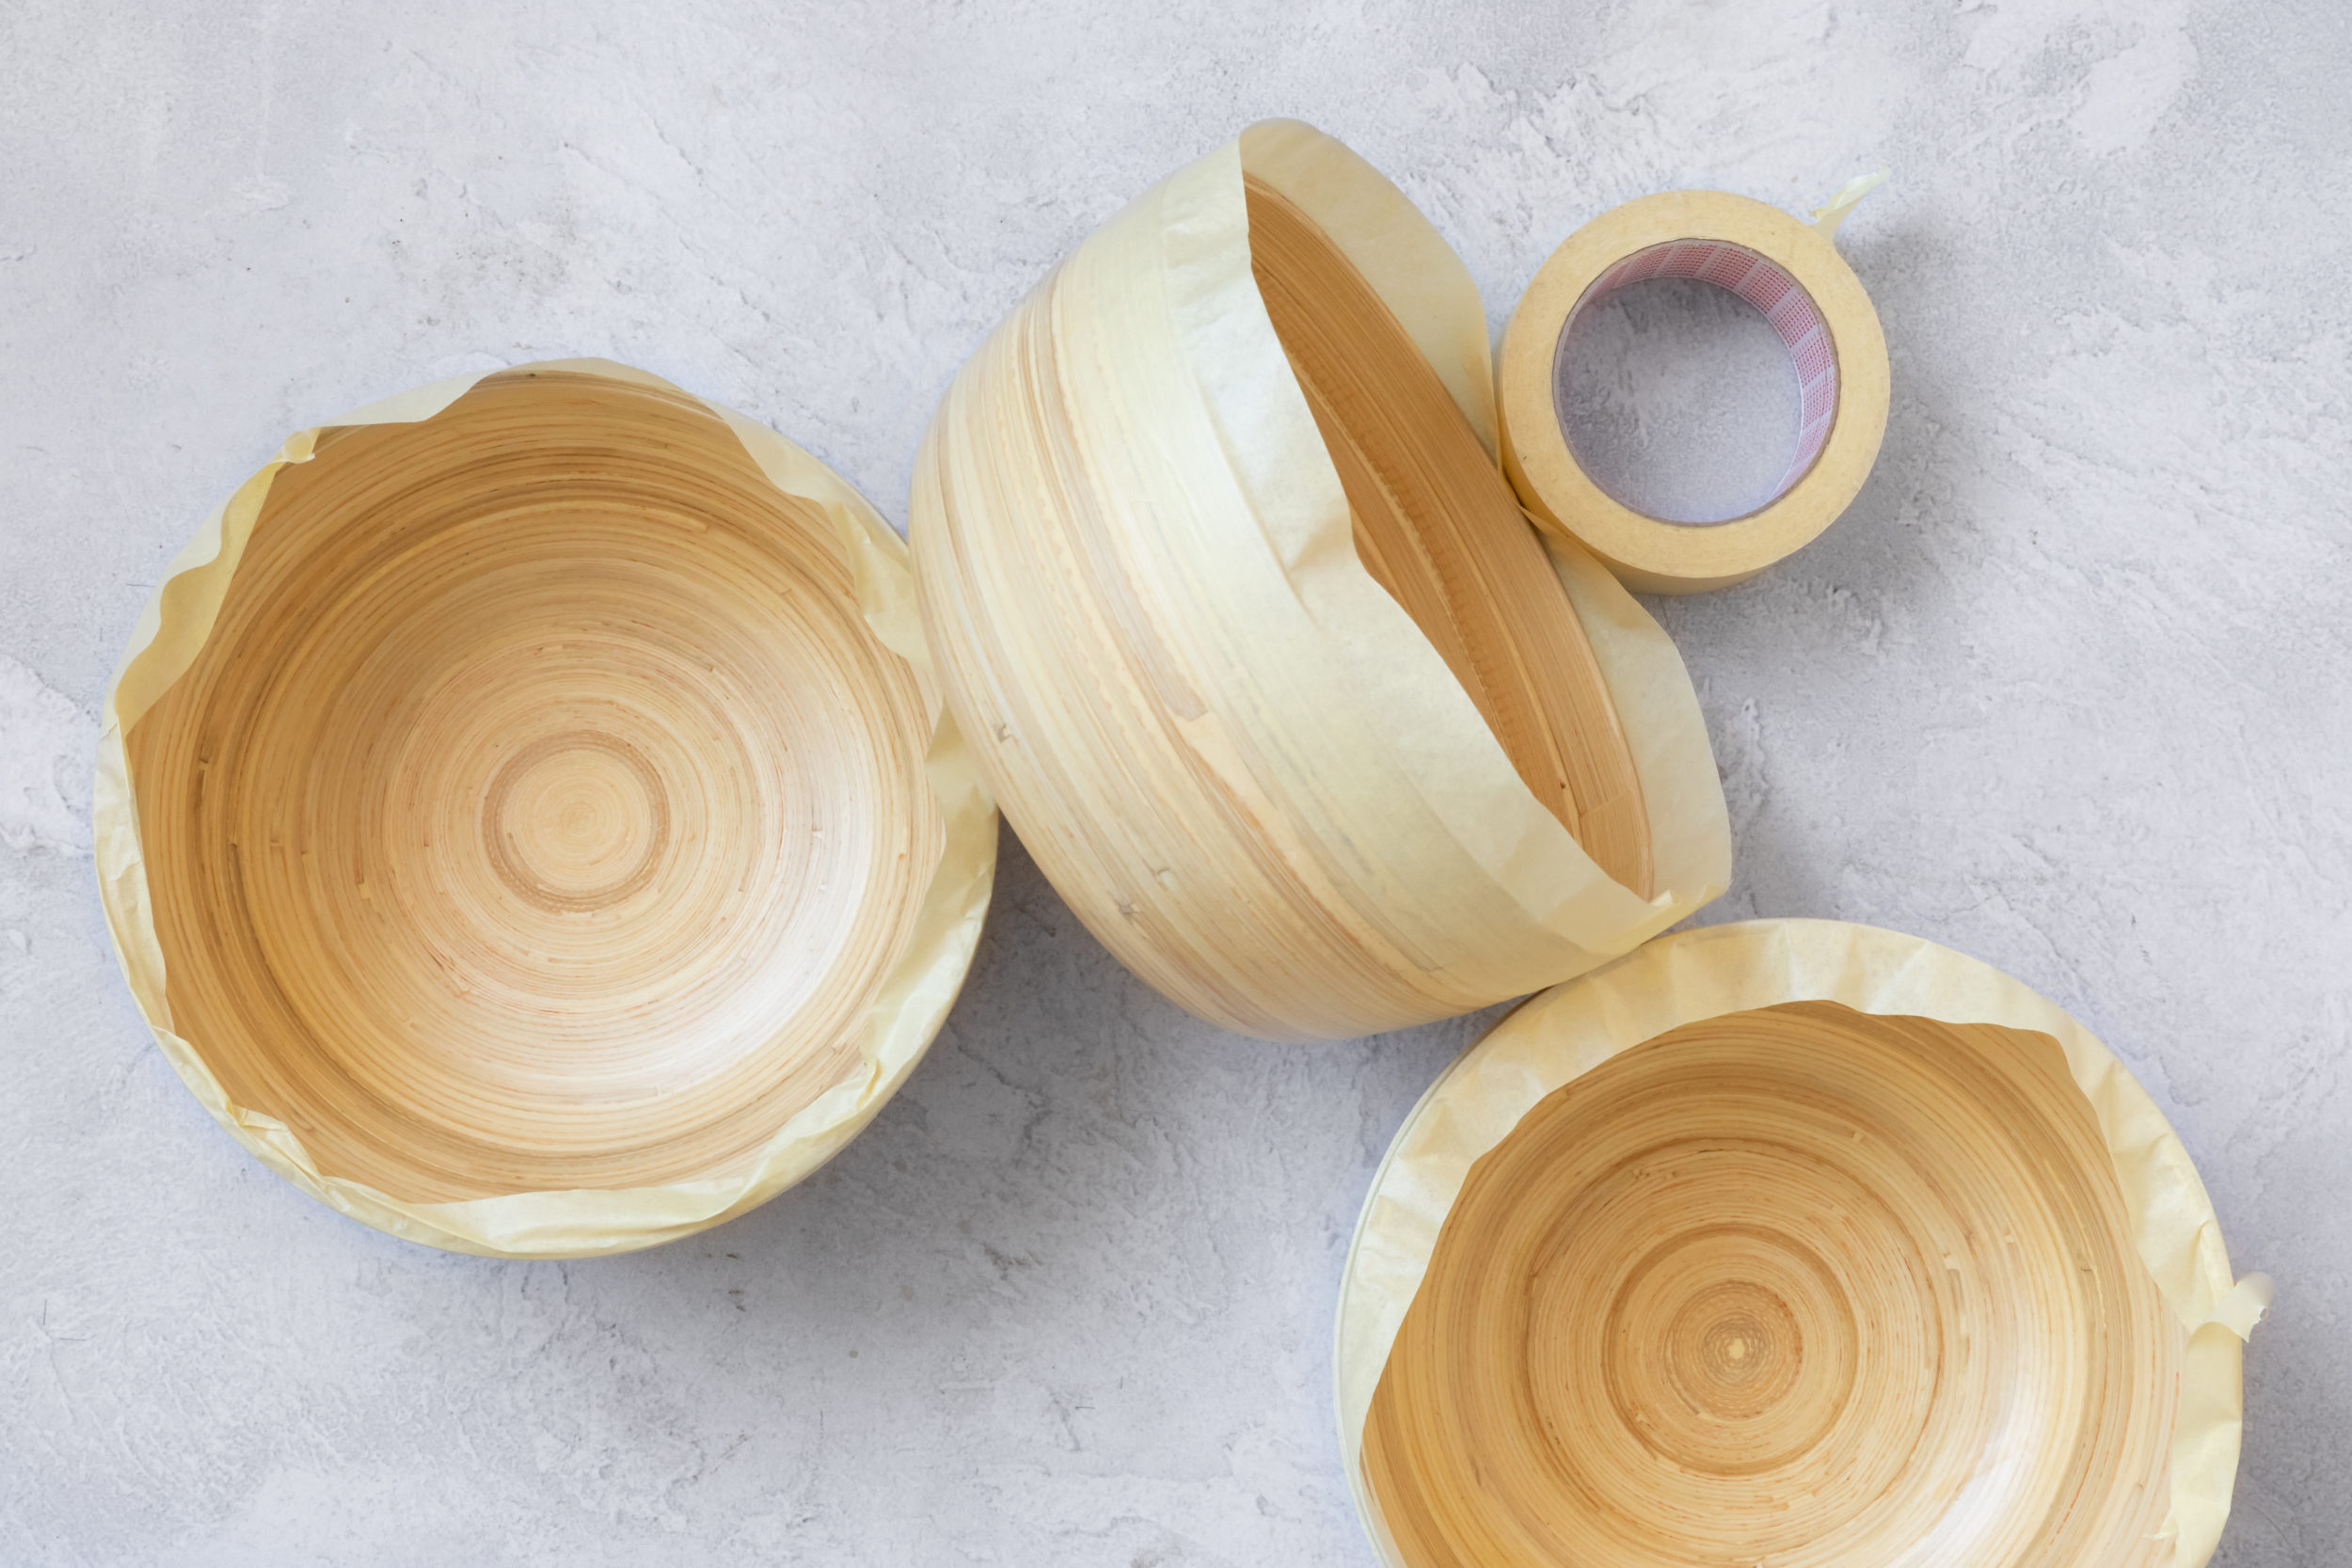
REMEMBER: you don’t want any paint near where there will be food or mouths. So only mask till about 2/3 of the way up. Apply the tape evenly and equally, pressing it down all the way around so no paint can sneak under the edges. Now it’s time to cover the rest of the bowl so no paint overspray lands anywhere you don’t want it to.
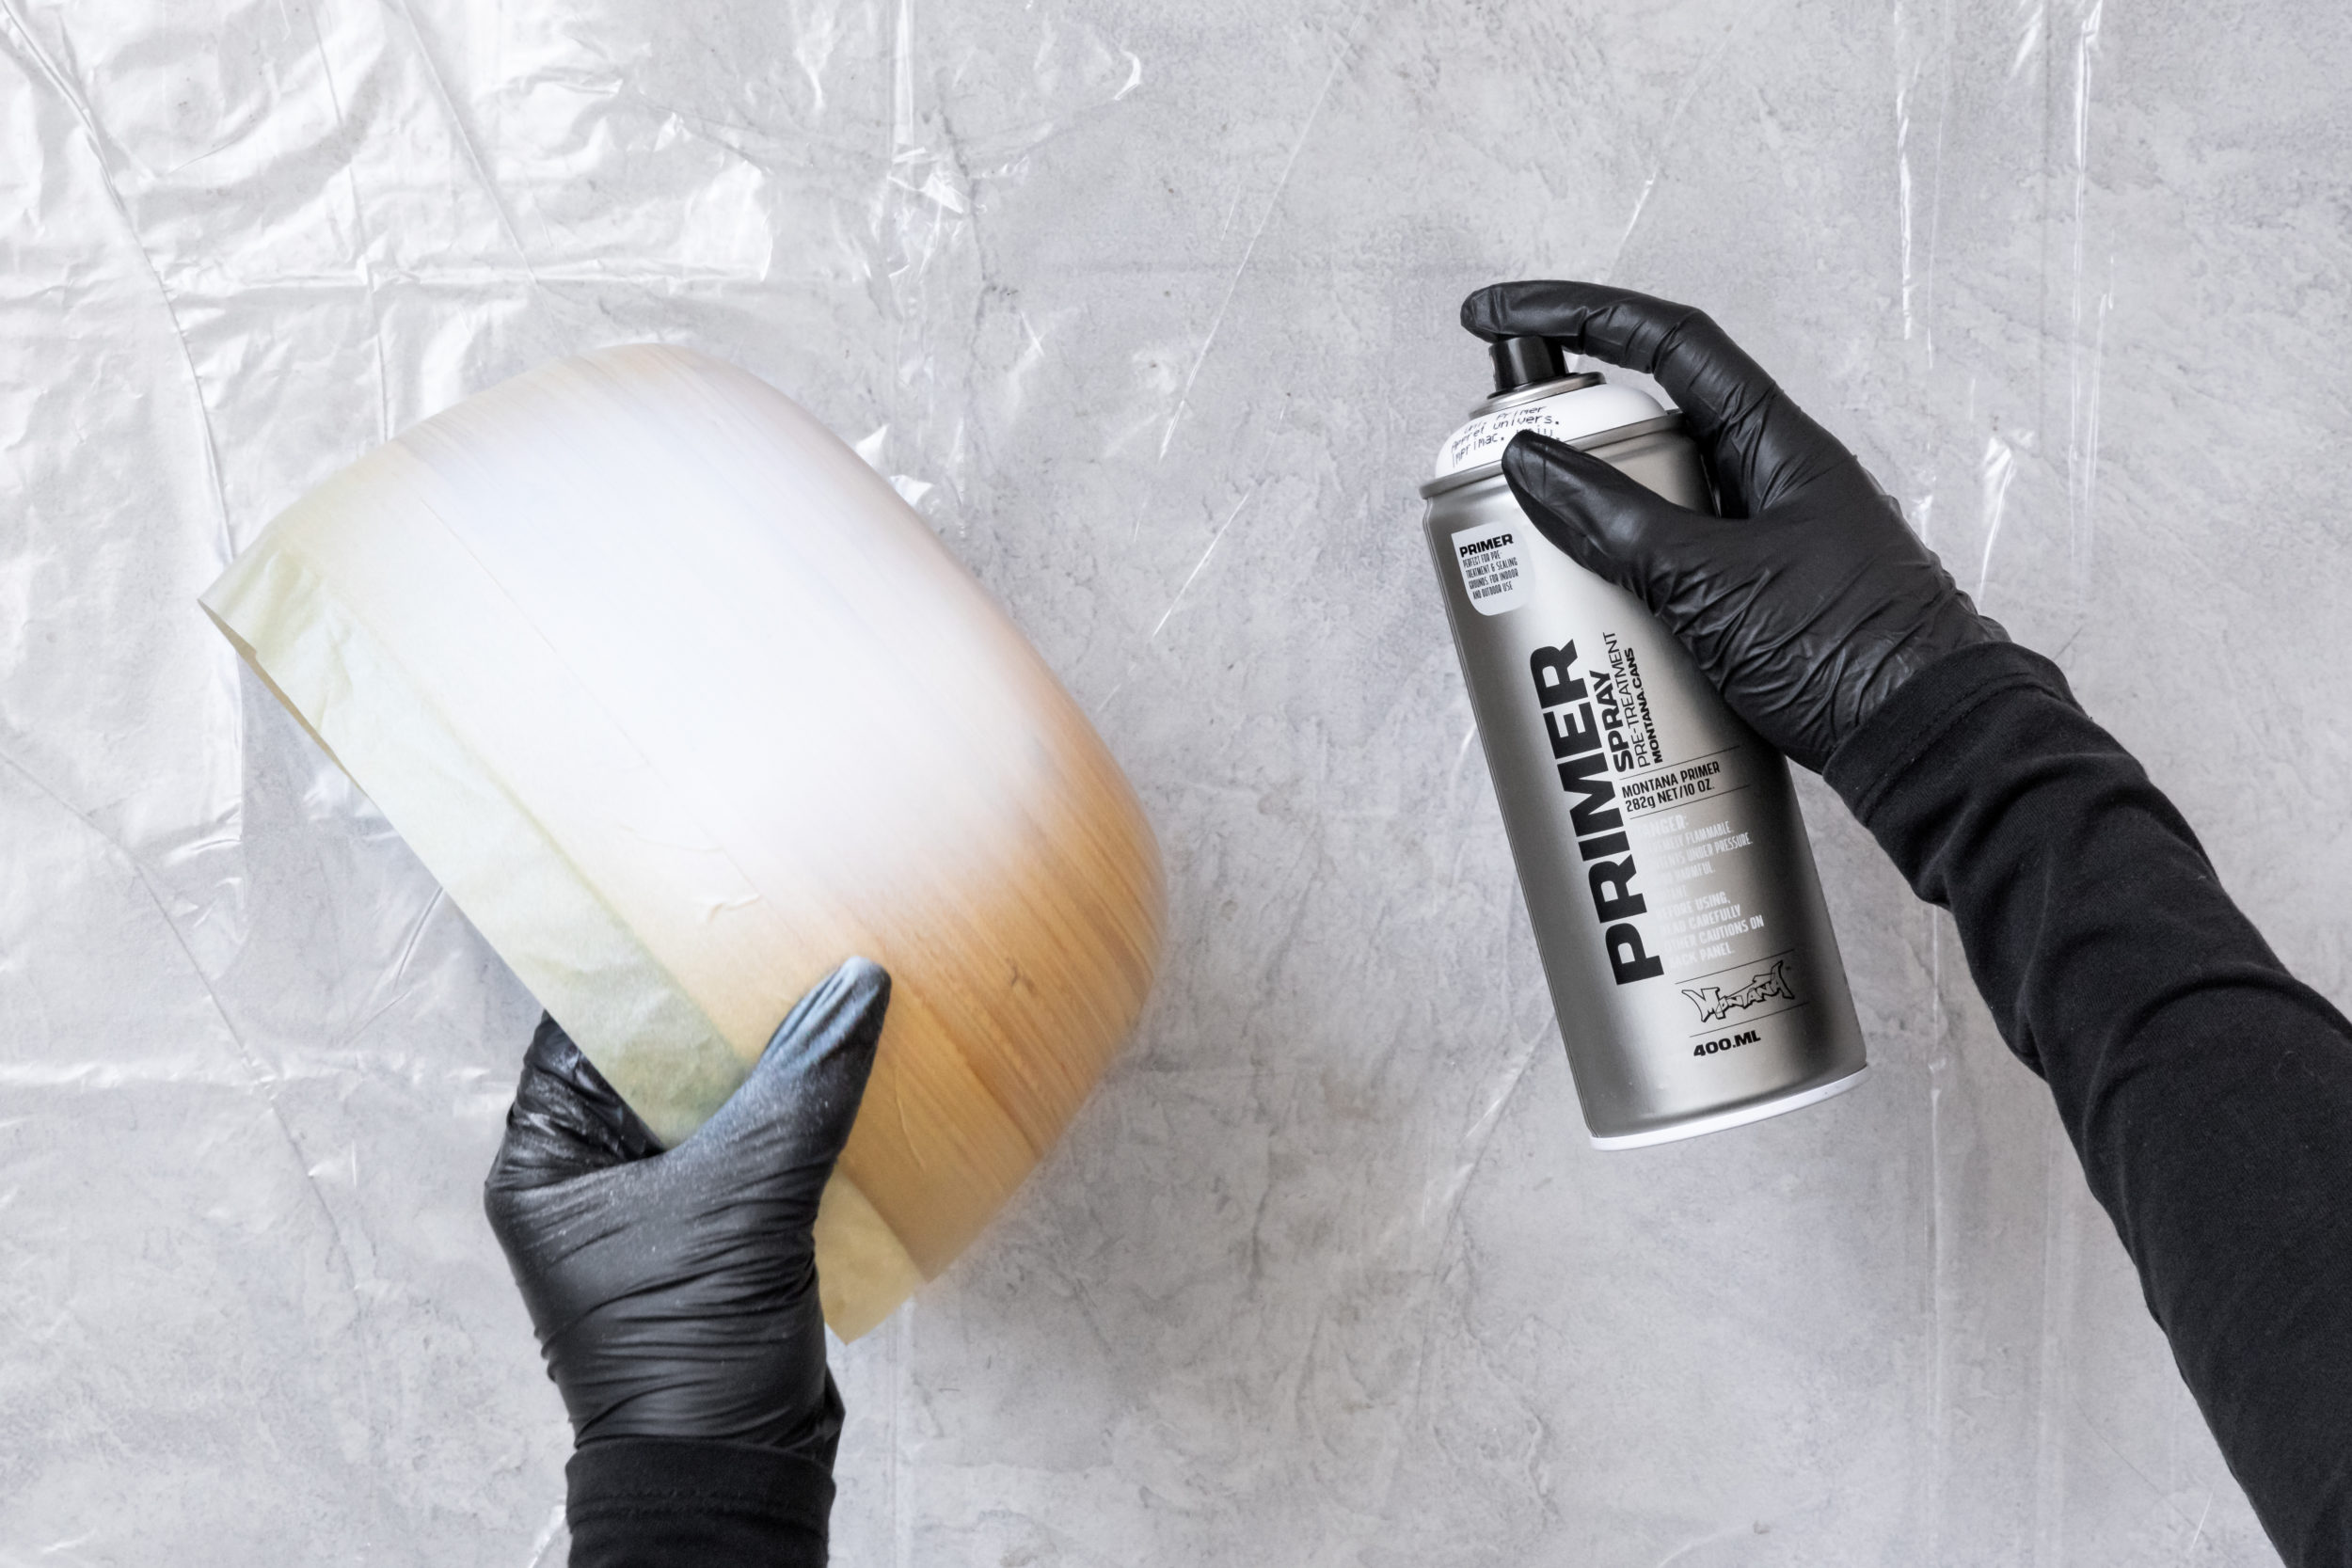
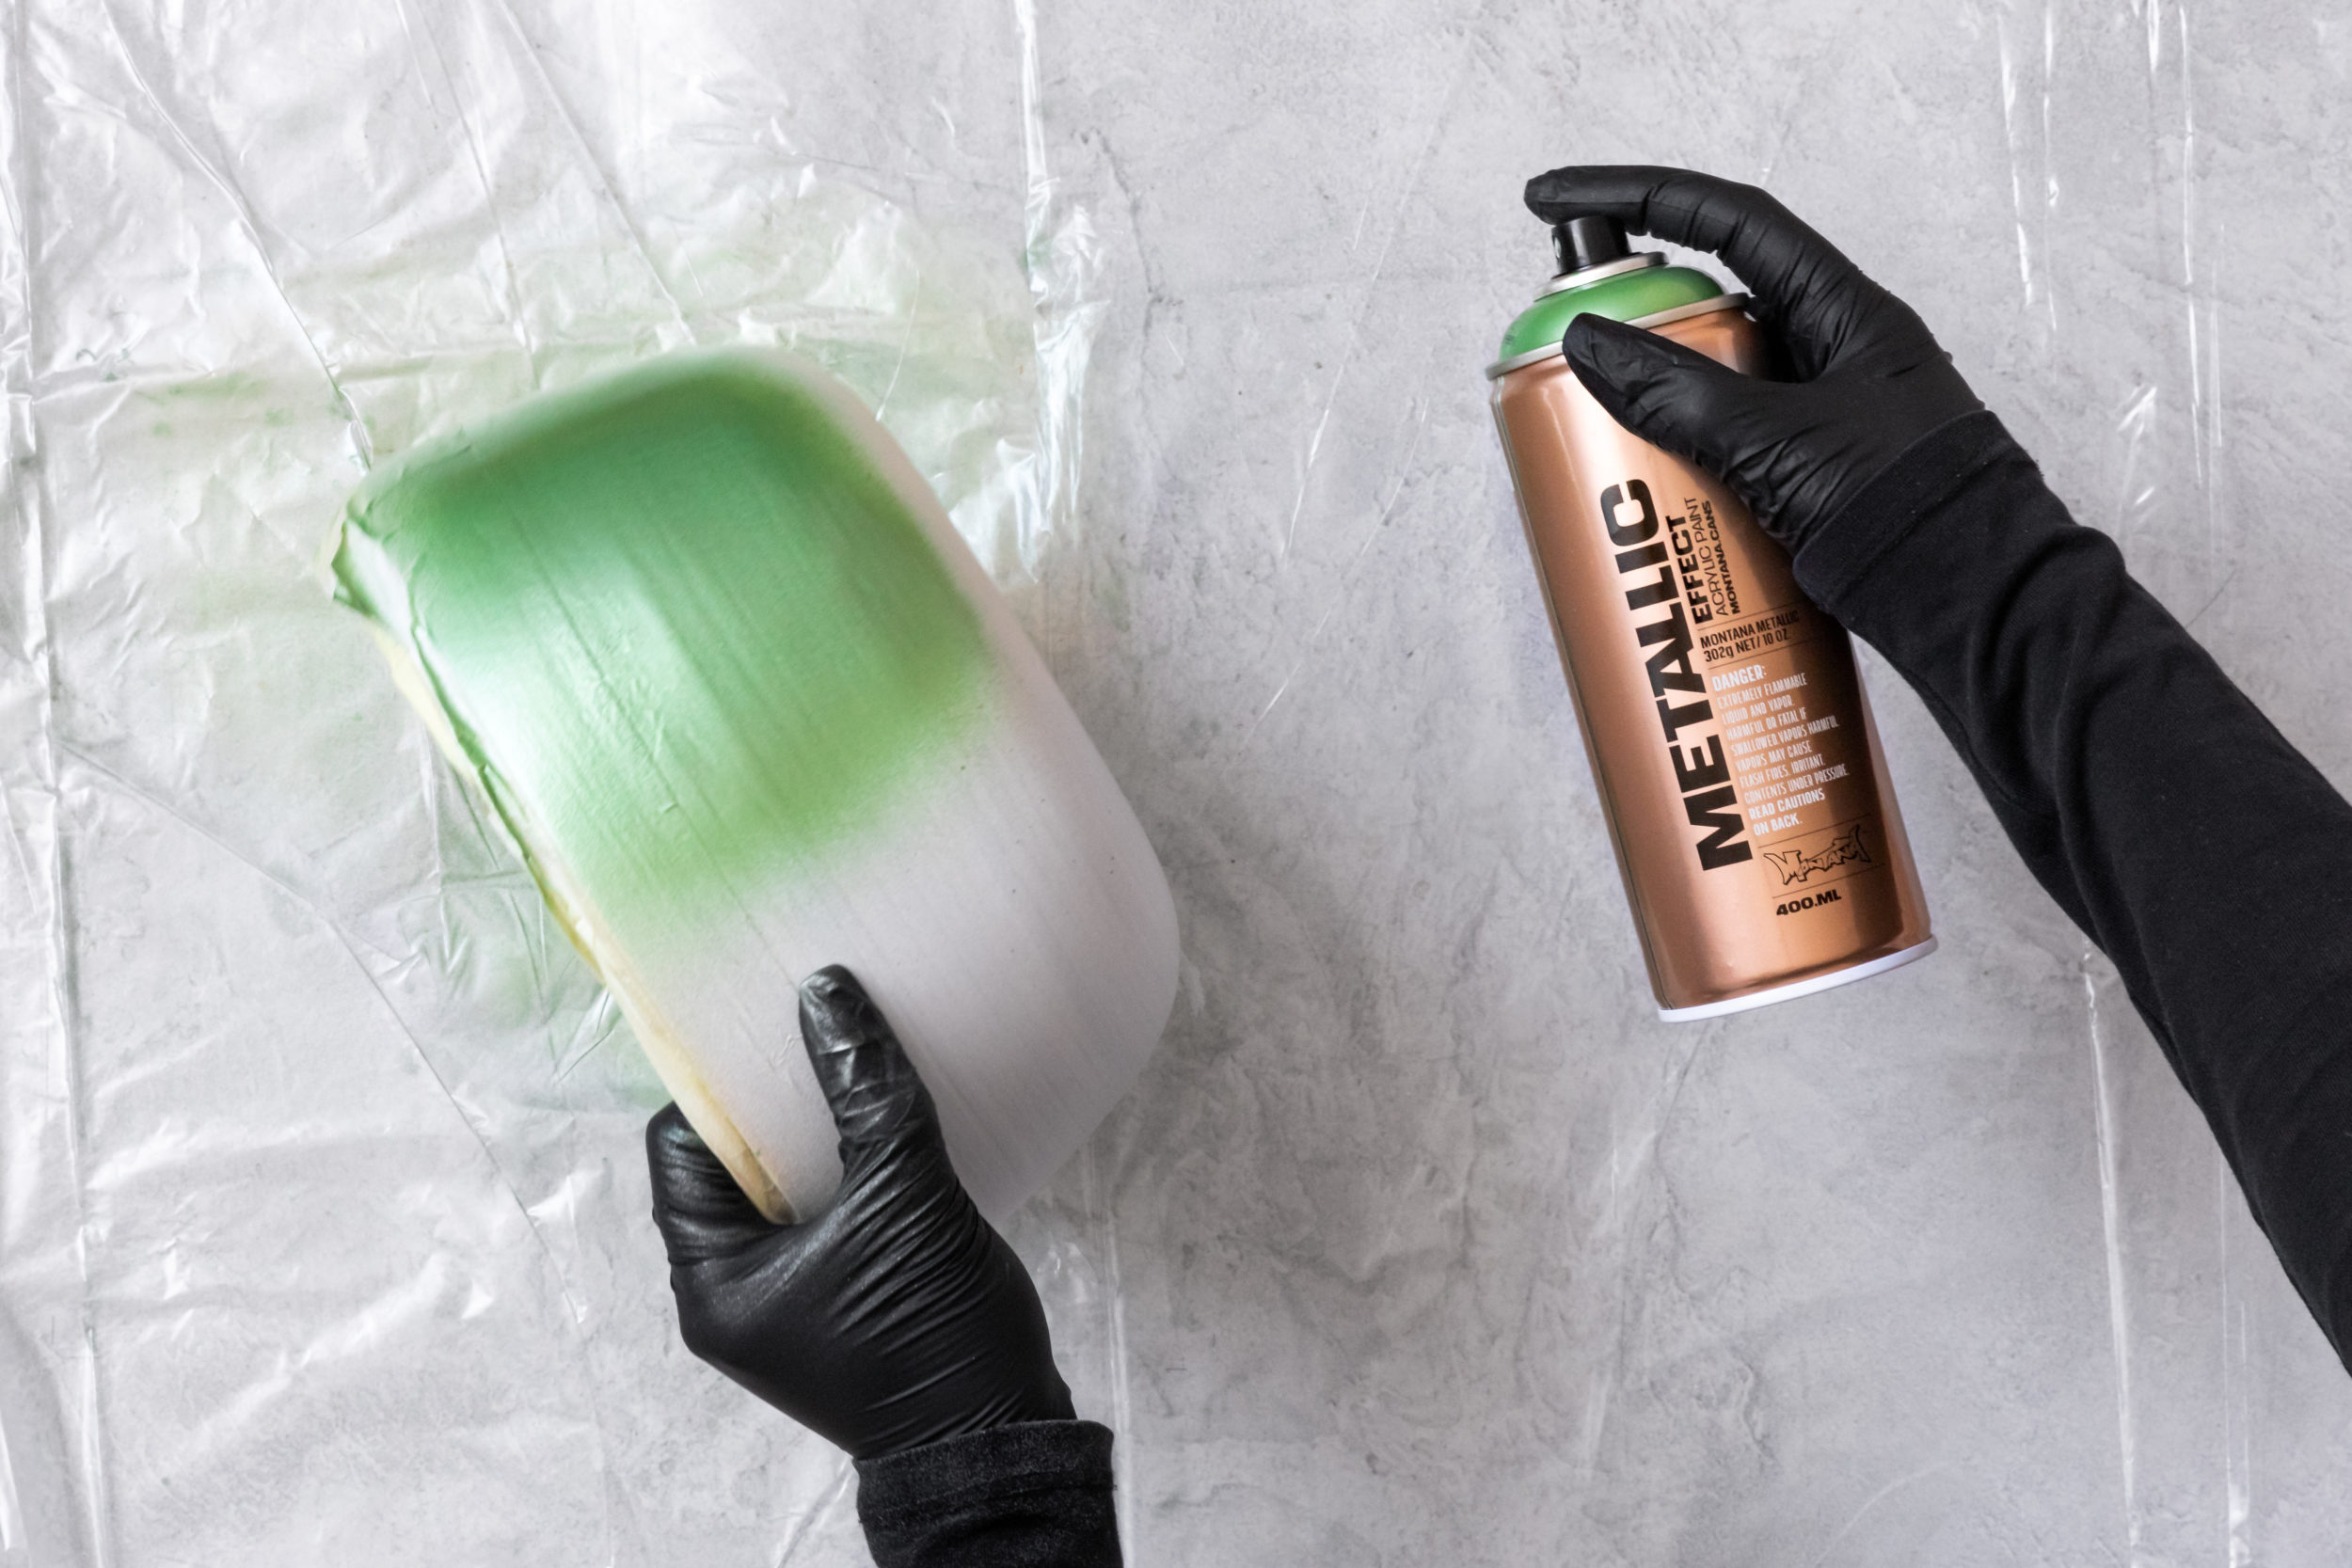
Shake all your cans for 2-3 minutes. Turn them upside down and remove the nozzles. Let the little black safety ring underneath them fall out. Re-apply the nozzles and give them a little spritz test spray, away from any surfaces. Turn your bowls upside down and place them on your drop sheet. With gloves and mask on, start with the MONTANA UNIVERSAL Primer and apply a light even coat to your bowls. Let them dry at least 15 minutes or more, till they are touch dry. Give the painted surface a light sanding and then re-apply. Ideally you leave the bowls sit to dry over night so you are sure the primer is completely cured.
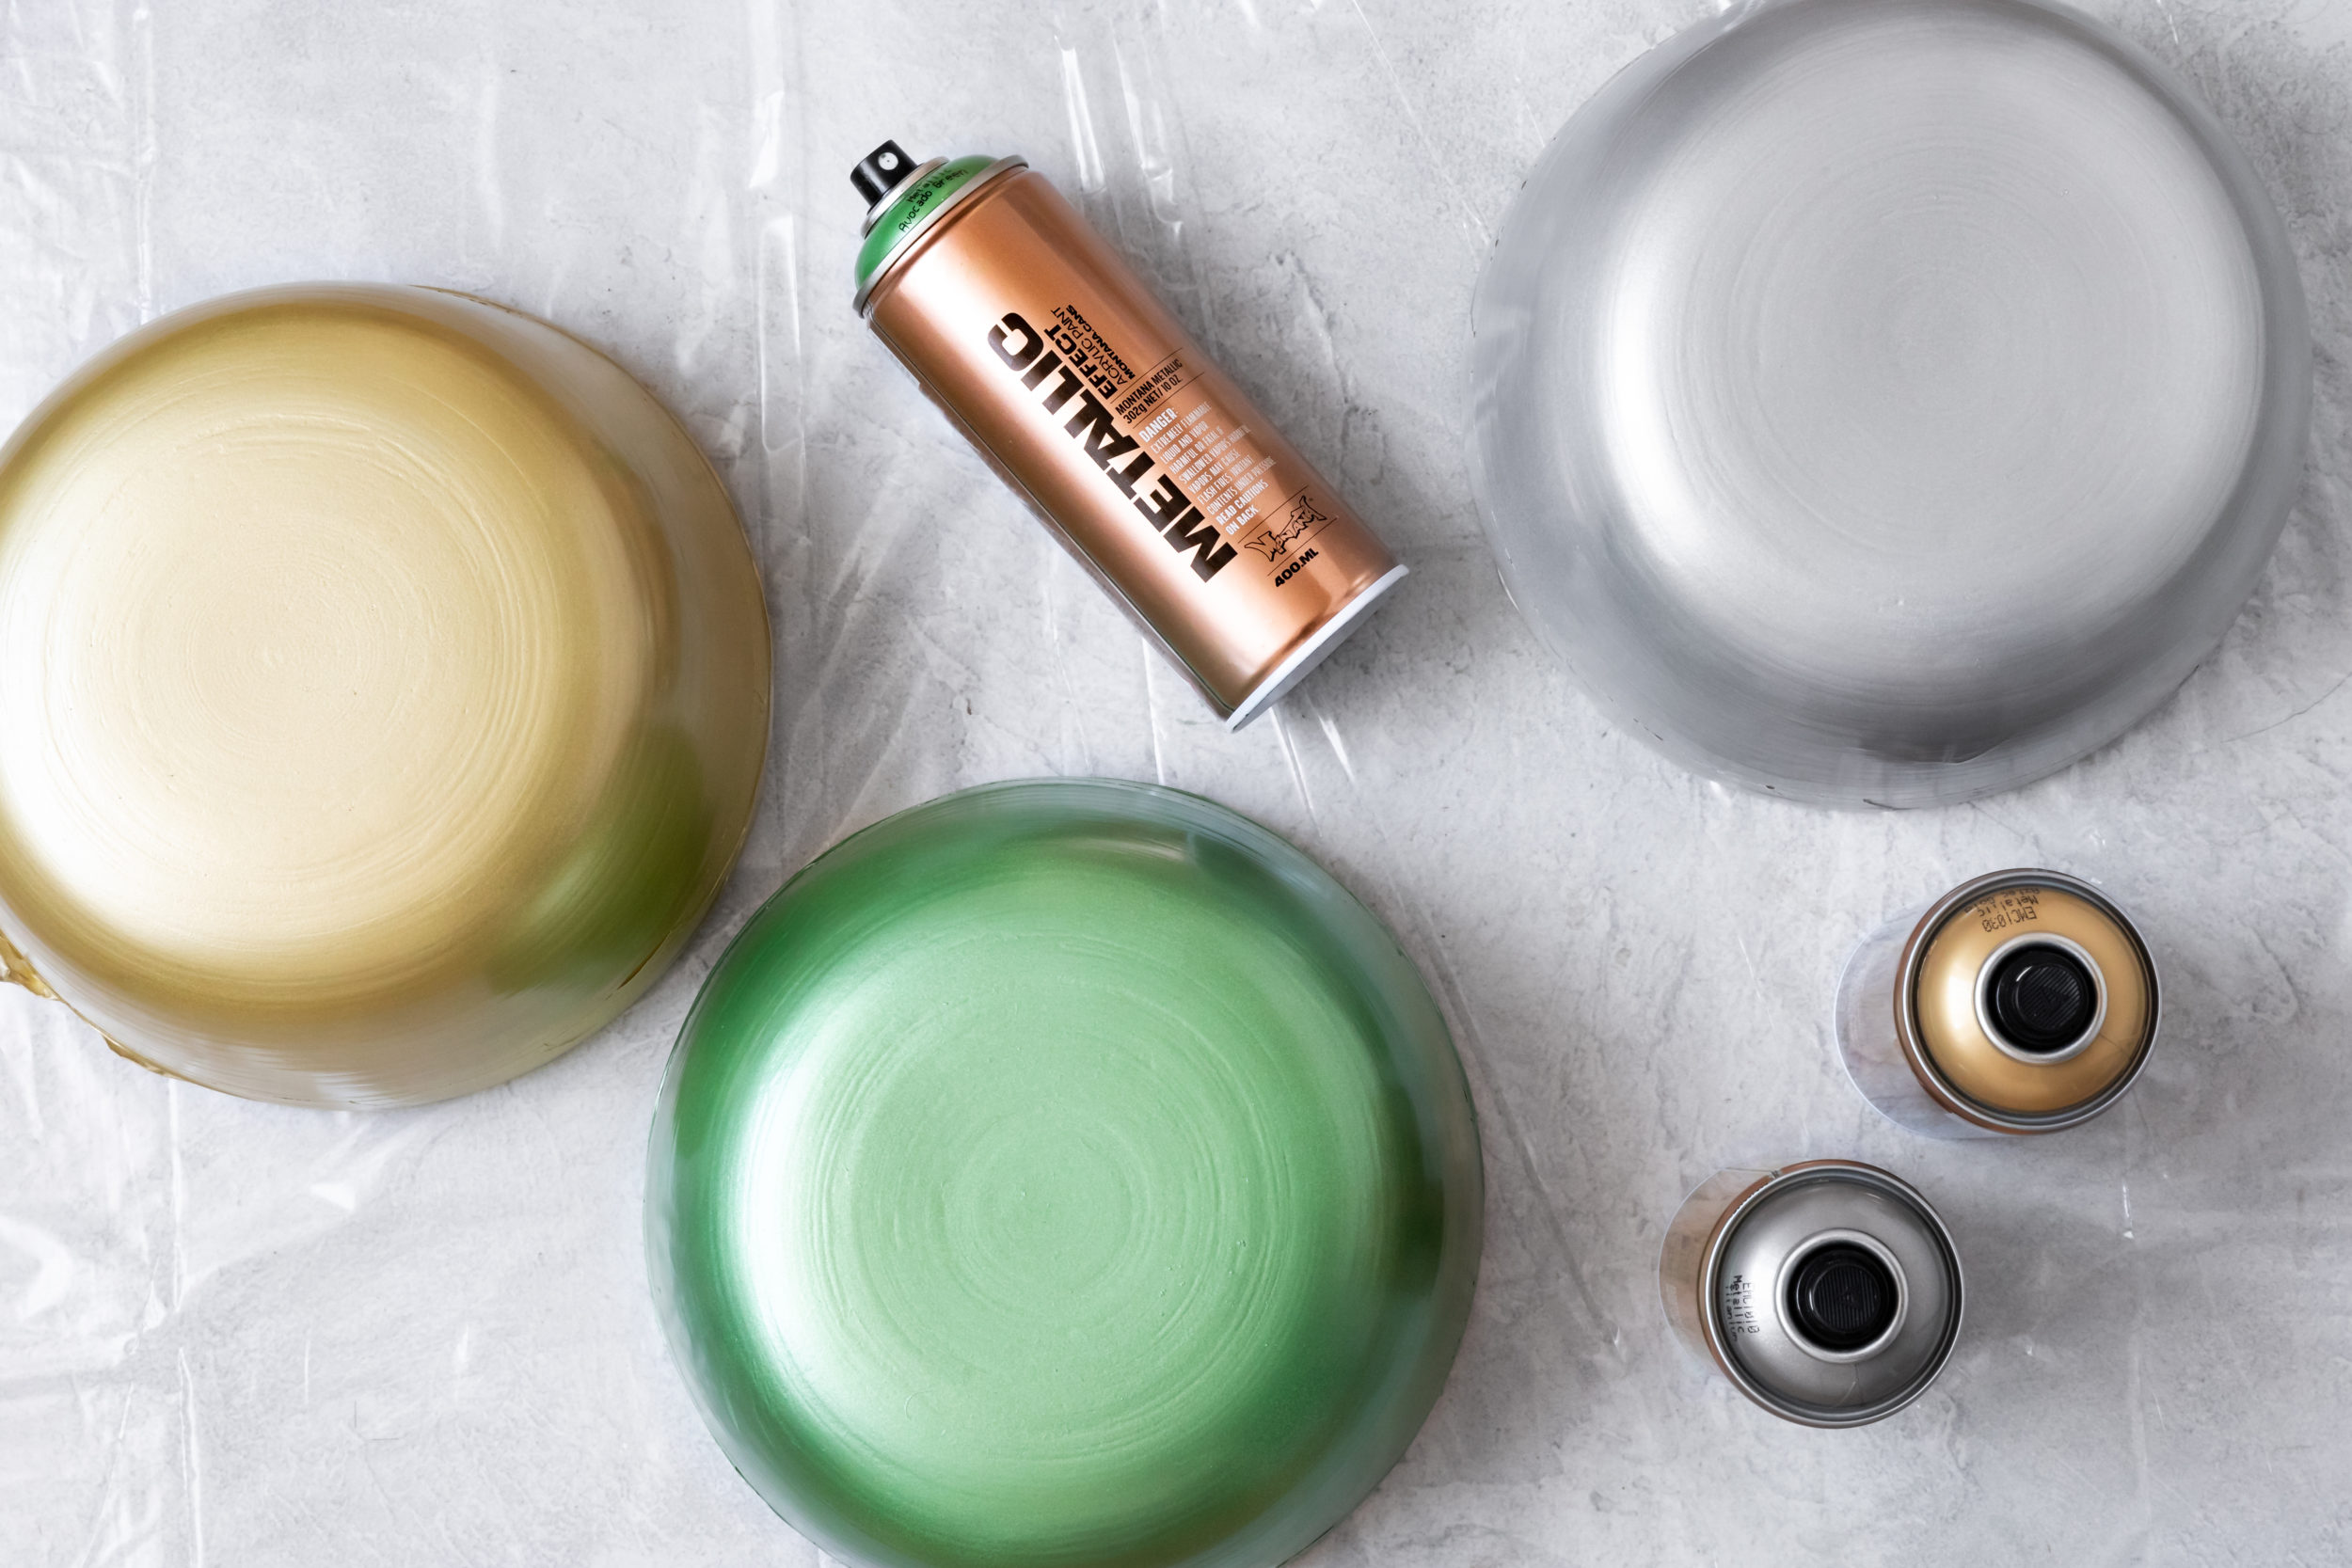
The last step of applying the METALLIC Effect colors is easy as your essentially repeating what you’ve done already. Sand lightly, clean free of dust and make sure the bowls are dry. Shake the cans, test spray and you are ready to go. The important part is to remember not to spray too close to your bowls with the metallic colors. Keep the can 15-25 cm away from the bowls and apply in thin, even coats. If you chose to do multiple coats, allow them to touch dry and repeat the steps: sand – clean – shake – spray.
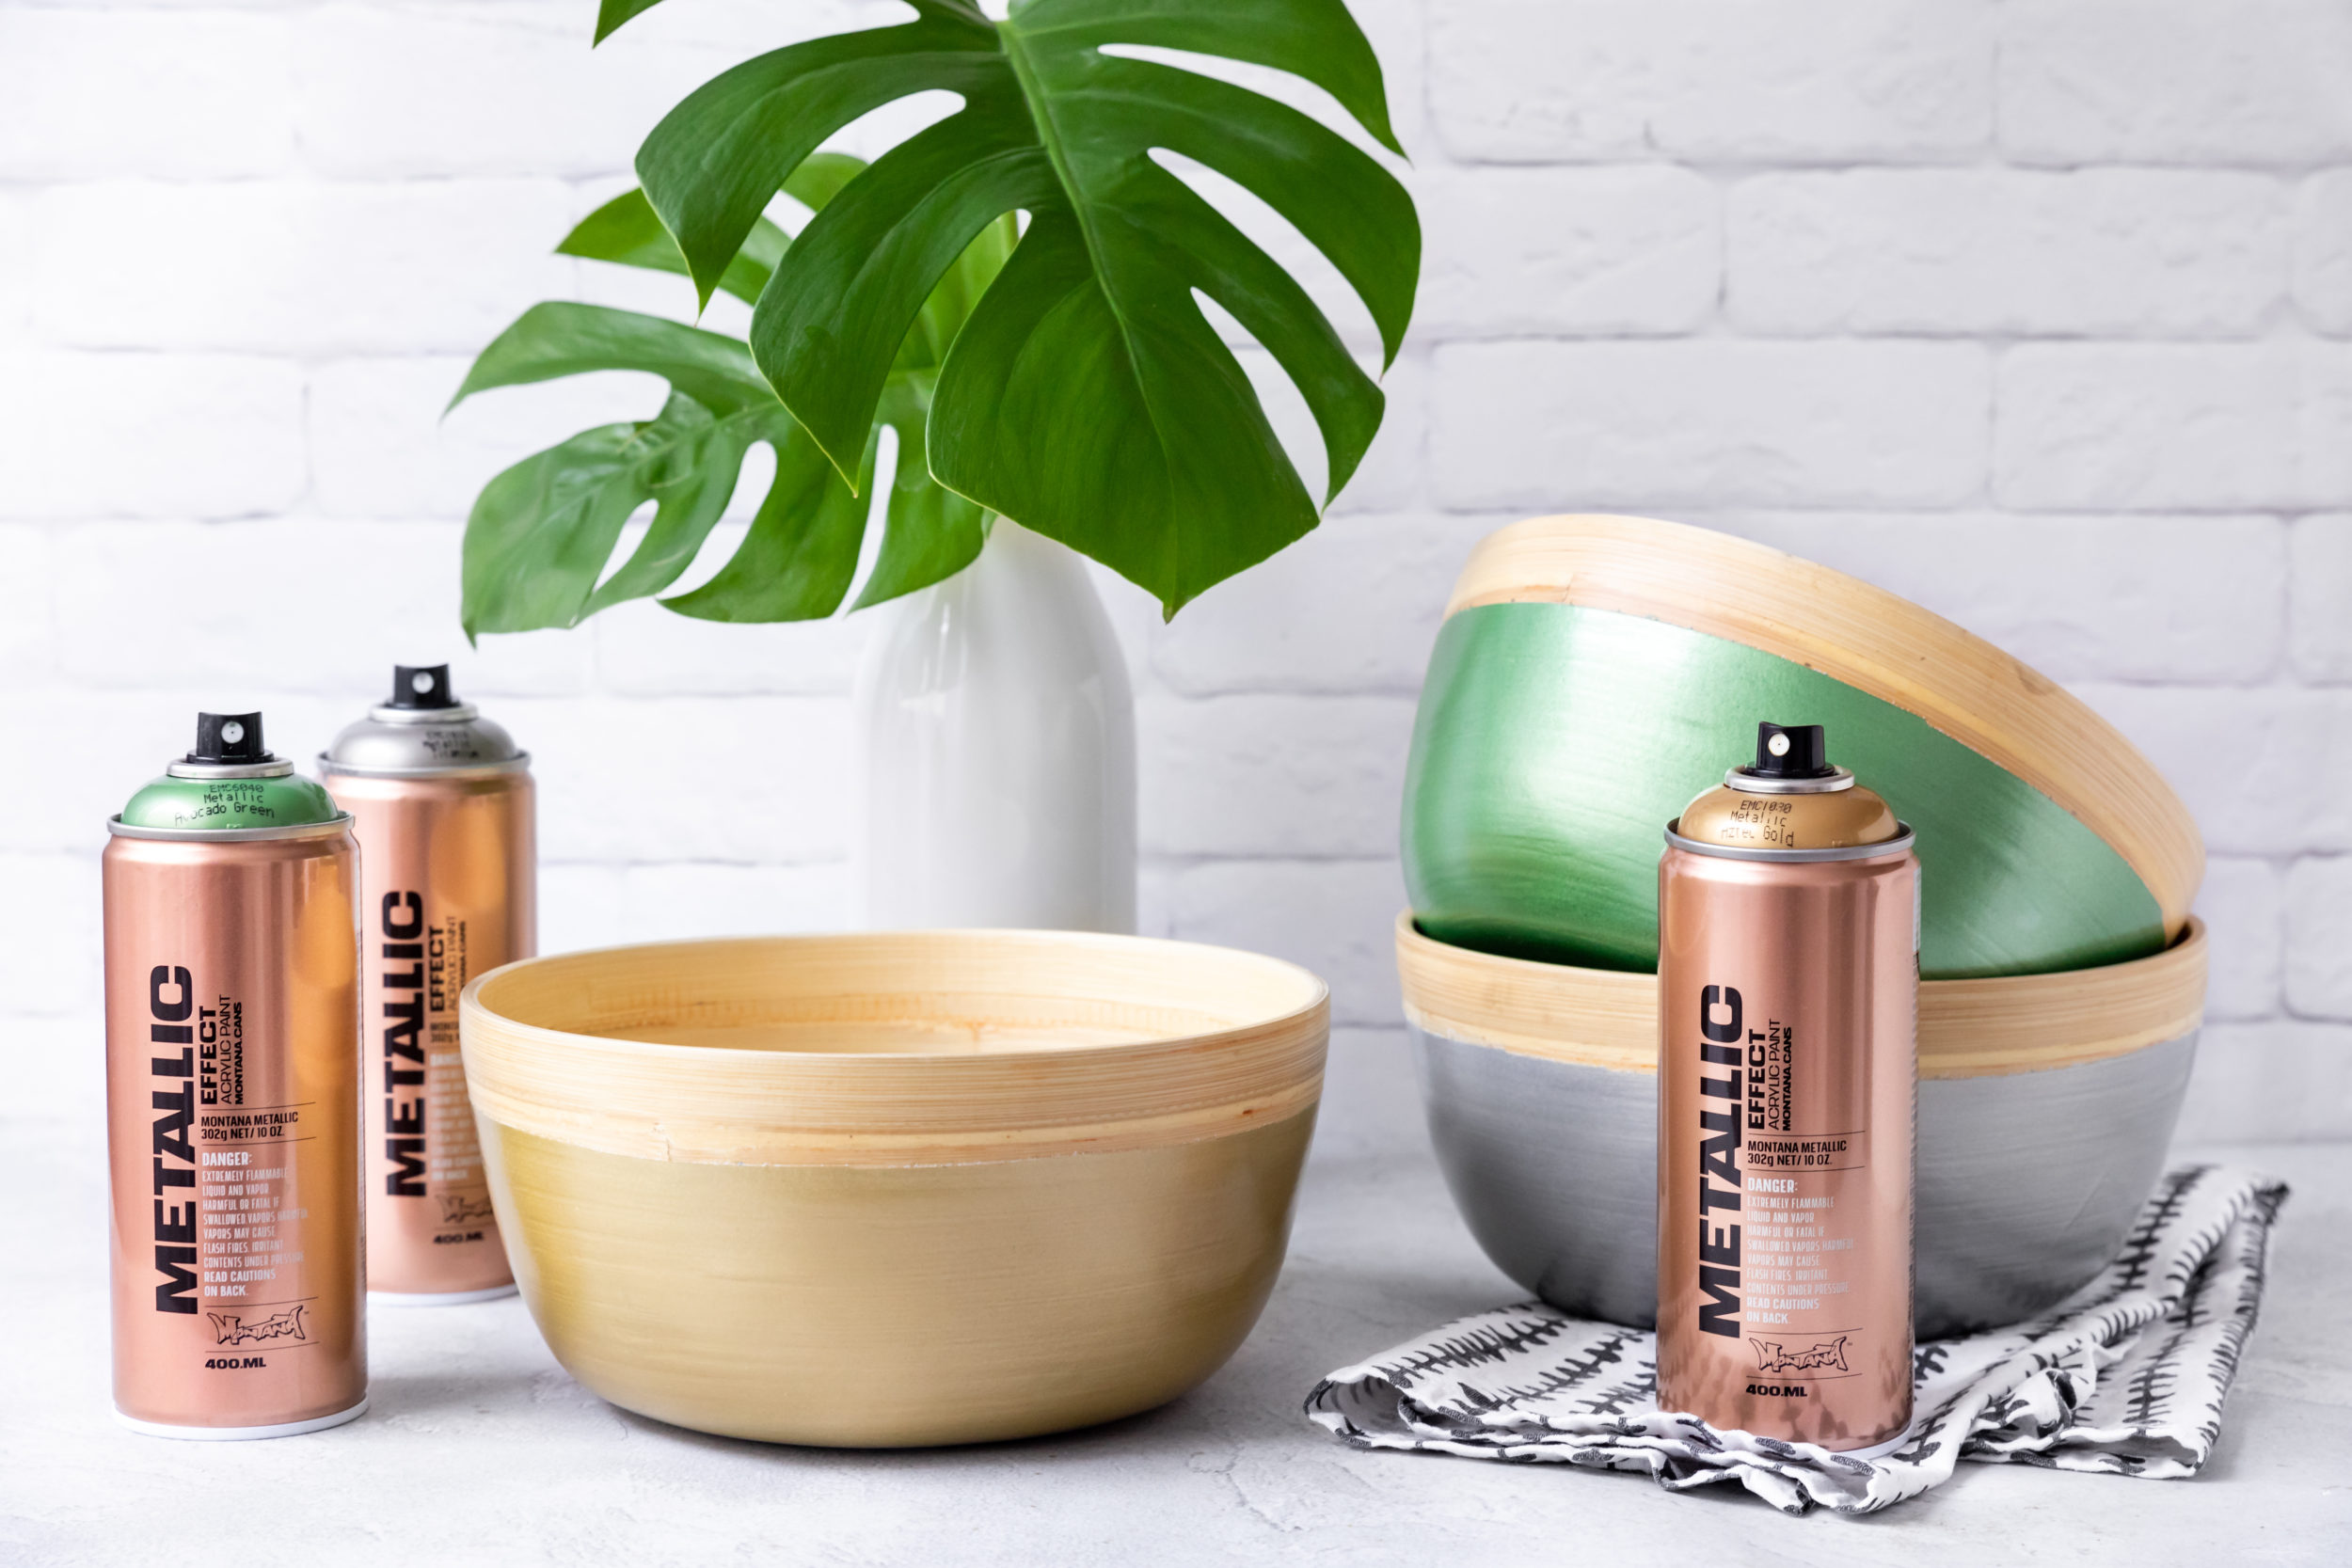
Once we removed our cover paper our bowls looked simply STUNNING! Who would have thought such a simple process would look so fab! And the best part is they are unique. You won’t be finding these guys in any chain stores. Allow to dry and cure completely for 48 hours before you use them, and of course give them a clean as well.

This project is for any skill level. It’s easy and fun. The actual working time is only approximately 30 minutes. It is important to let the layers dry well so the bowls can be durable as well as beautiful. Sanding between coats is not compulsory but we do recommend it for the best results. Good luck and happy crafting!