

Glowing Halloween decor with a spooky touch
refreshing. And above all, they can always do with a new touch of spookiness. This year we chose the beloved pumpkin. As reliable at Halloween as Christmas tree at Christmas. Wondering what we did? Read on and prepared to be inspired.
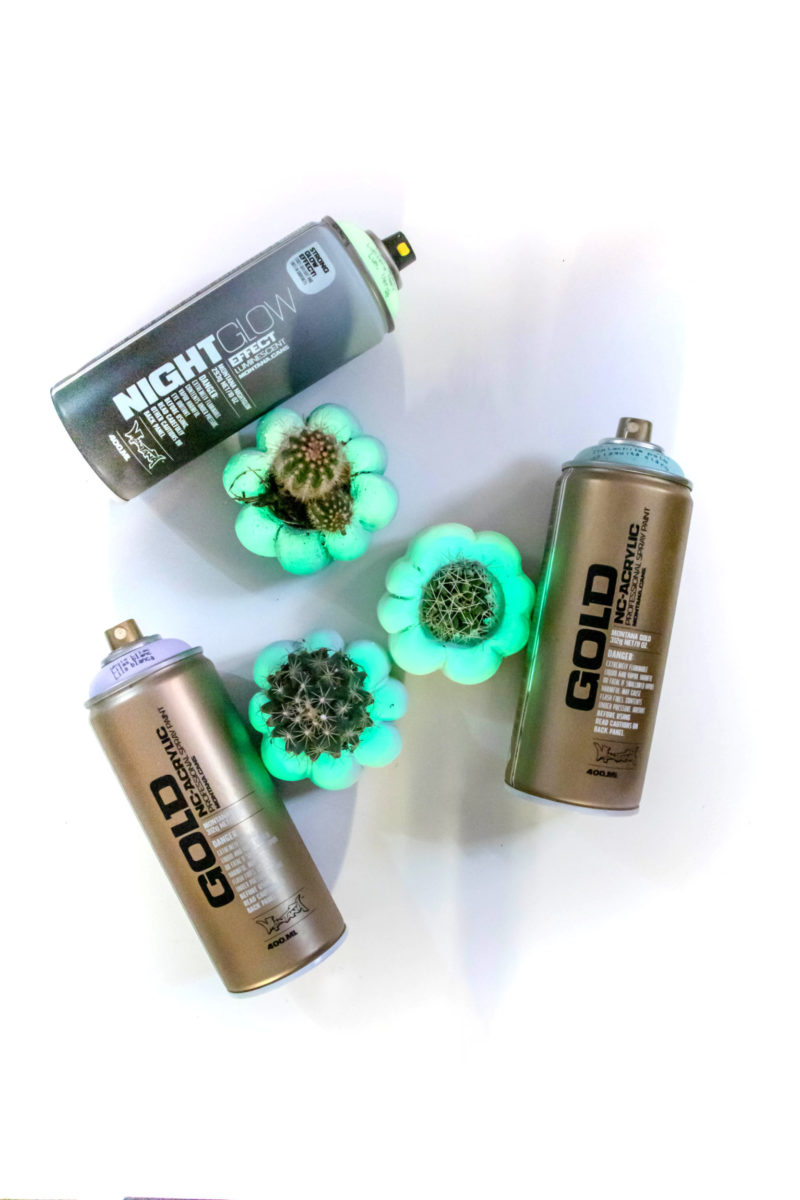
Materials used
- Montana GOLD Line cans in pastel colors
- Montana NIGHTGLOW
- Montana VARNISH
- Tea light or similar form
- Ready mix cement
- Nylon socks or cut stockings
- Four rubber bands
- A mixing cup or container
- Mixing spatula
- Water
- Small cactuses or similar succulent plants
- Gloves
- Mask
- Drop sheet
How it was done
During Halloween, you may be lucky and find pre-formed, solid, mini pumpkins in some form. Hardware stores or decor shops are your best bet. We chose to make them from scratch. For this we started by mixing our cement with water in a plastic container similar to the size we wanted the pumpkins to be. Add the water slowly as you mix with the spatula, ensuring the cement becomes a thick paste without dry lumps in it. But not too wet! Adding more cement can correct excessive moisture, but be careful not to mix more cement than you need.
Take your nylon socks or cut stockings (using the feet), and fill them with the mixed cement to the desired size. Tie a knot at the top of the sock when it is full to create a ball like shape. While wet, take your rubber bands and apply them around the wet cement ball so that they all overlap in the middle. After each rubber band you will notice a pumpkin shape starting to occur.
The finishing touch was to push the tea light candle we had into the top of the pumpkin, ensuring we went down deep enough to allow a small plant to fit in. You could create this shape with your fingers or an alternative form if you don’t have tea light candles handy. Let them dry as required (see cement packaging), and remove the socks/stockings and the rubber bands. Now you have the hard part done.

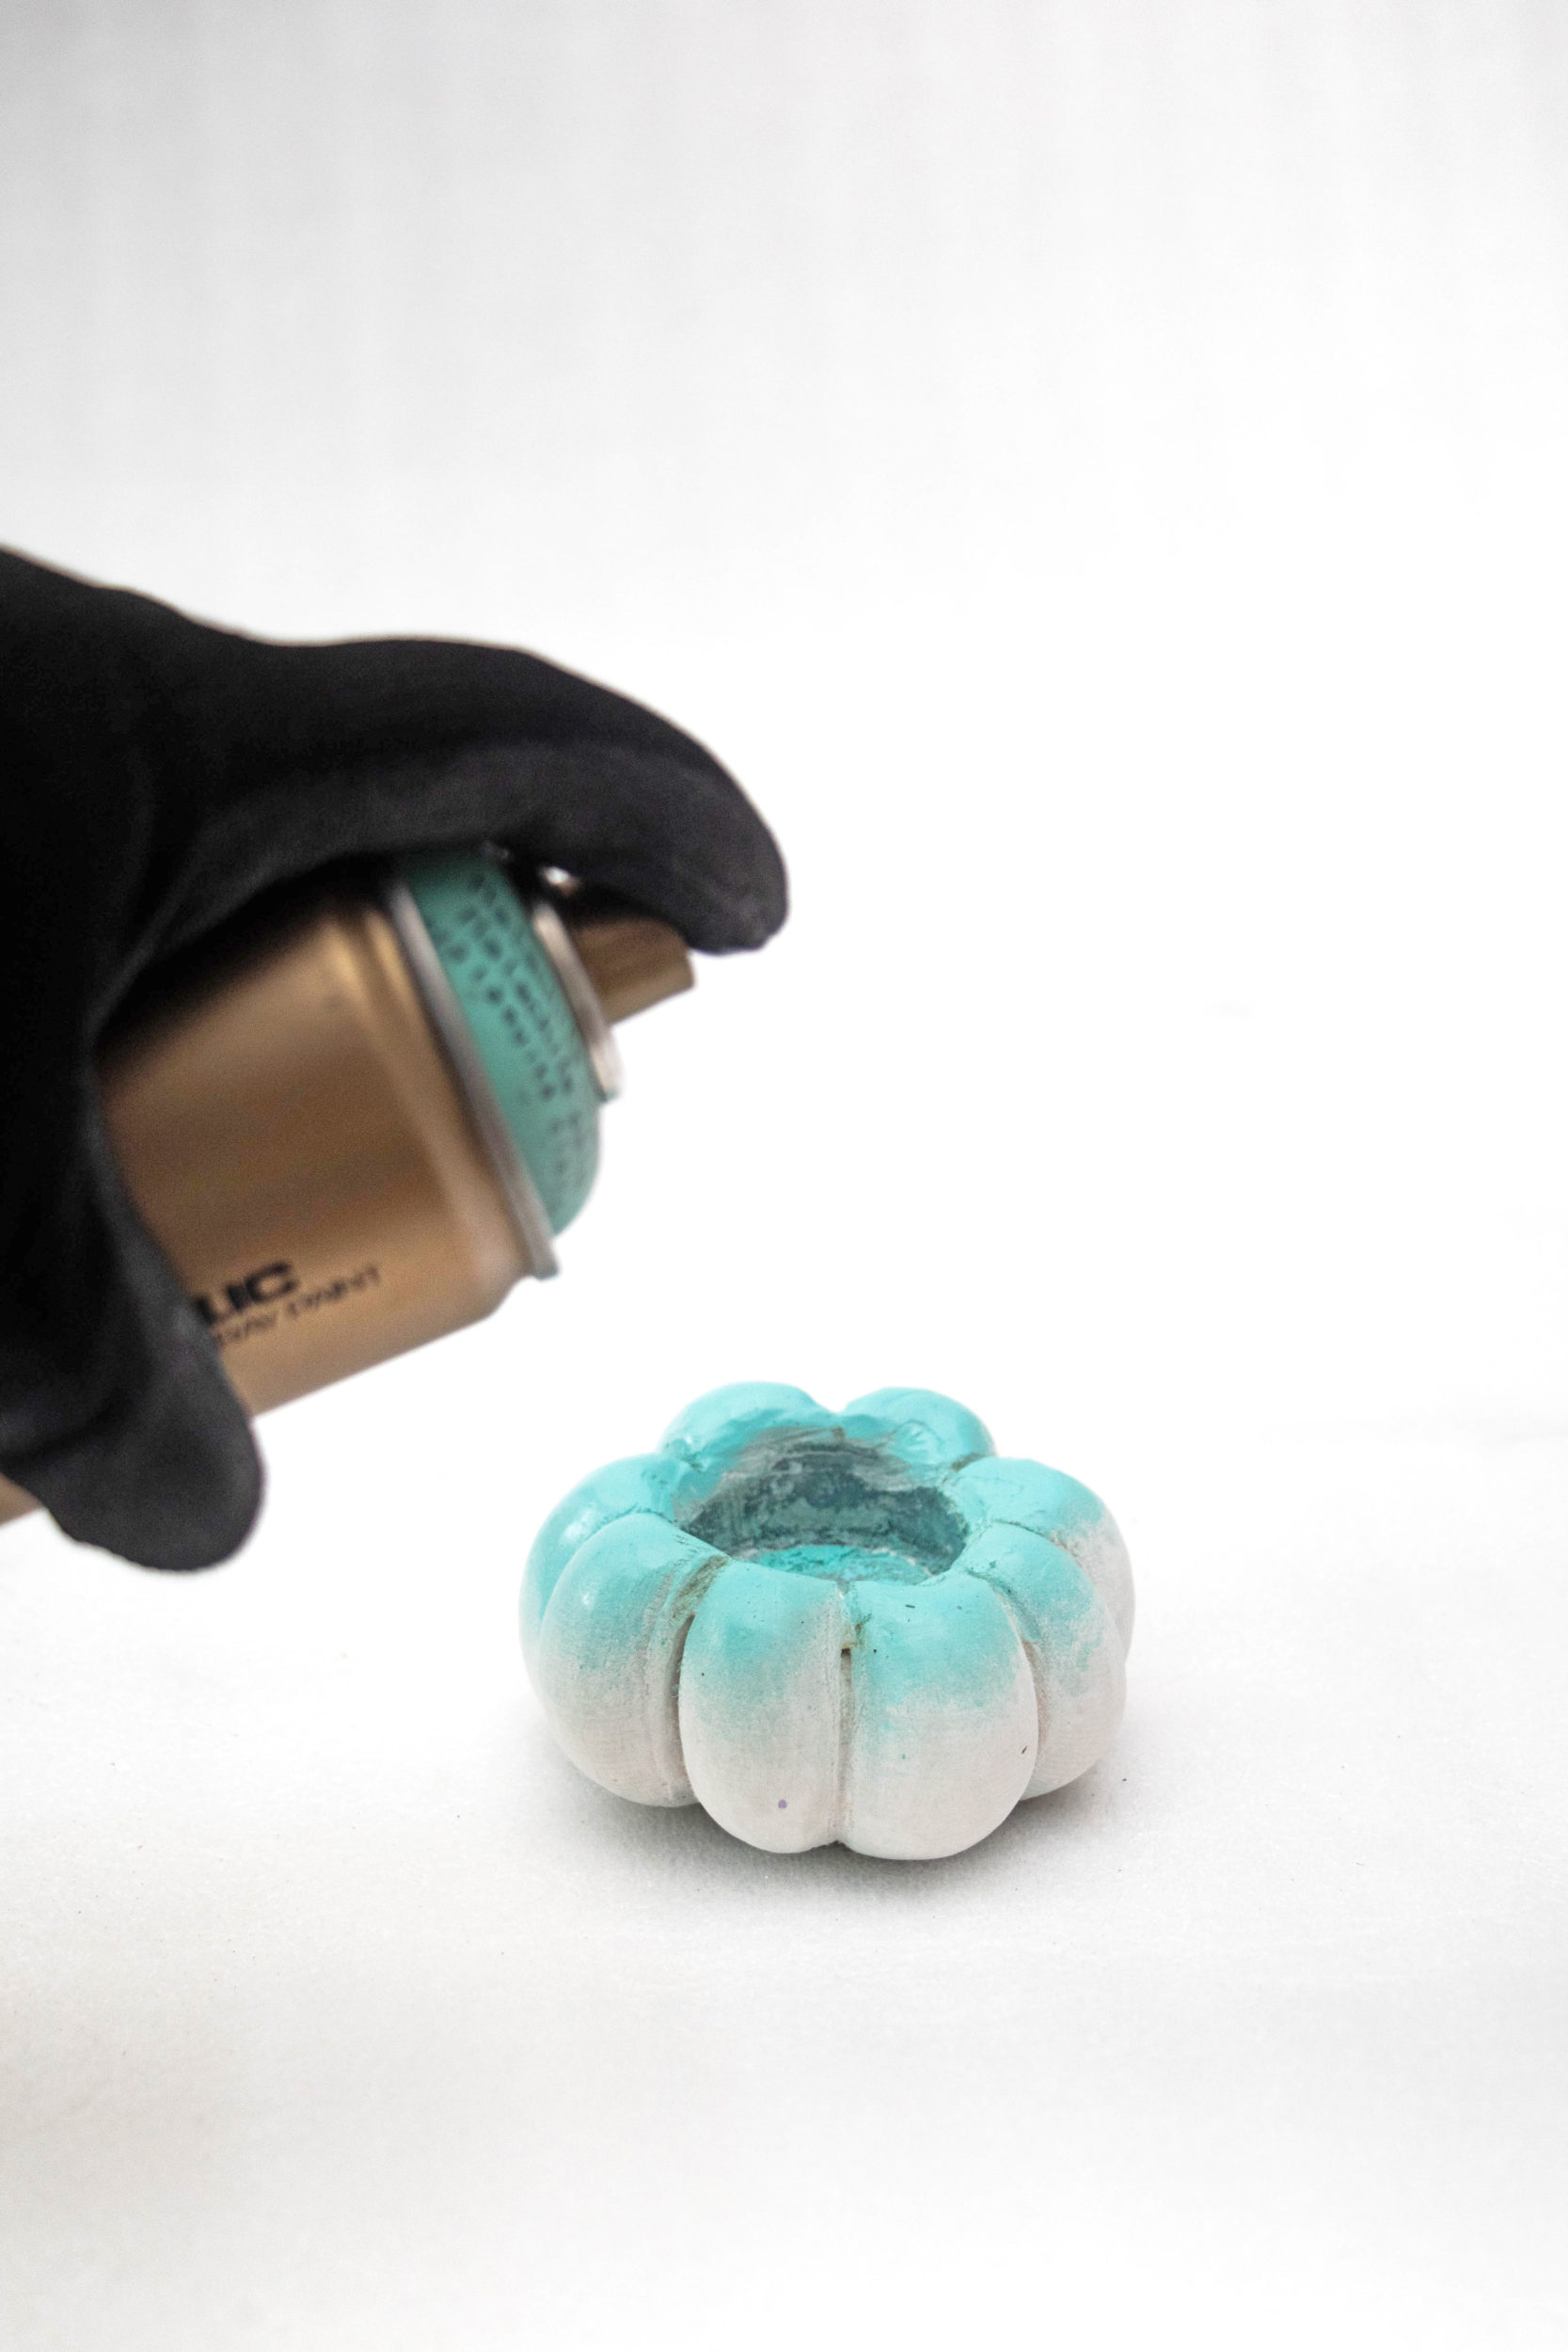
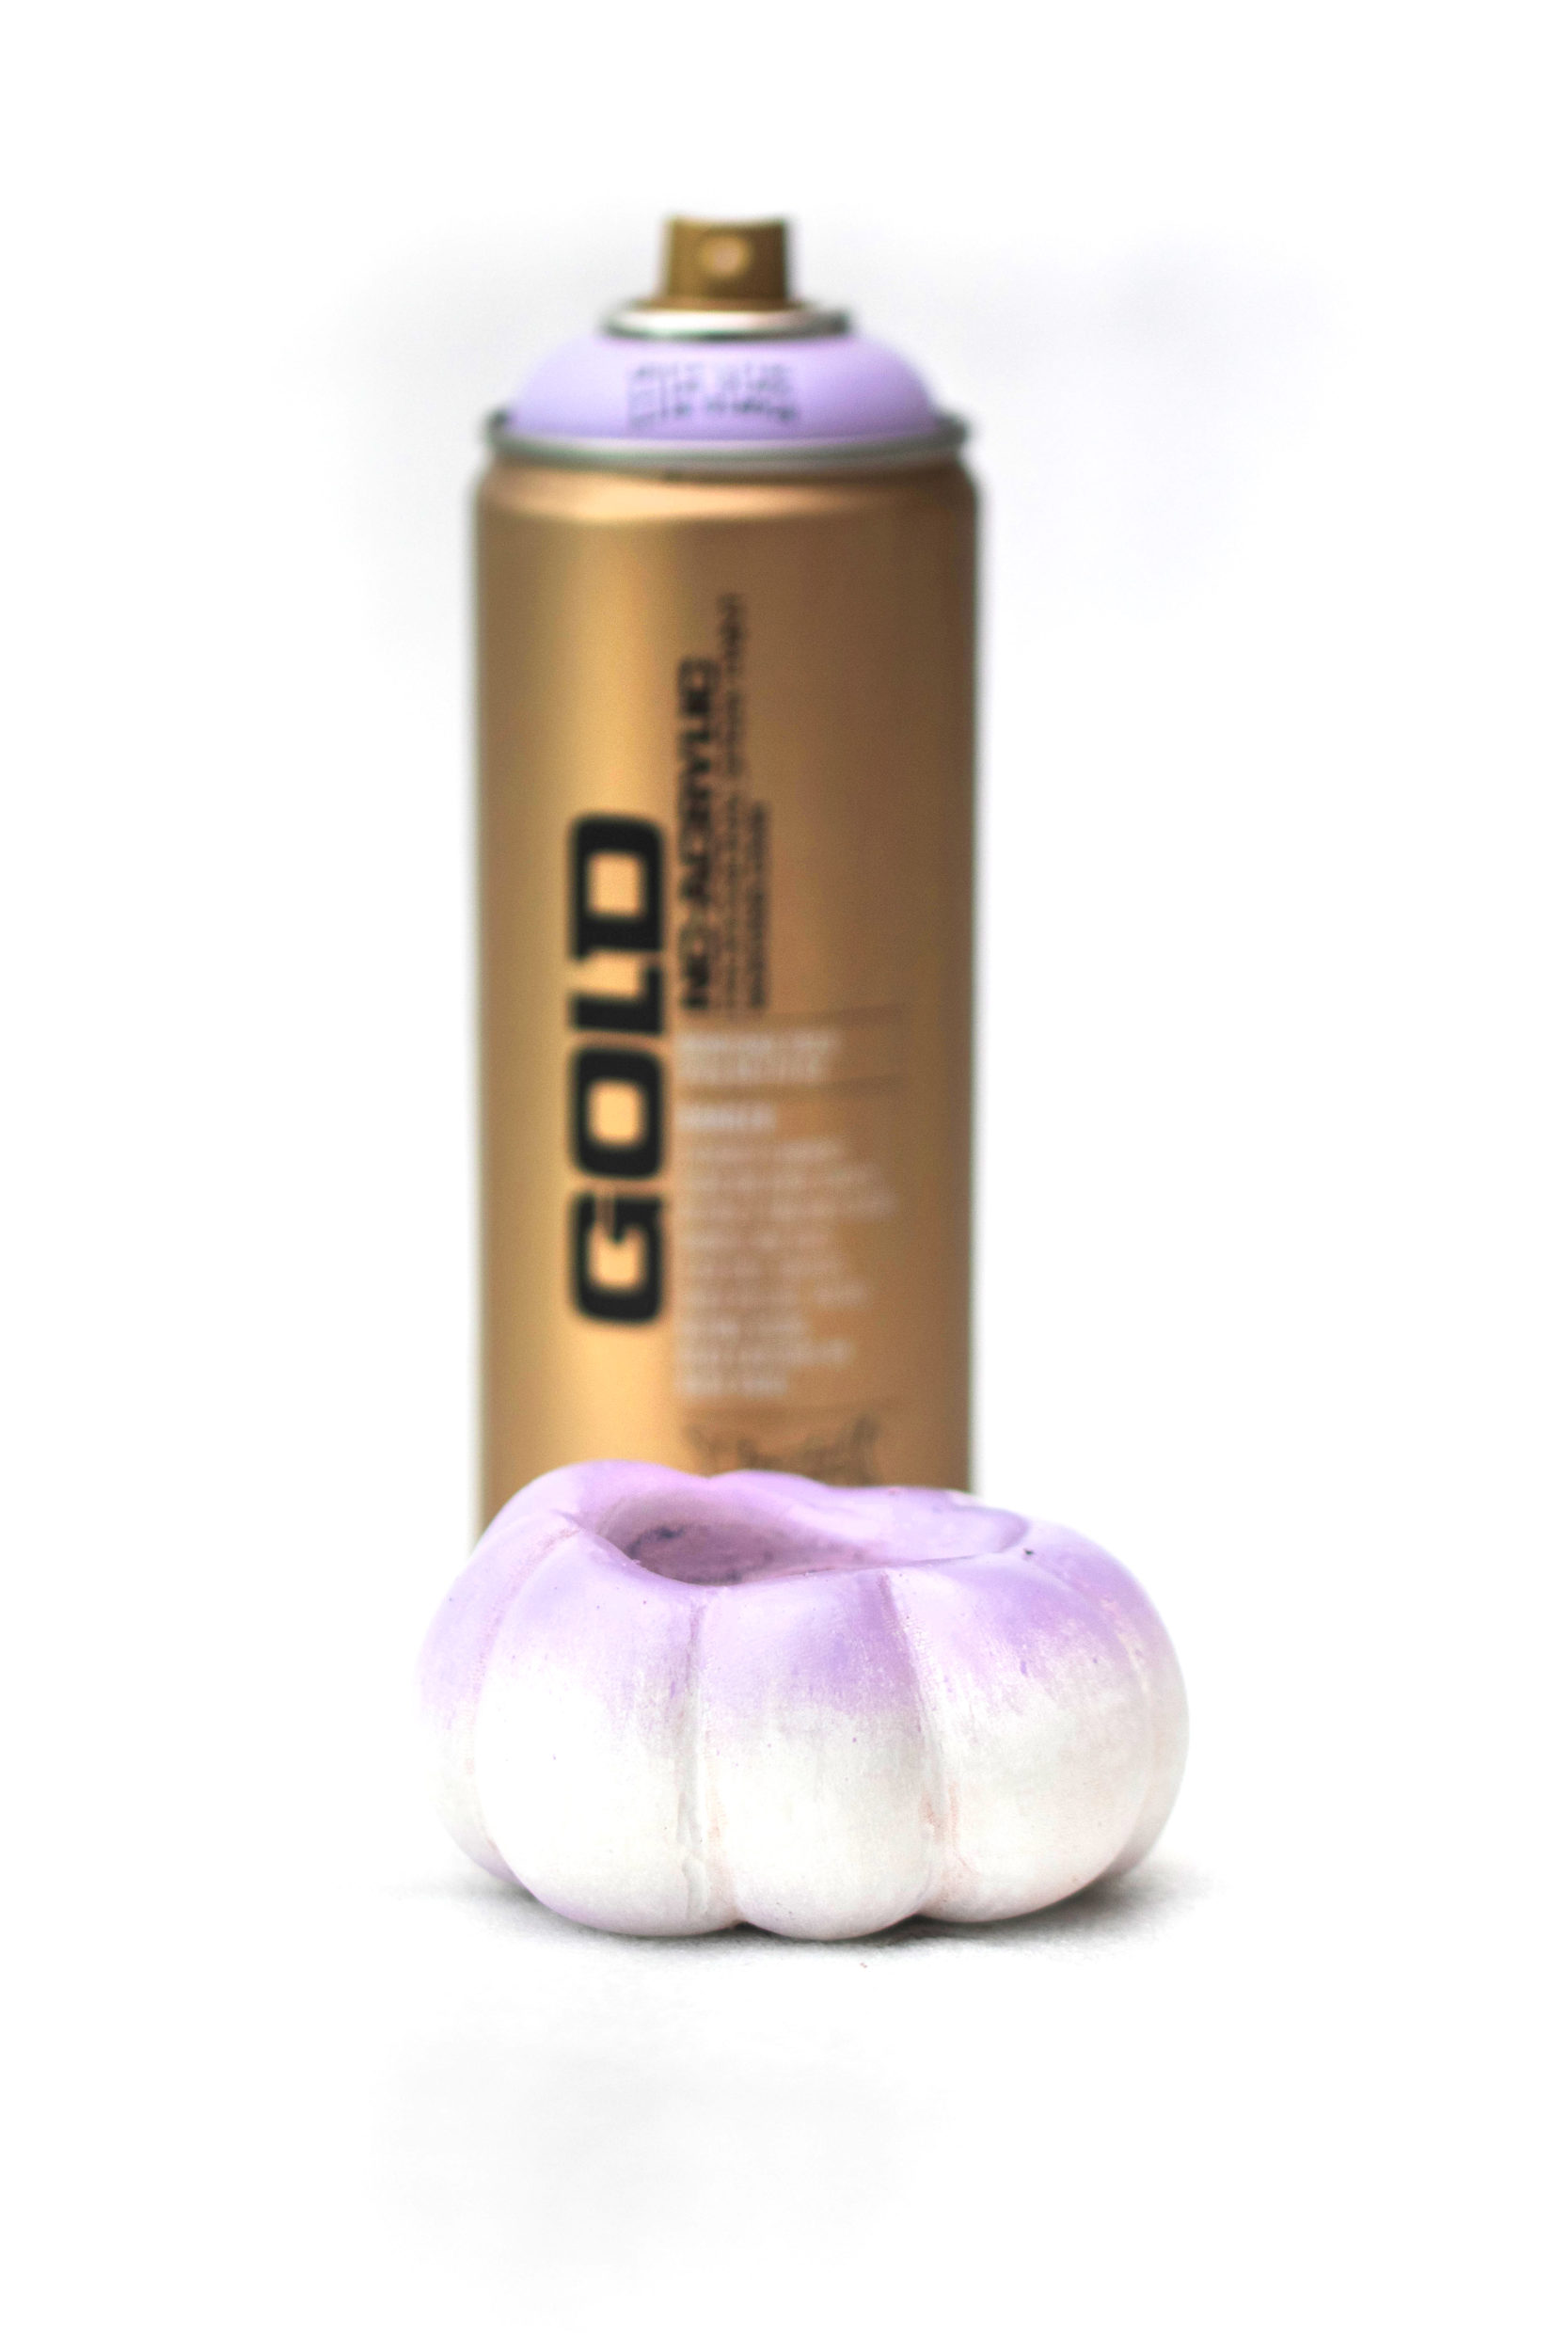
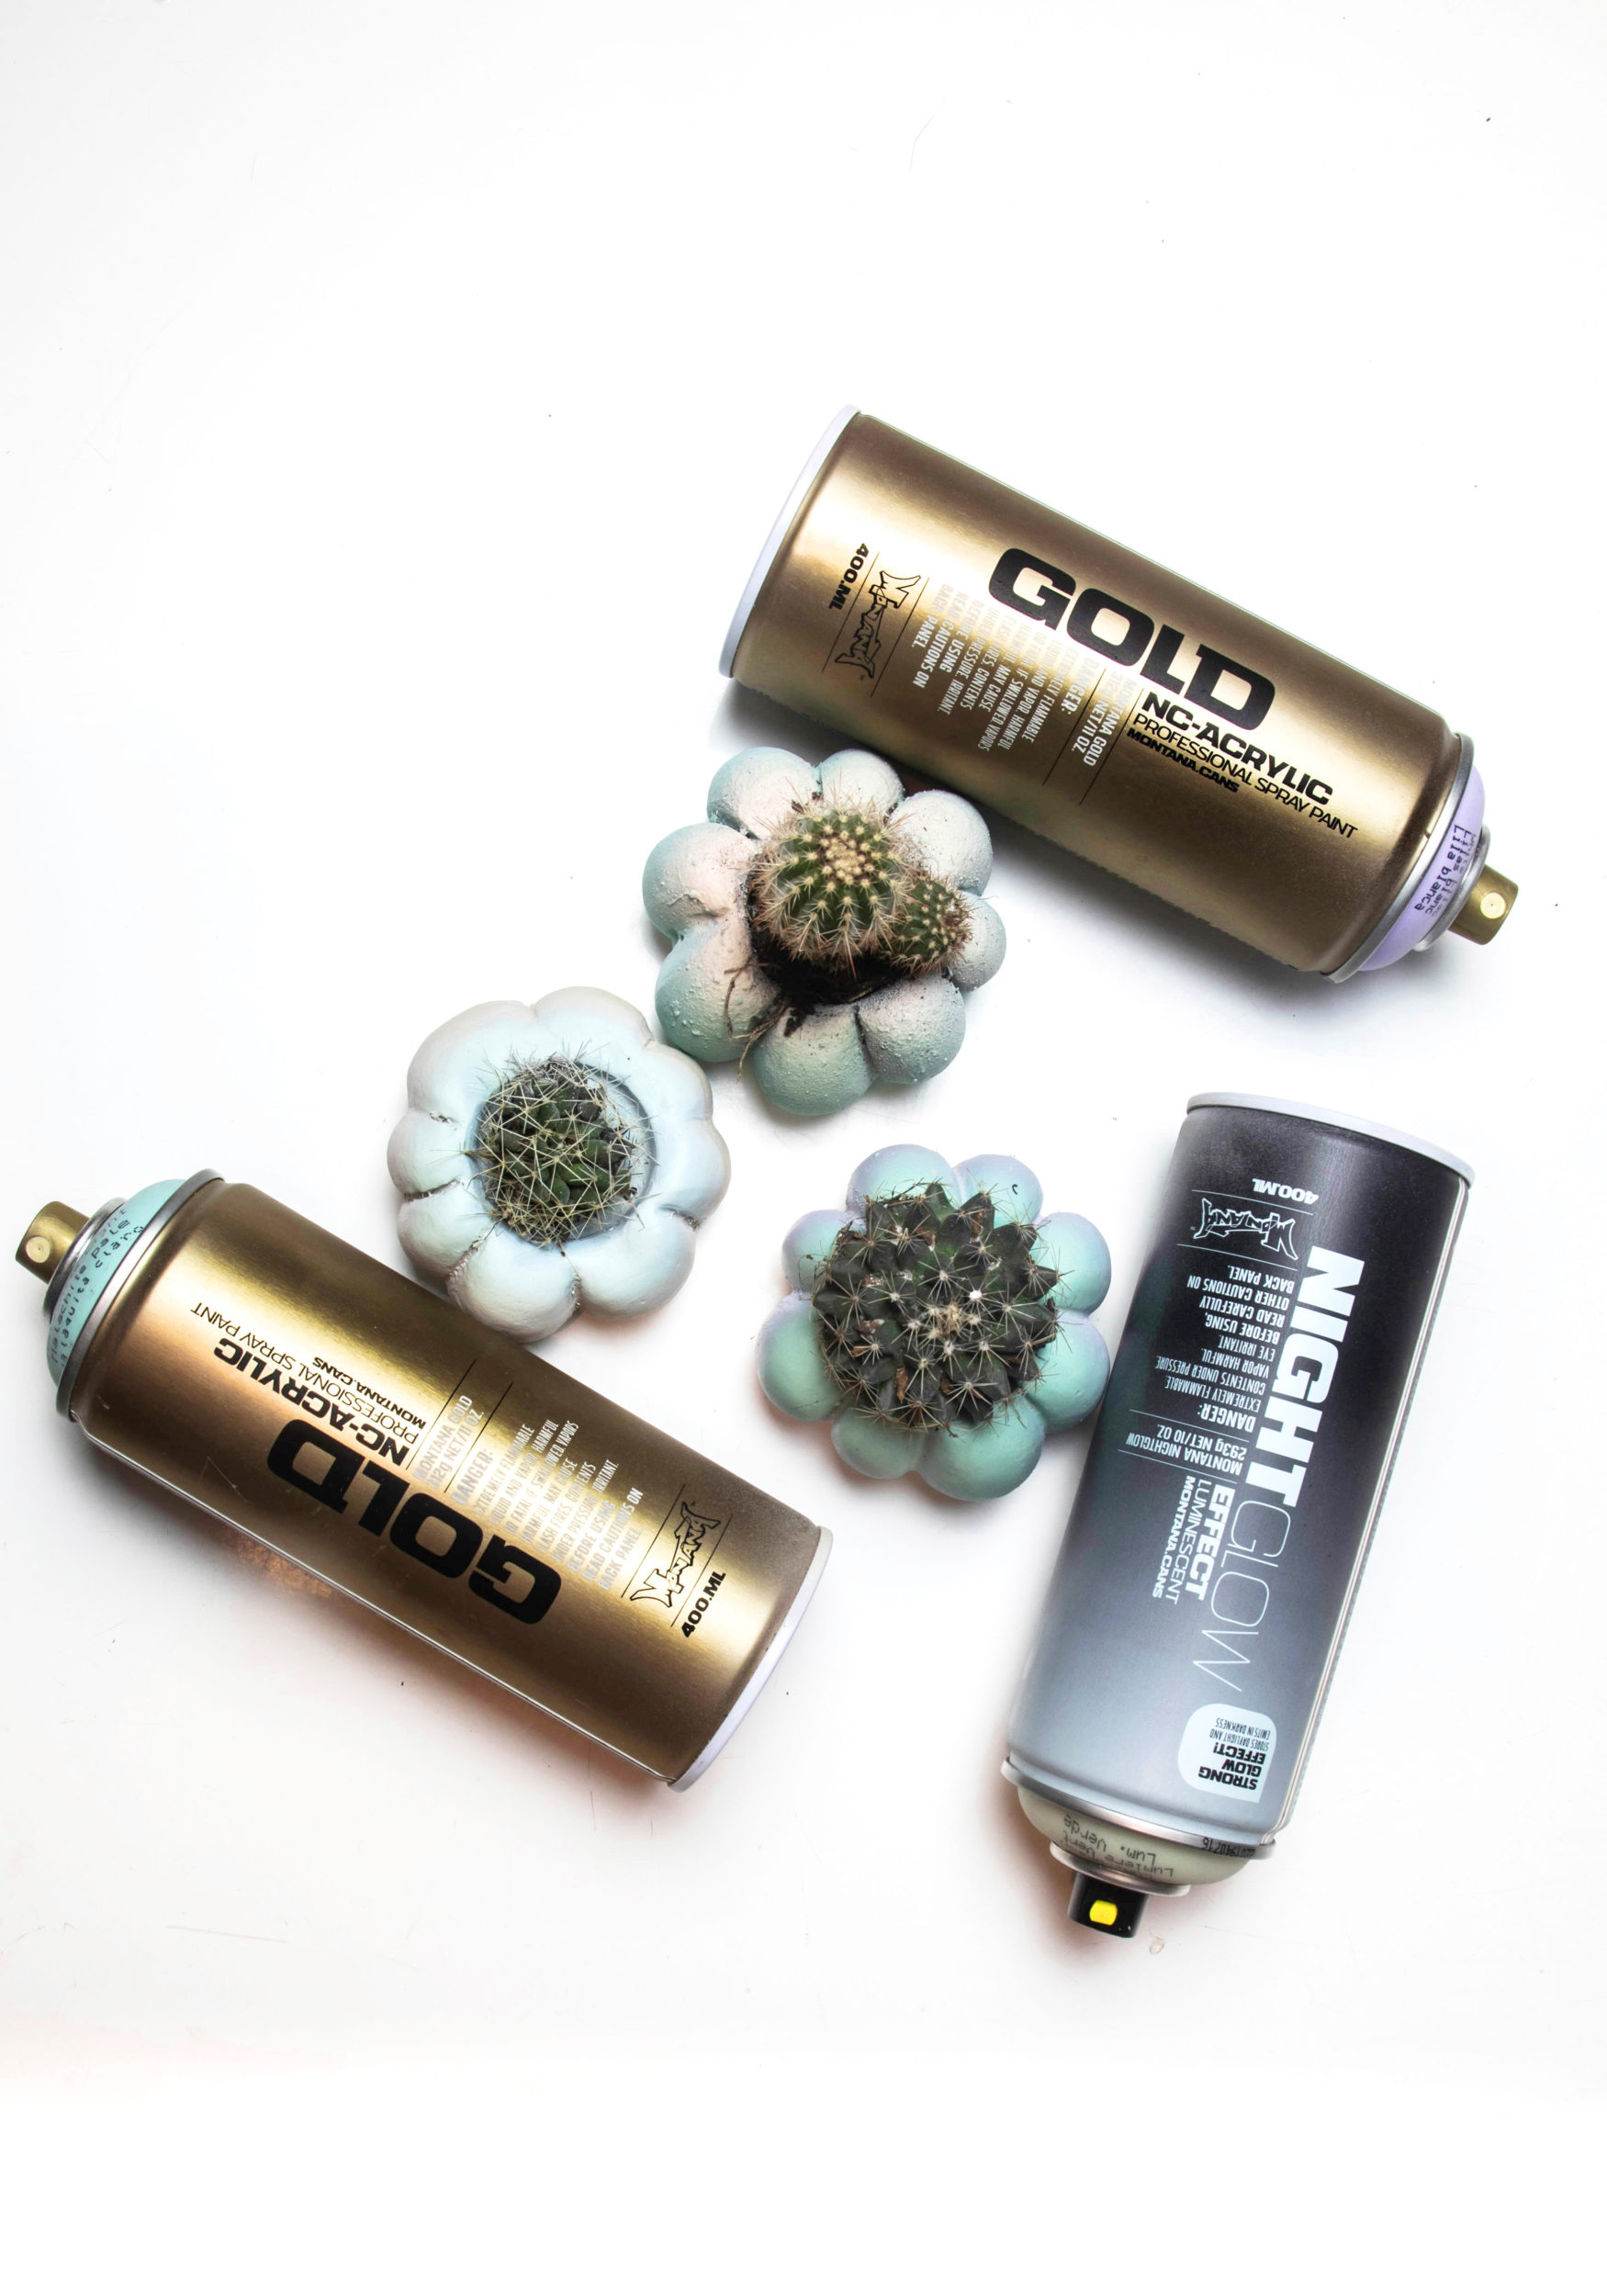
While your thinking about which color will go where on your pumpkins, shake all your cans well for 2-3 minutes. You should hear the mixing balls moving freely. Take off the nozzle and turn the can upside down so that the black safety ring under the nozzle can fall out. Then place your nozzle back on the can. Test spray away from everything to ensure you are ready to go. Knowing that we wanted a NIGHTGLOW touch, we applied our purple pastel Montana GOLD can color at the base of our cement pumpkins and allowed 5-10 minutes to dry.
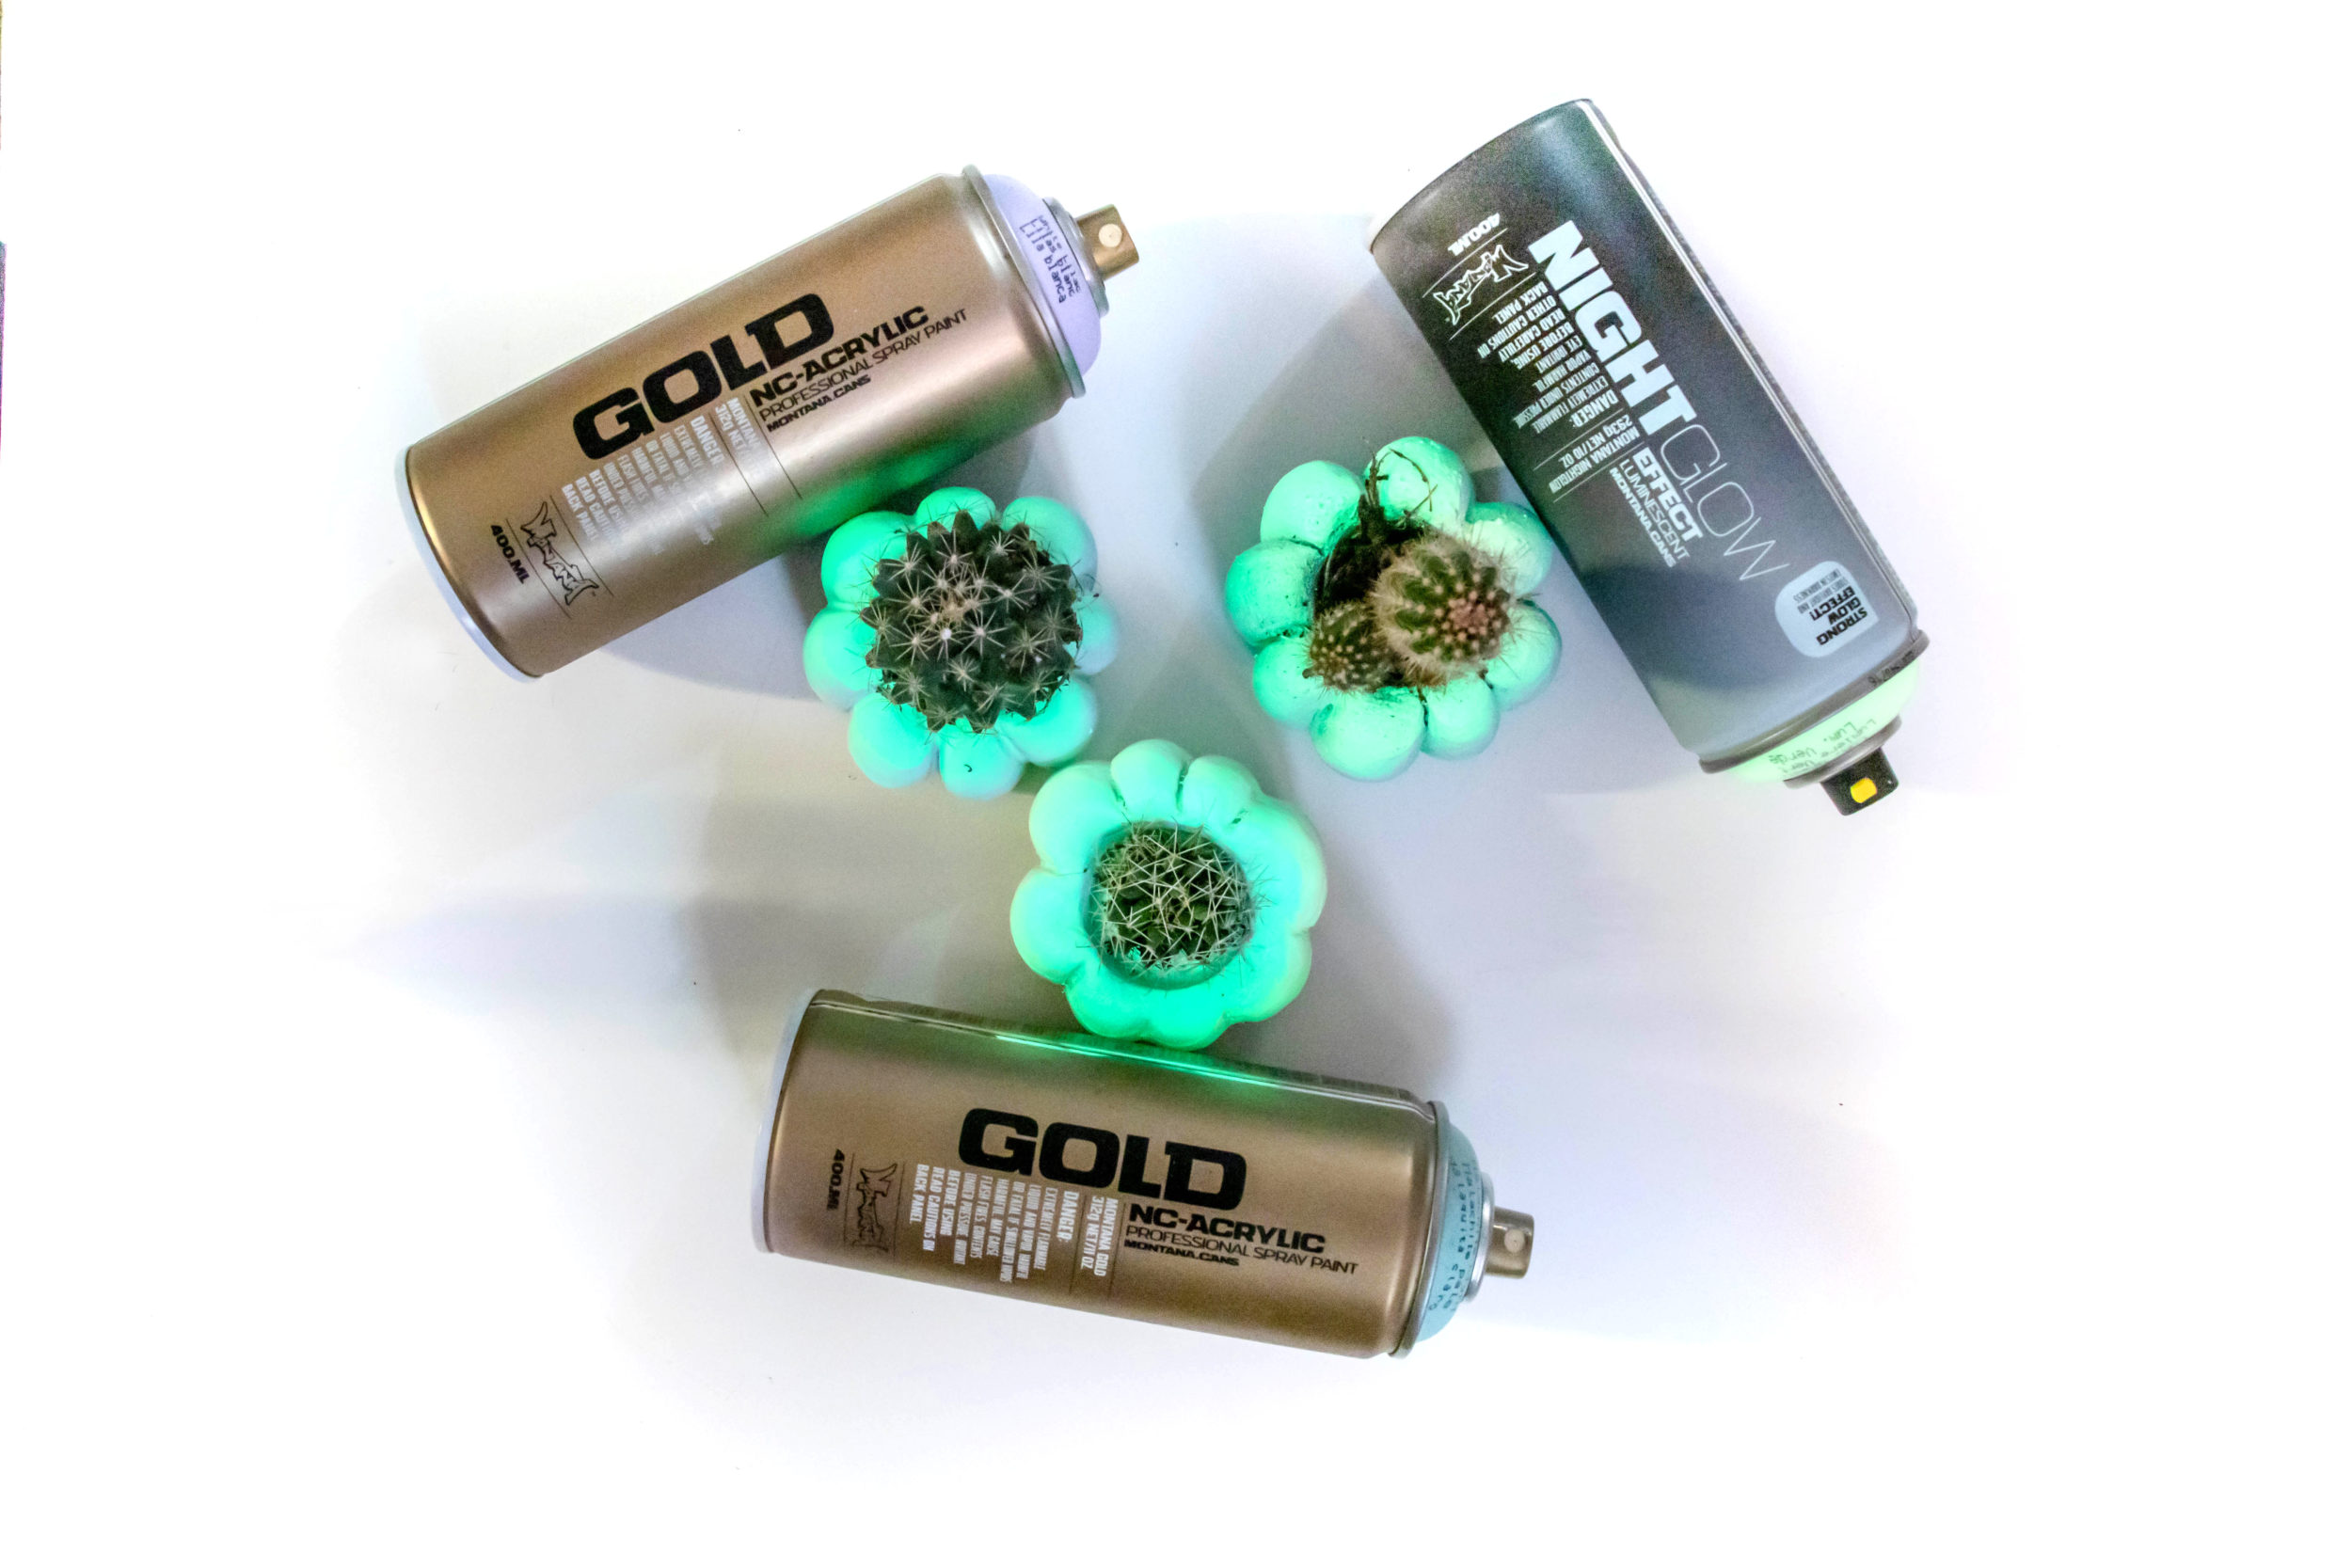
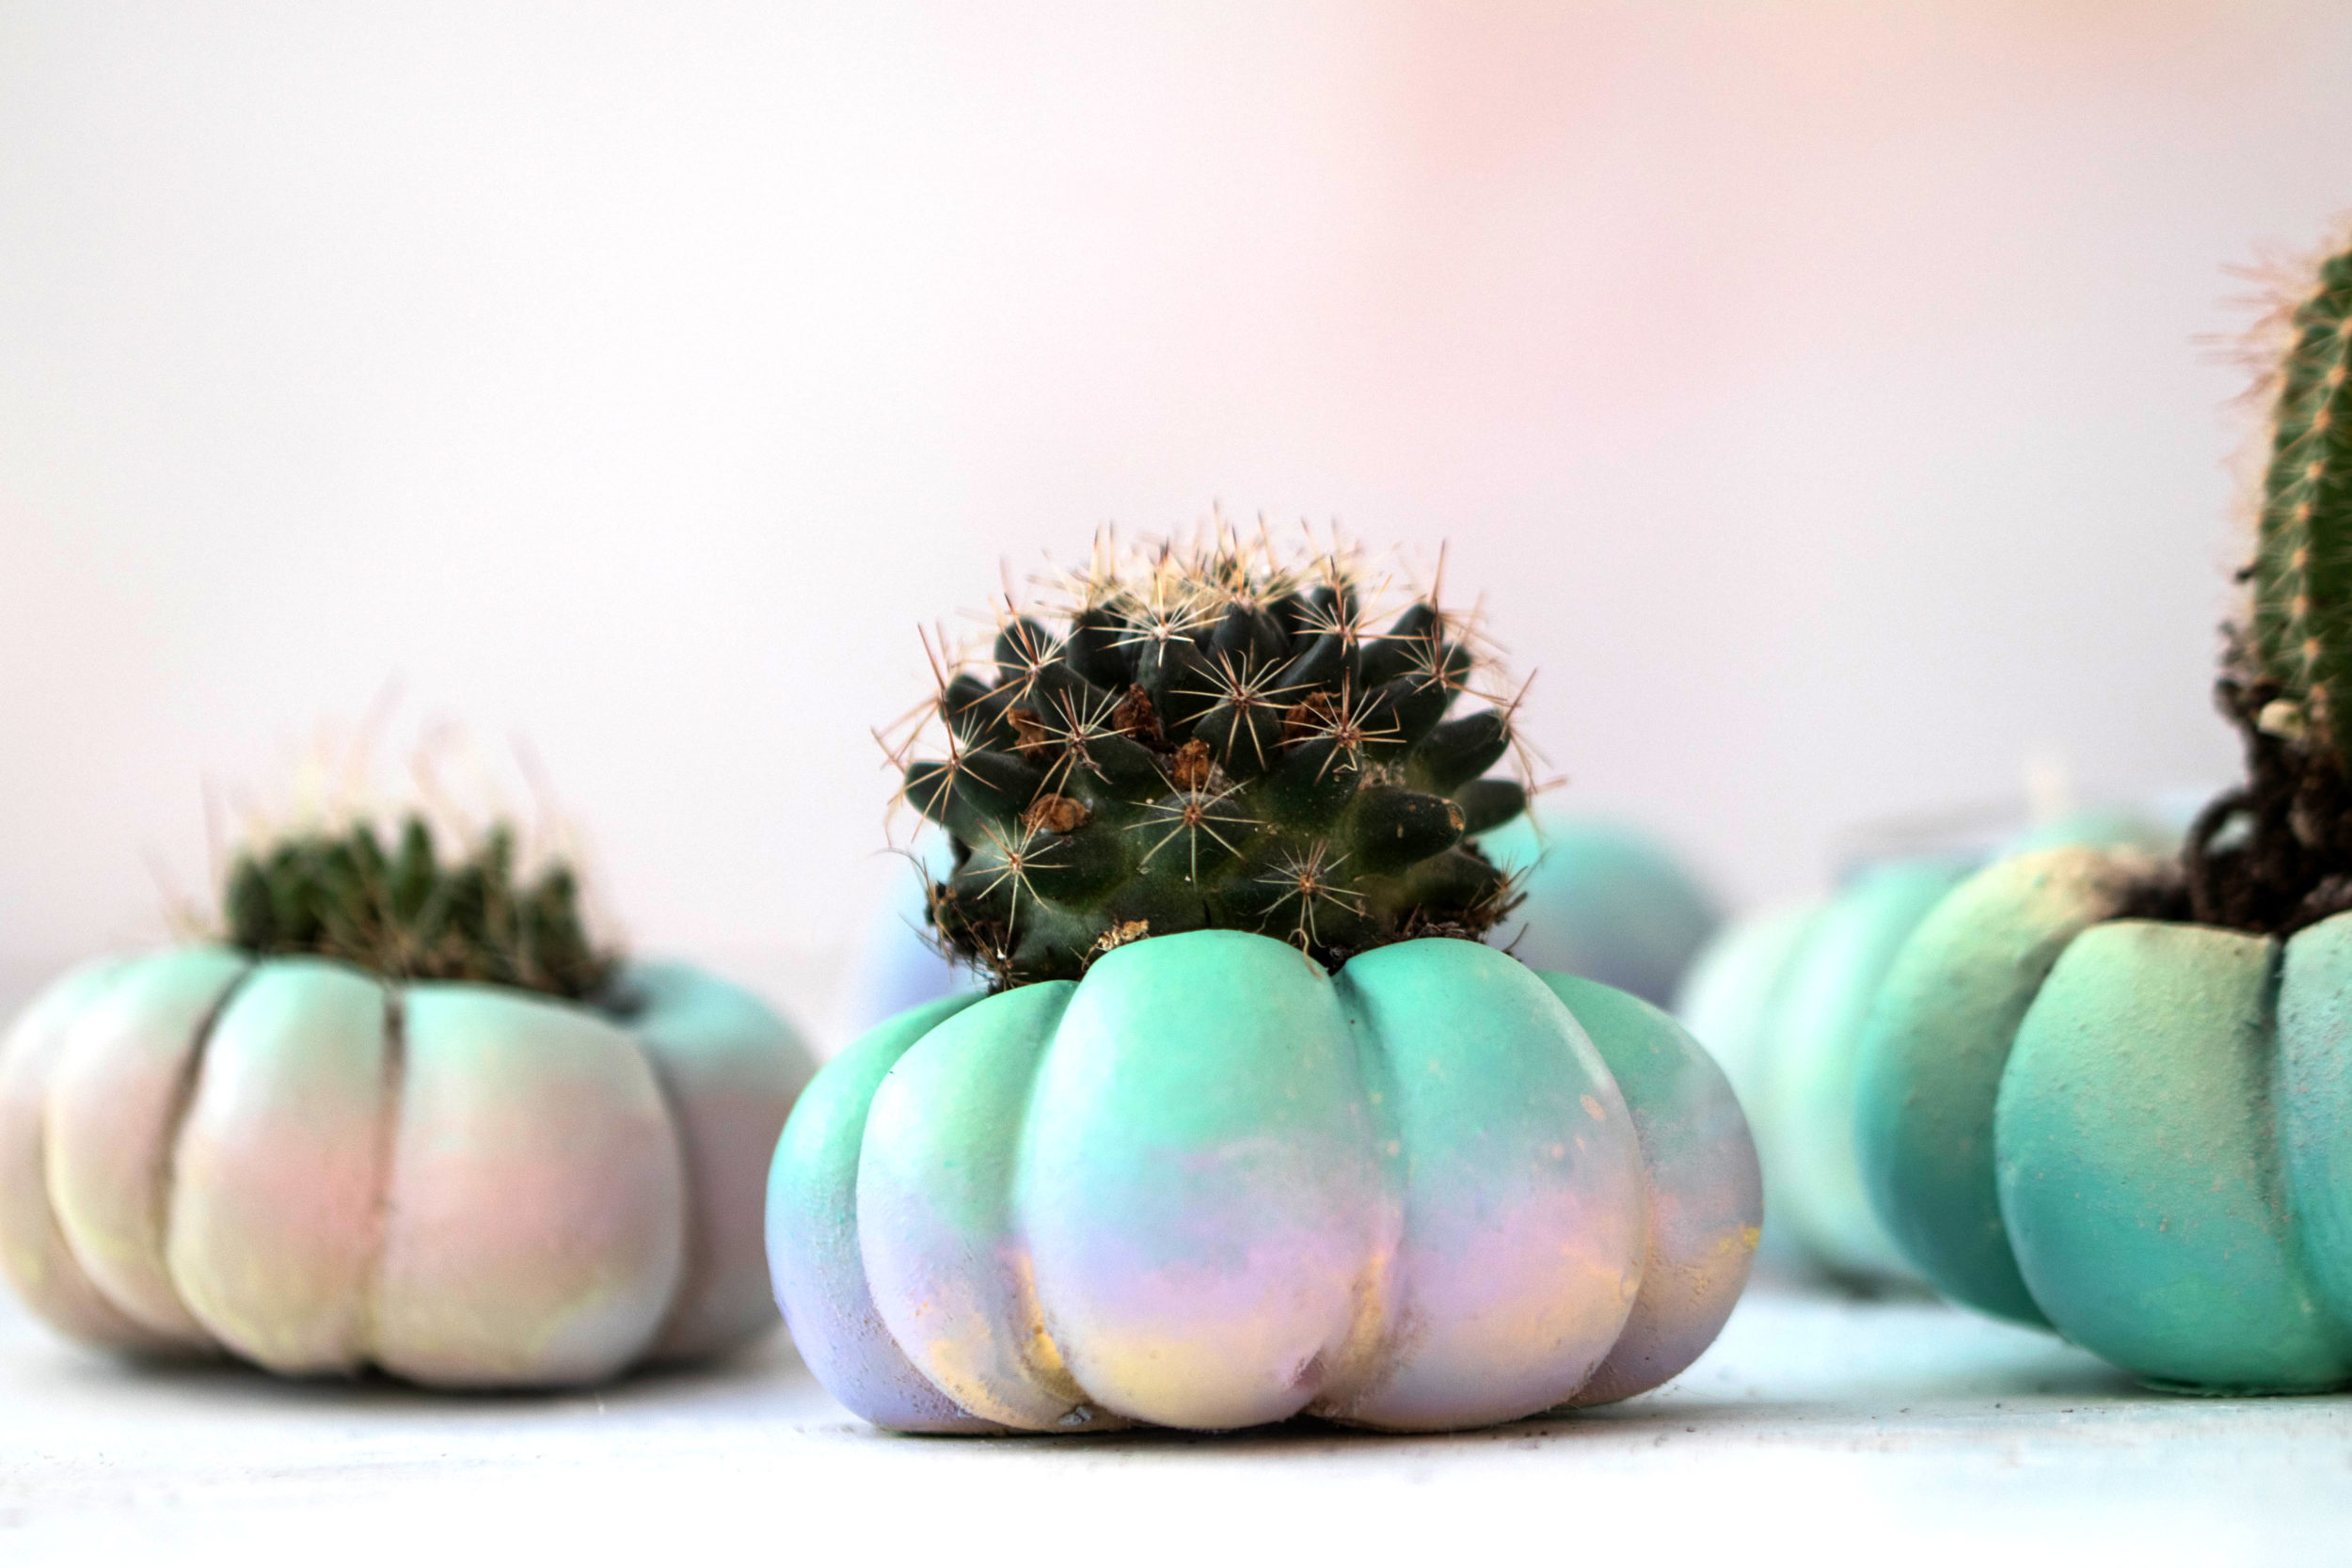
Then we applied our ocean toned pastel color on the top. These colors make for a great base for the NIGHTGLOW which is applied over them once they are dry. Repeating the shaking procedure, apply you Montana NIGHTGLOW from the top.
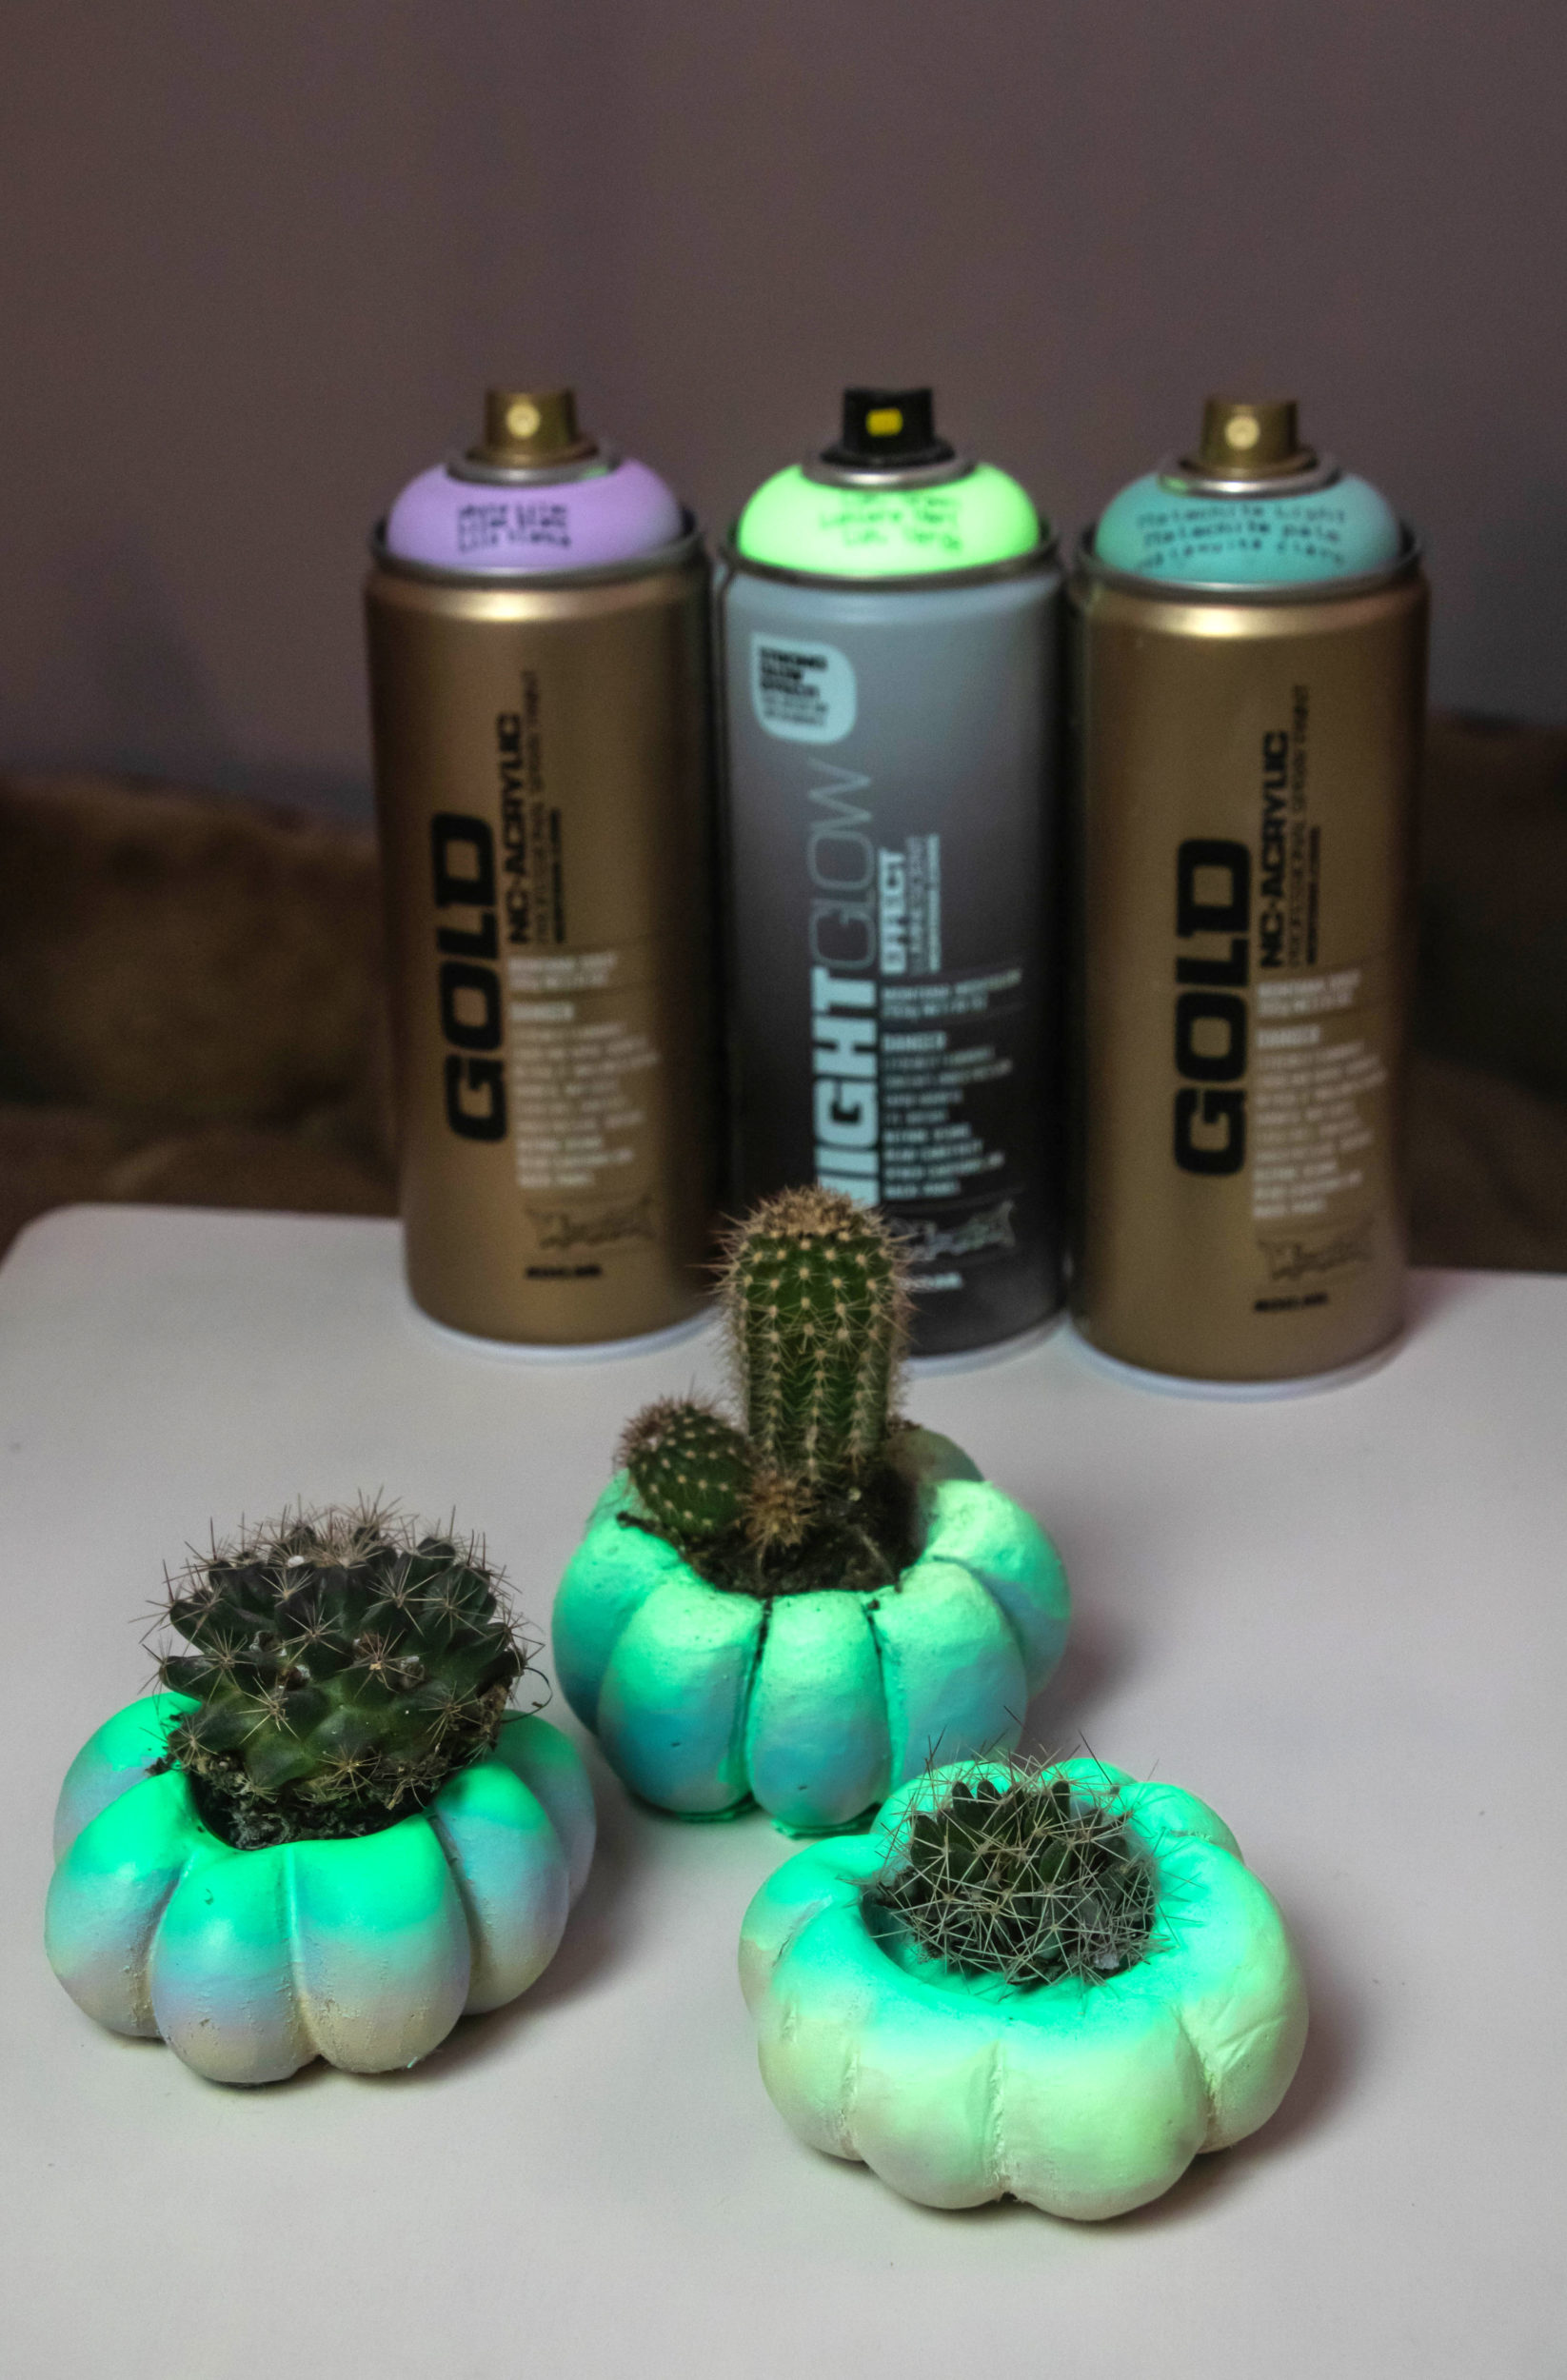
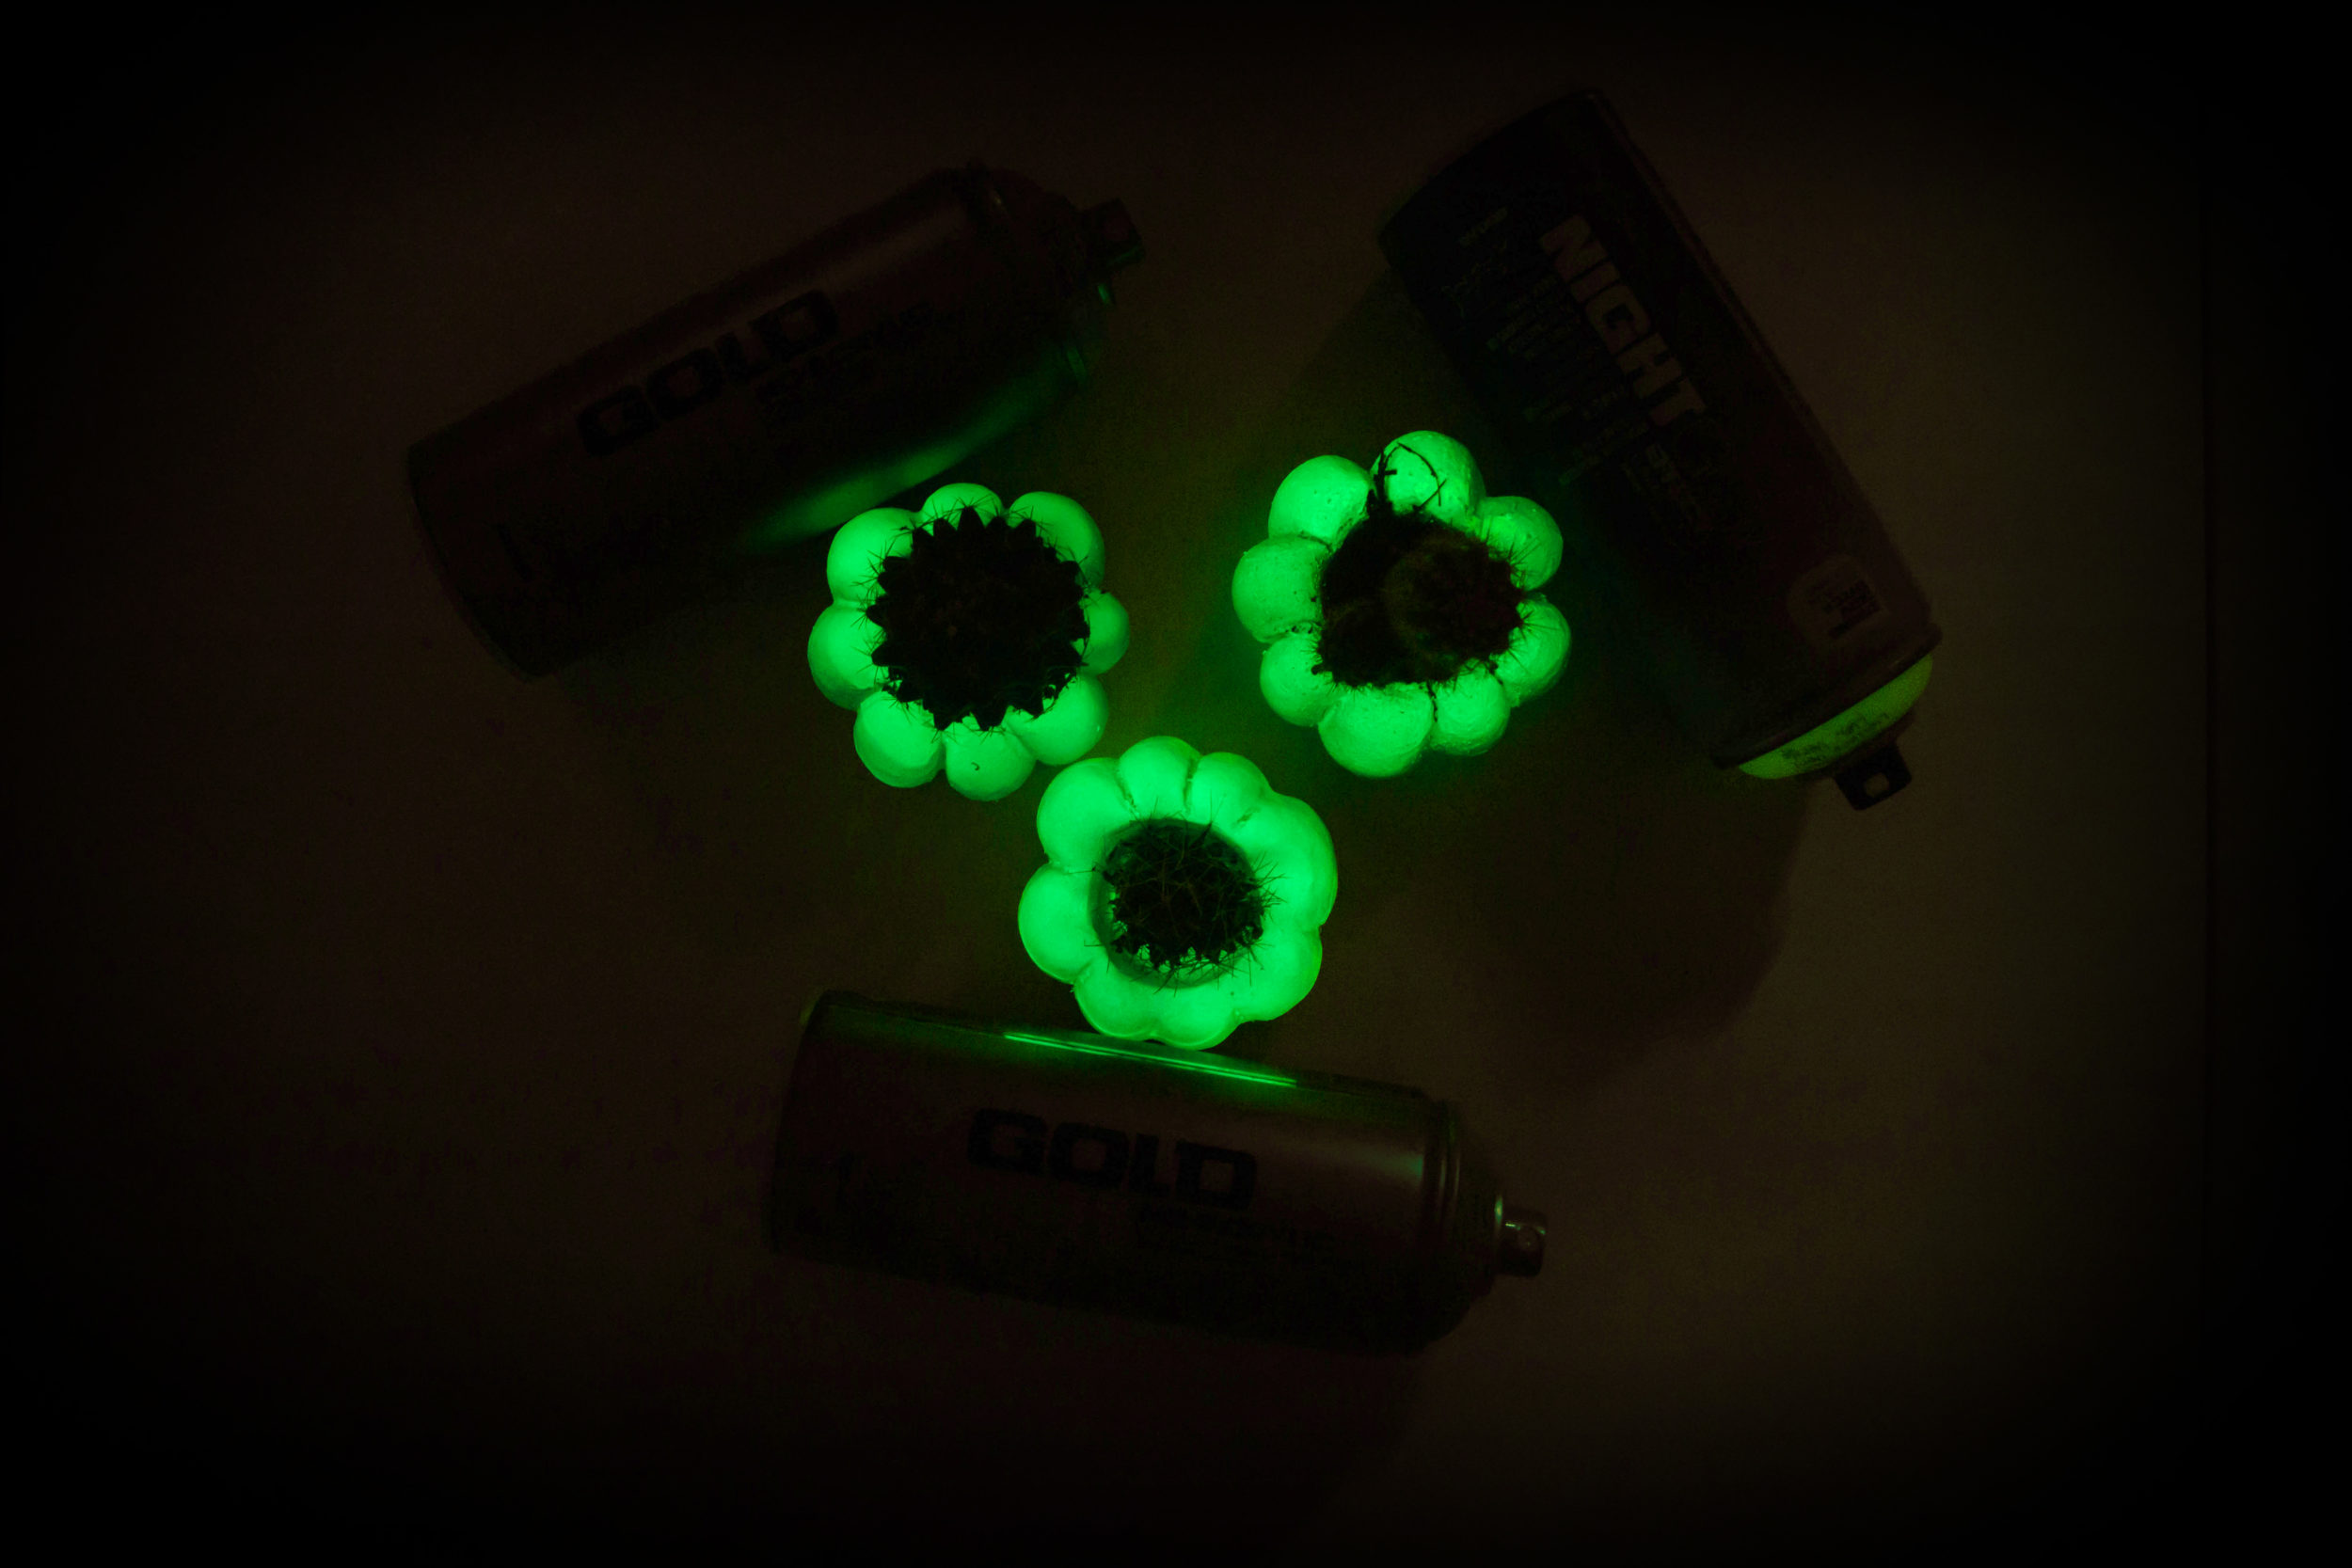
No need to cover the whole pumpkin. Let them all dry 24 hours so the paint has ample time to cure. Should you choose to seal your planters with a clear coat, do so with Montana VARNISH in the finish of your choice. Again, allow to dry over night. All your NIGHTGLOW Pumpkin Planters need now, is plants.
When you are ready, carefully take your cactus or succulent plant and its soil, and place it in your planter in the hole you pressed with your tea light candle. For the best “WOW” effect, let your NIGHTGLOW planters charge in direct sunlight or under a bright light as long as possible. Then, when the lights go off, it’s show time!
This is a medium level project. The painting aspect is actually easy. And if you are lucky enough to find some sort of solid mini pumpkin, it’s all easy. The main challenging parts is making the pumpkins. And if you have never used cement, it is actually really fun! Give it a go..
Happy Crafting..
Nightglow Pumpkin Planters


