There are countless possibilities when it comes to lighting. Everything from mass-produced options, to unique handmade limited editions. There are variations for every budget, taste, surface, or space. Seldom, however, can you get exactly what you want at a price you can pay. Something many people can relate to. At times like these, you need to take matters into your own hands. And in this Metallic Wooden Light project, that is exactly what was done. Read on and be inspired.
BEFORE
Lighting can be as flexible or as fixed as required. Either the power source is hanging out of the wall or ceiling, where the old light fitting used to be with a simple globe fitting attached. Or you’re moveable plug-in light, consisting of a cord, fitting, and a globe can go anywhere as long as it can reach a PowerPoint. In some cases, all this can be used exactly as it is. However, if you are keen to personalize even more regarding the globe, cord type, or fitting color, visit a local hardware or lighting store and see which type of cords and fittings capture your attention. While you are out and about, you can also use the time to grab 4 other important ingredients for this project.

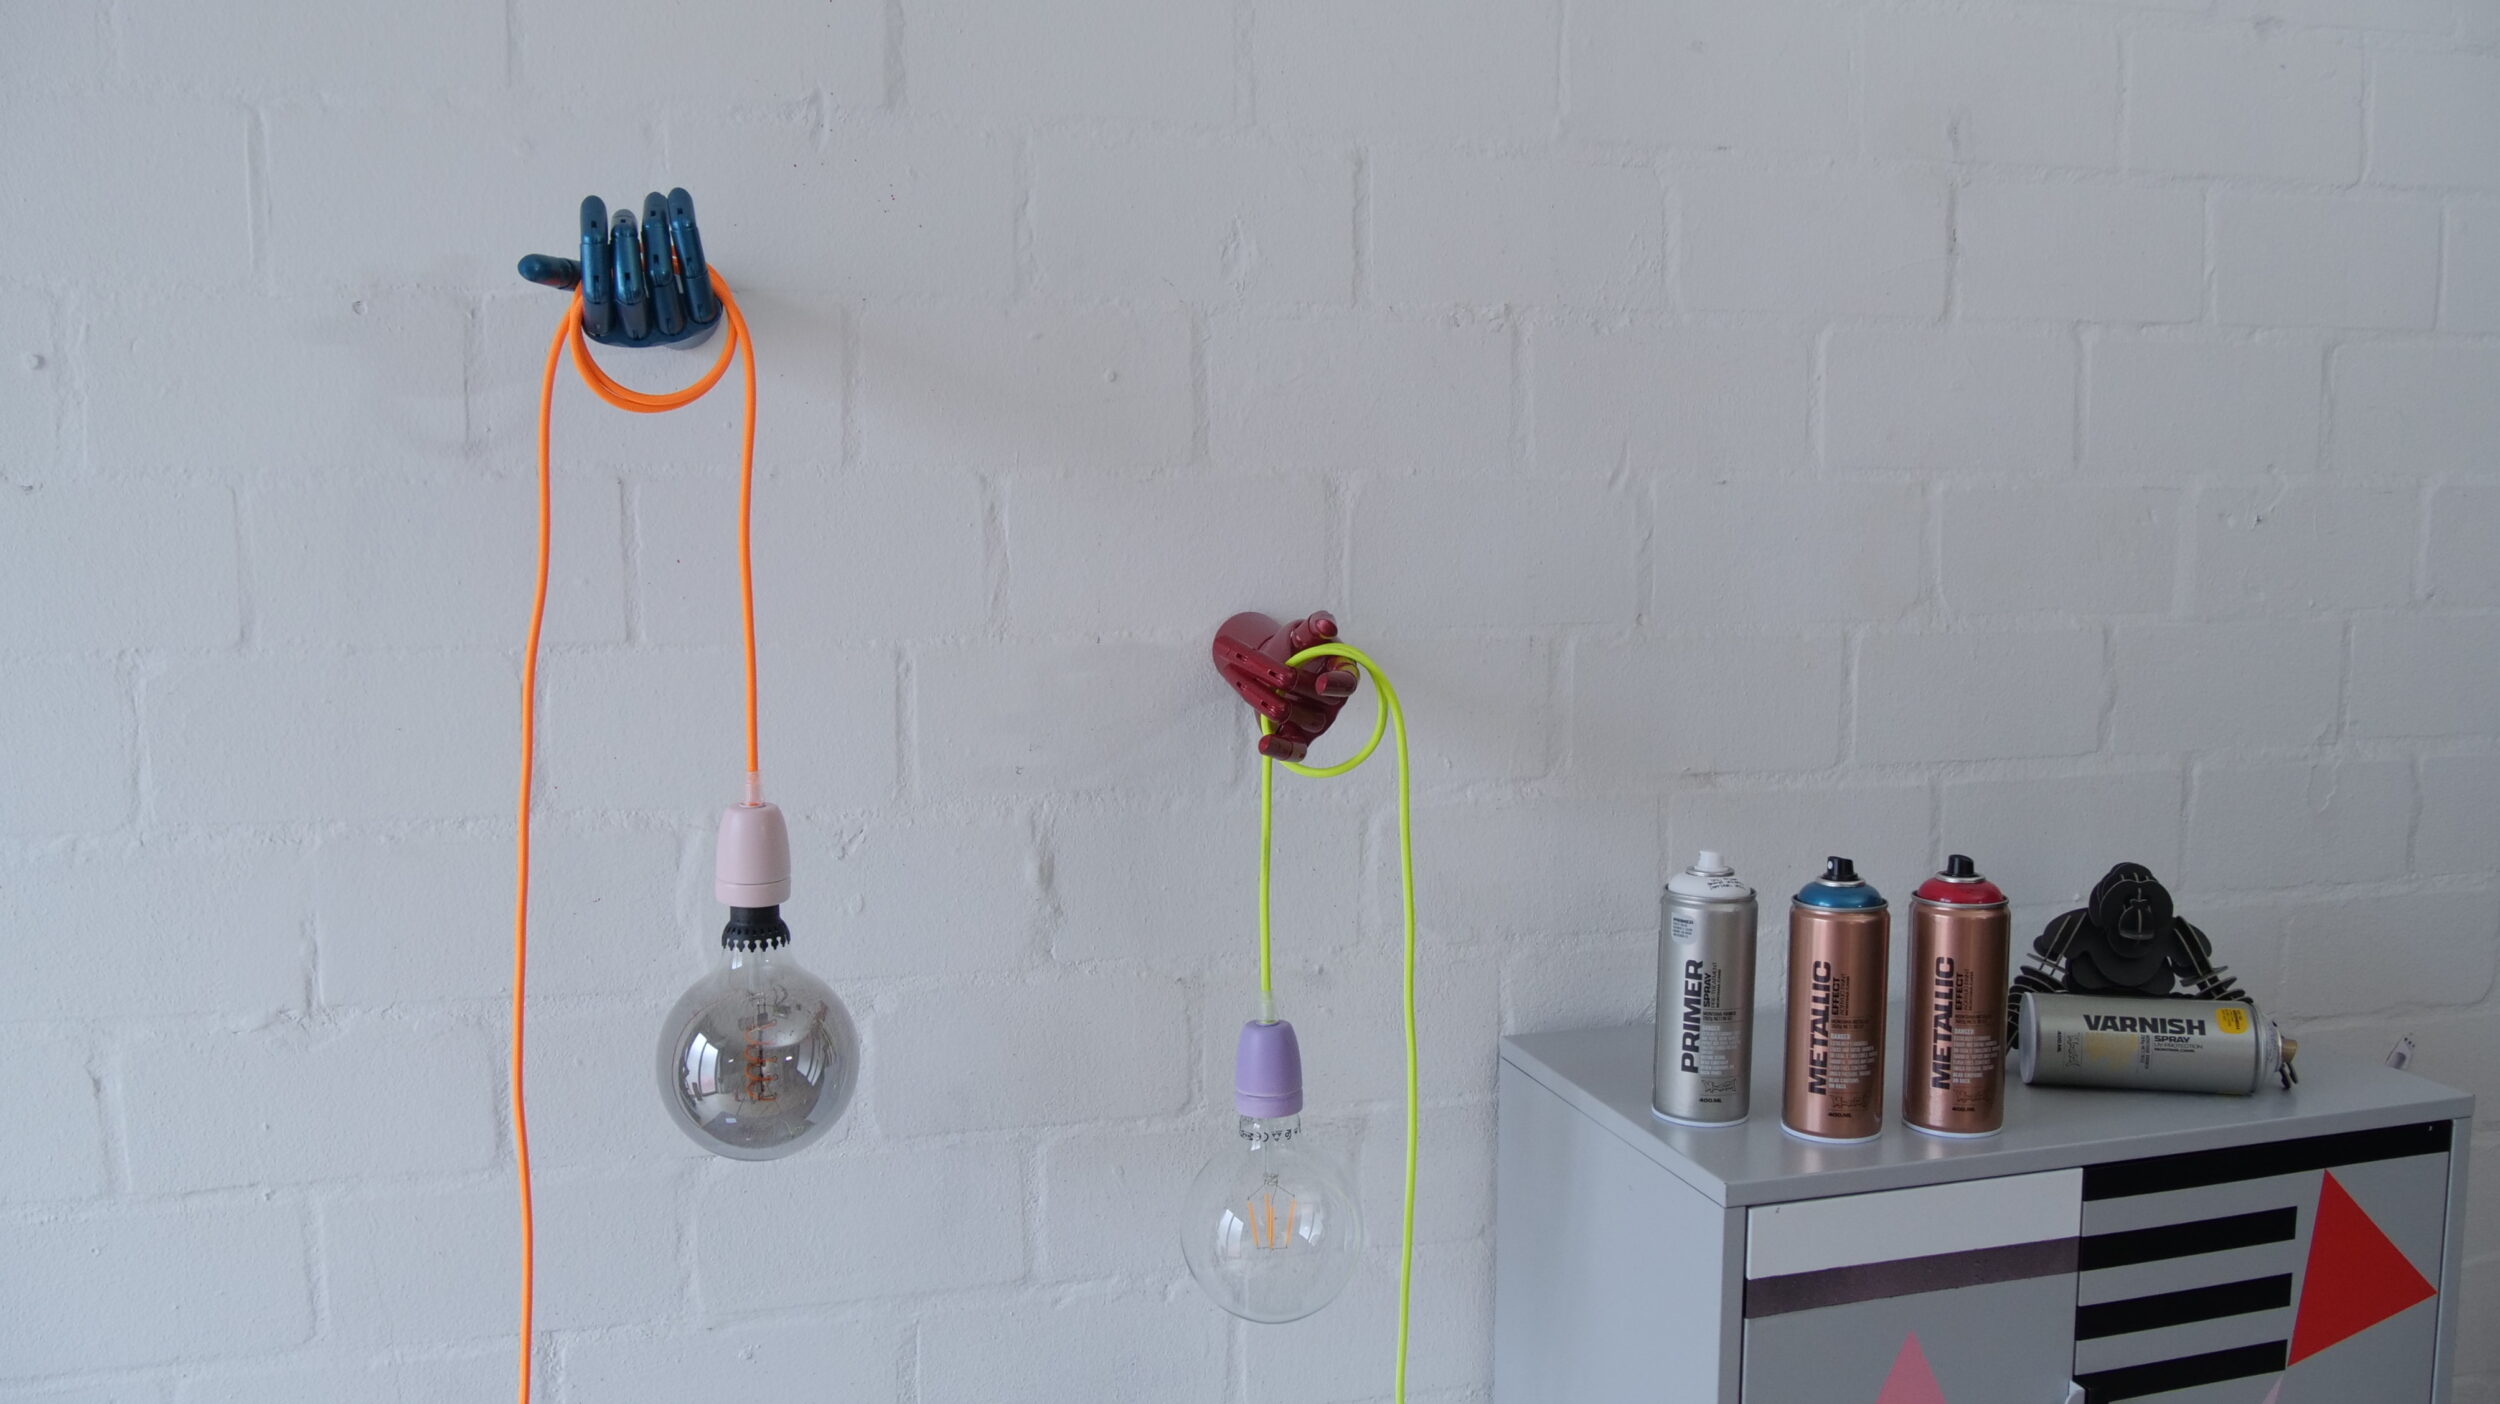
In your local art and craft store, there are usually wooden hand models in various shapes and sizes on offer. These wooden hands are usually used by artists practicing to draw or paint hand positions. The hand (or hands if you’re making multiples) will form the basis of the light holder.
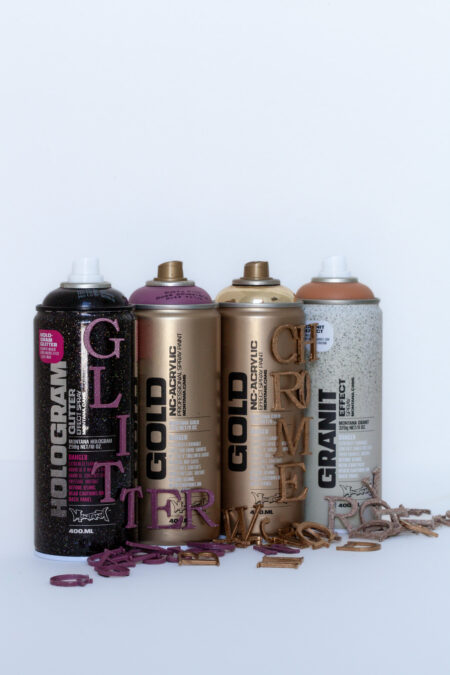
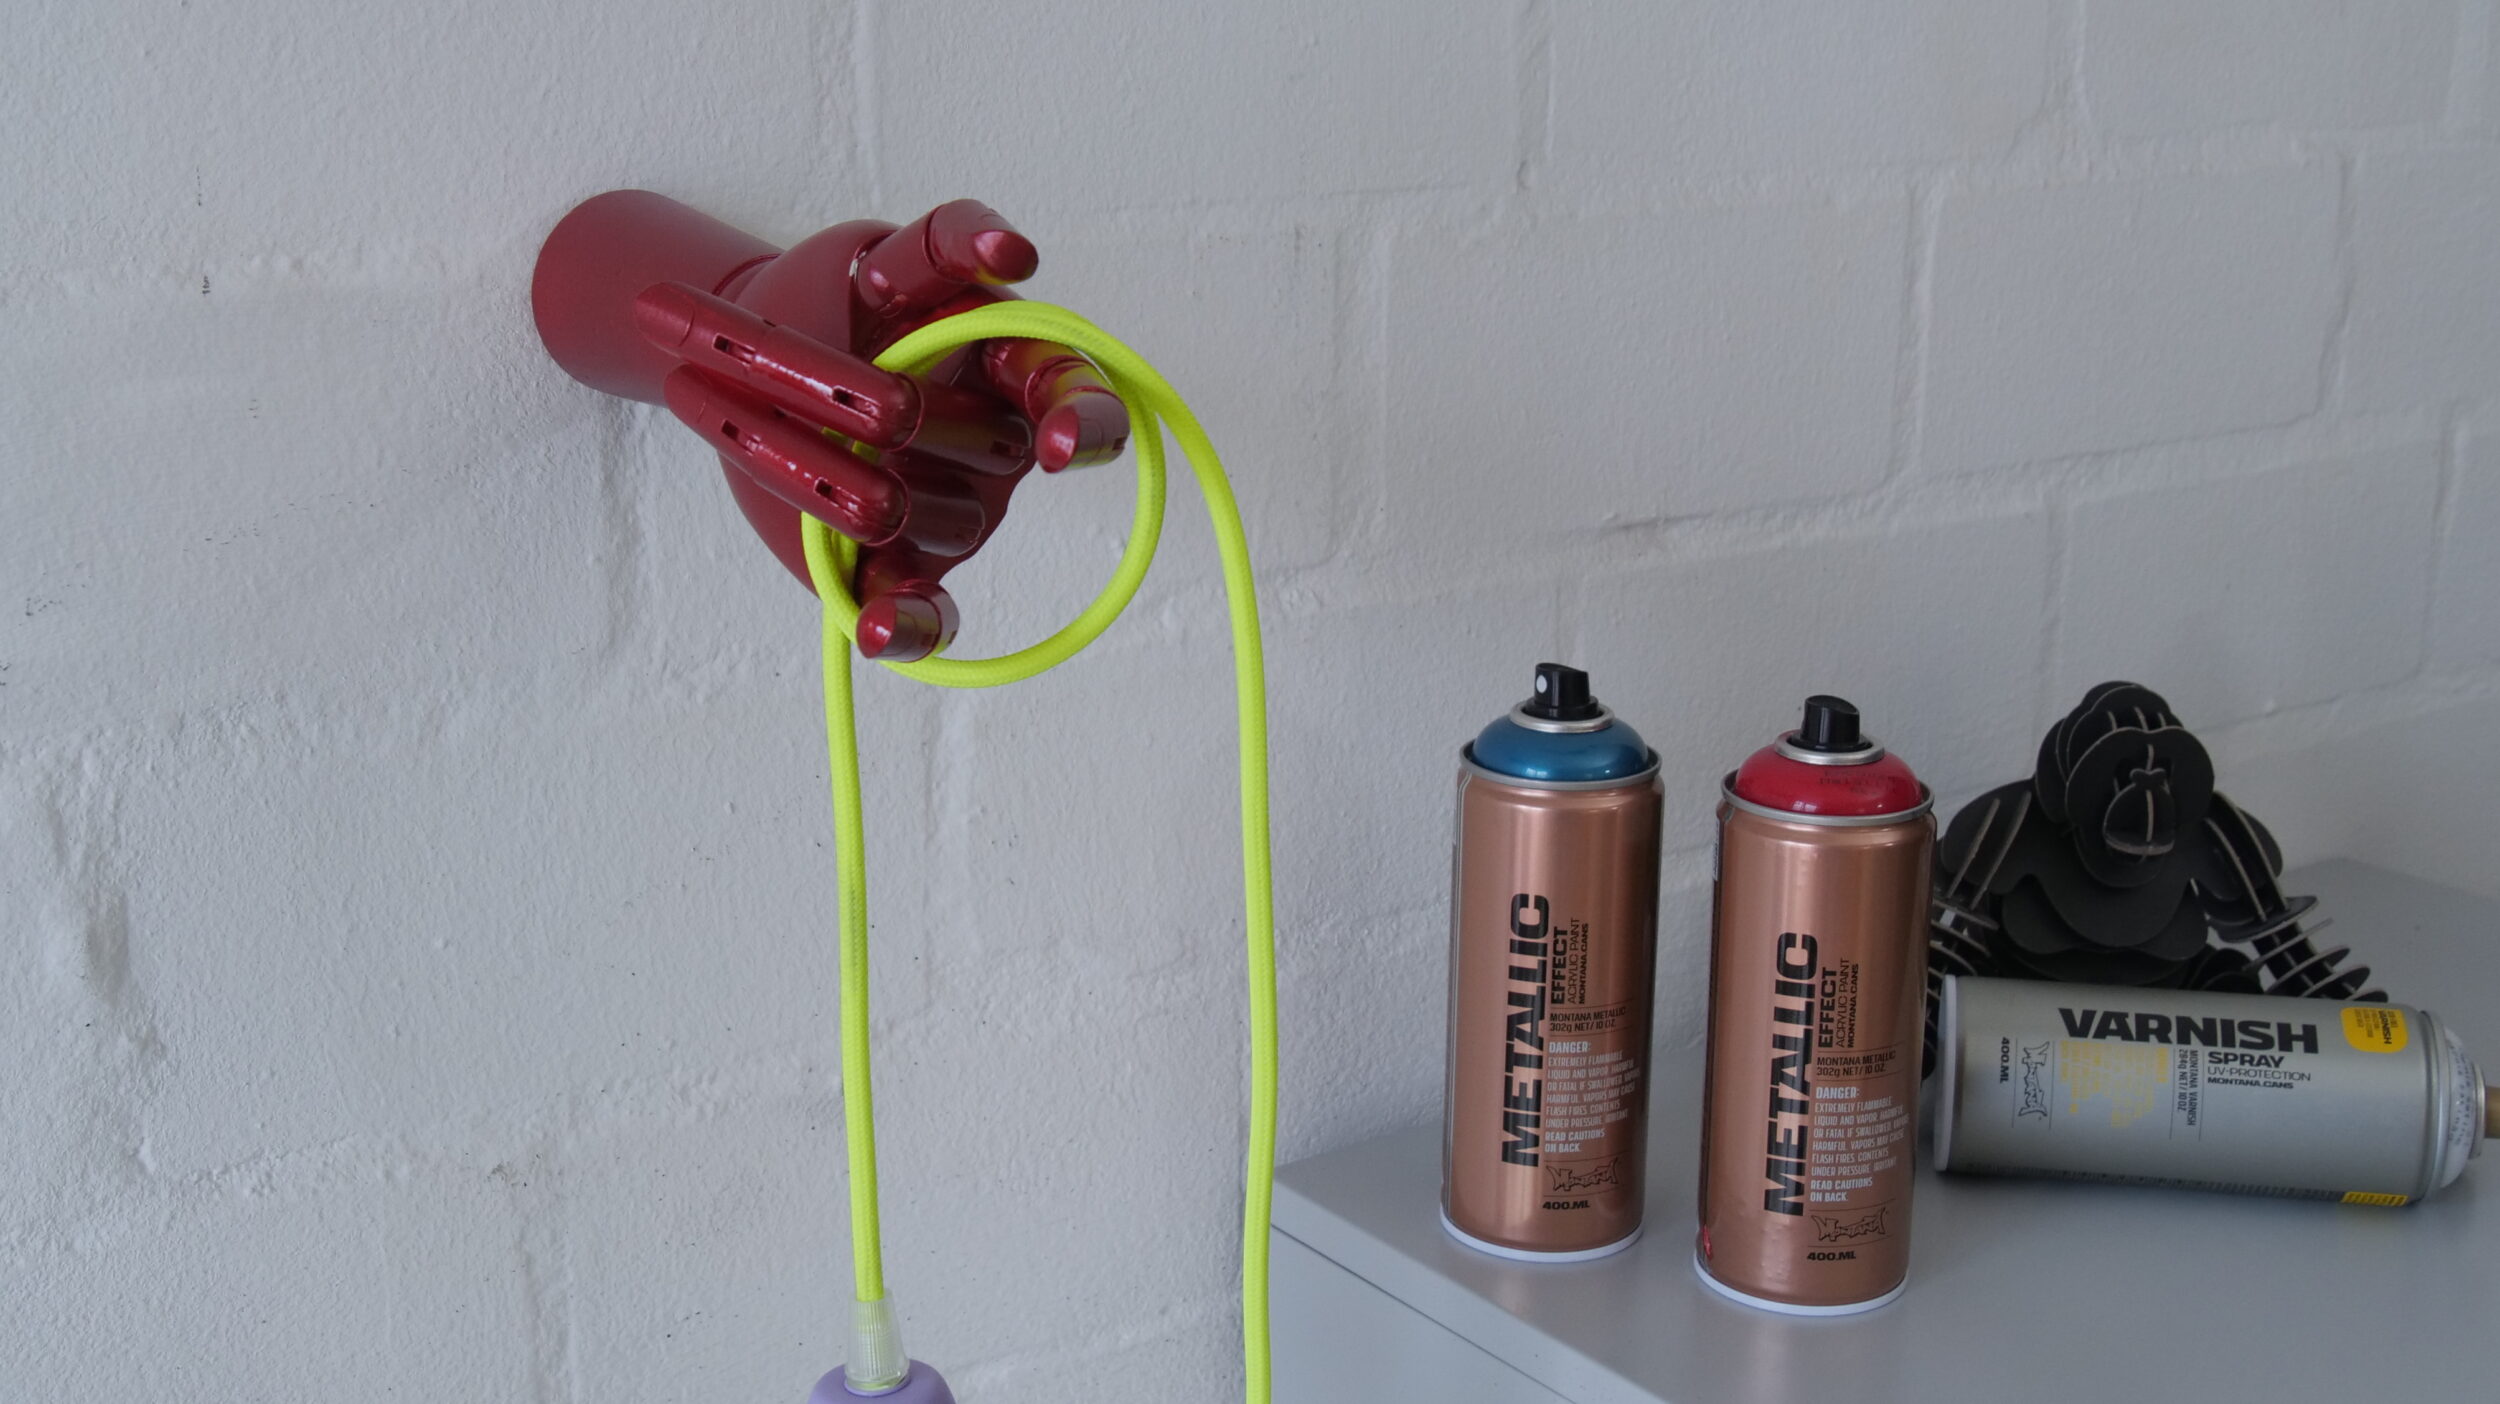
Next in line is a can of Montana Universal PRIMER, a can of Montana METALLIC Effect paint in the color of your choice, and the optional can of Montana VARNISH in the finish of your choice that will give the final touches.
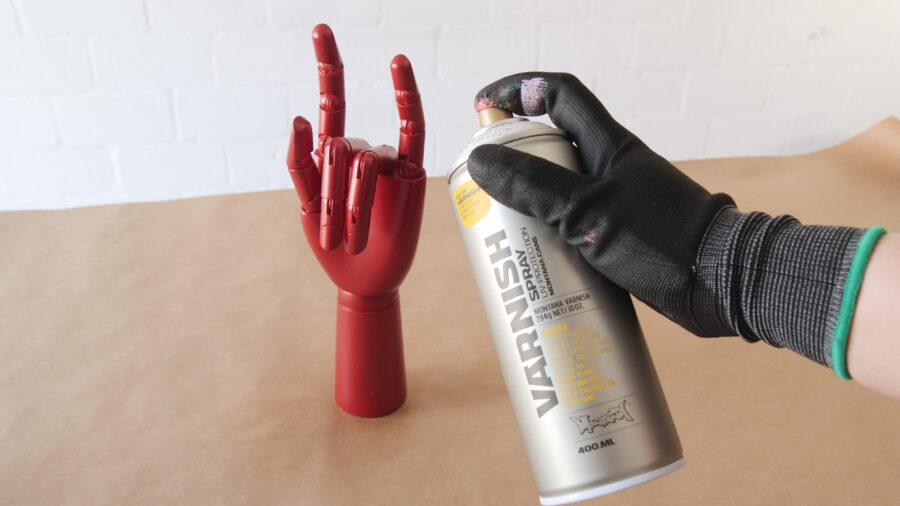
Before moving over to a prepared painting area, give the wooden hand a light sand with fine sandpaper and ensure it is clean, free of all dust, and oils. From here it is time to start painting. Once your mask and gloves are on, all the cans need to be shaken for 2-3 minutes.

Starting with the Montana Universal PRIMER, spray the whole hand in thin, even coats. Apply from about 15cm distance from the hand. Depending on the wood and seepage of the PRIMER into it, repeat this process if required. Allow to completely dry before applying the Montana METALLIC Effect color. Again, shake well for 2-3 minutes, apply in thin even, multiple coats if required, at a distance of about 15cm. Your hand is almost ready for installation. Allow it to dry and cure overnight. If desired, using the Montana VARNISH Spray in the finish of your choice (Gloss/Semi-Gloss/Matt), apply it to your hand for the final touch, and finish you desire. This will not only look the way you want it to, but it will also add extra protection and durability to your fitting. Essentially the work is done!
How you attach the hand to the wall depends on the wall surface, and how the base of the hand was made. In most cases, it is possible to purchase double-sided screws that can be screwed into the wall on one side and the wood of the hand base on the other. If you are not confident about this process, speak to the salesperson who sells you the hand to get some tips or advice. There are many other possibilities that they or a hardware store can assist with, including hanging aids, or hard-wearing adhesives that may be the simplest solution.
AFTER
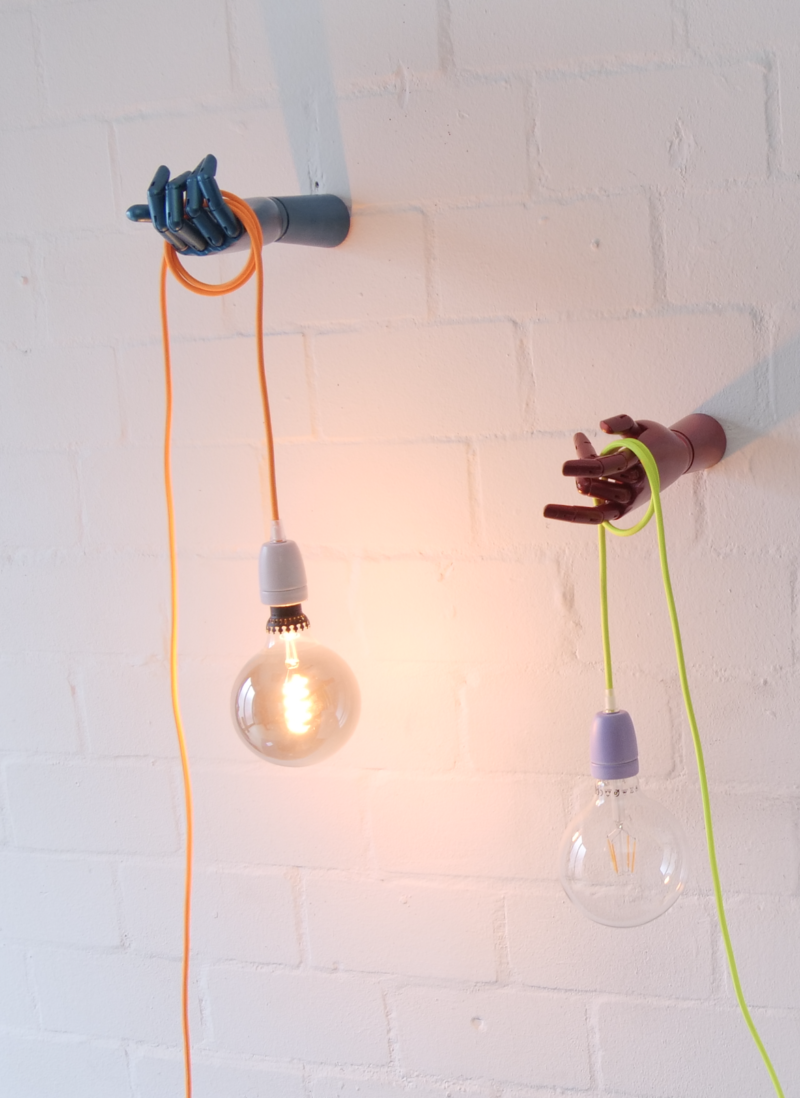
We chose a plug-in light and cord combination, with the cord colors that we liked, that complimented the Montana METALLIC colors that we chose. As a result, once the wooden hand was attached to the wall, it was just a matter of rolling the cord around the hand in an aesthetic way, plugging it in, and then simply turn it on. If this was also the type of light you used, remember to mount the hand near enough to a PowerPoint so that the cord will reach.
In the case that you are using a cord and light fitting that is attached to the wall and main power supply, also consider the position of your hand concerning the length of the cord, so that it too can reach the hand. Should you chose a more complicated variation of this project that requires more cord, or any electrical work, be sure to contact a certified electrician that can help and do the work safely.
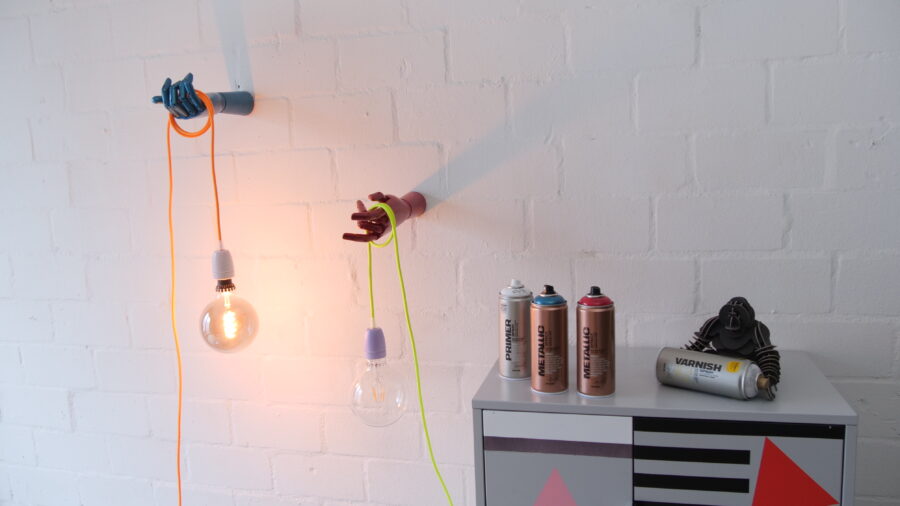
The hands look great and by changing the finger gestures on them, our light can not only can be adjusted in the position that they hang but also varies the mood that the hand position creates. This unique idea can make a great single light feature, or a series of lighting solutions regardless of the context.

The level of difficulty for this project can vary from easy (if using ready-made plug-in light fittings), to very difficult (if you want to personalize permanent light fittings in your home). Don’t be surprised if other people are inspired to try this idea after seeing it also! Good work and well done for taking your lighting problems into your own hands. Happy Crafting!