Easy Decoration MAde of PAper
Stars are great shapes. Inspired by those shiny little lights that we see in the clear night skies, they represent so many things to so many people. If you are good at something you may become one, you can wish upon them, and if you’re lucky enough, you may be able to see one shoot across the sky one last time. And of course, at Christmas everybody loves them. But it doesn’t only need to be Christmas to enjoy star decor. Here is a simple DIY project that will show you how to make your own stars, for any festivity. Do you have a pair of scissors? Then you are already halfway there to create your own Metallic Paper Stars. Read on.
Materials Used
- Paper Bags
- Scissors
- Glue stick or craft glue
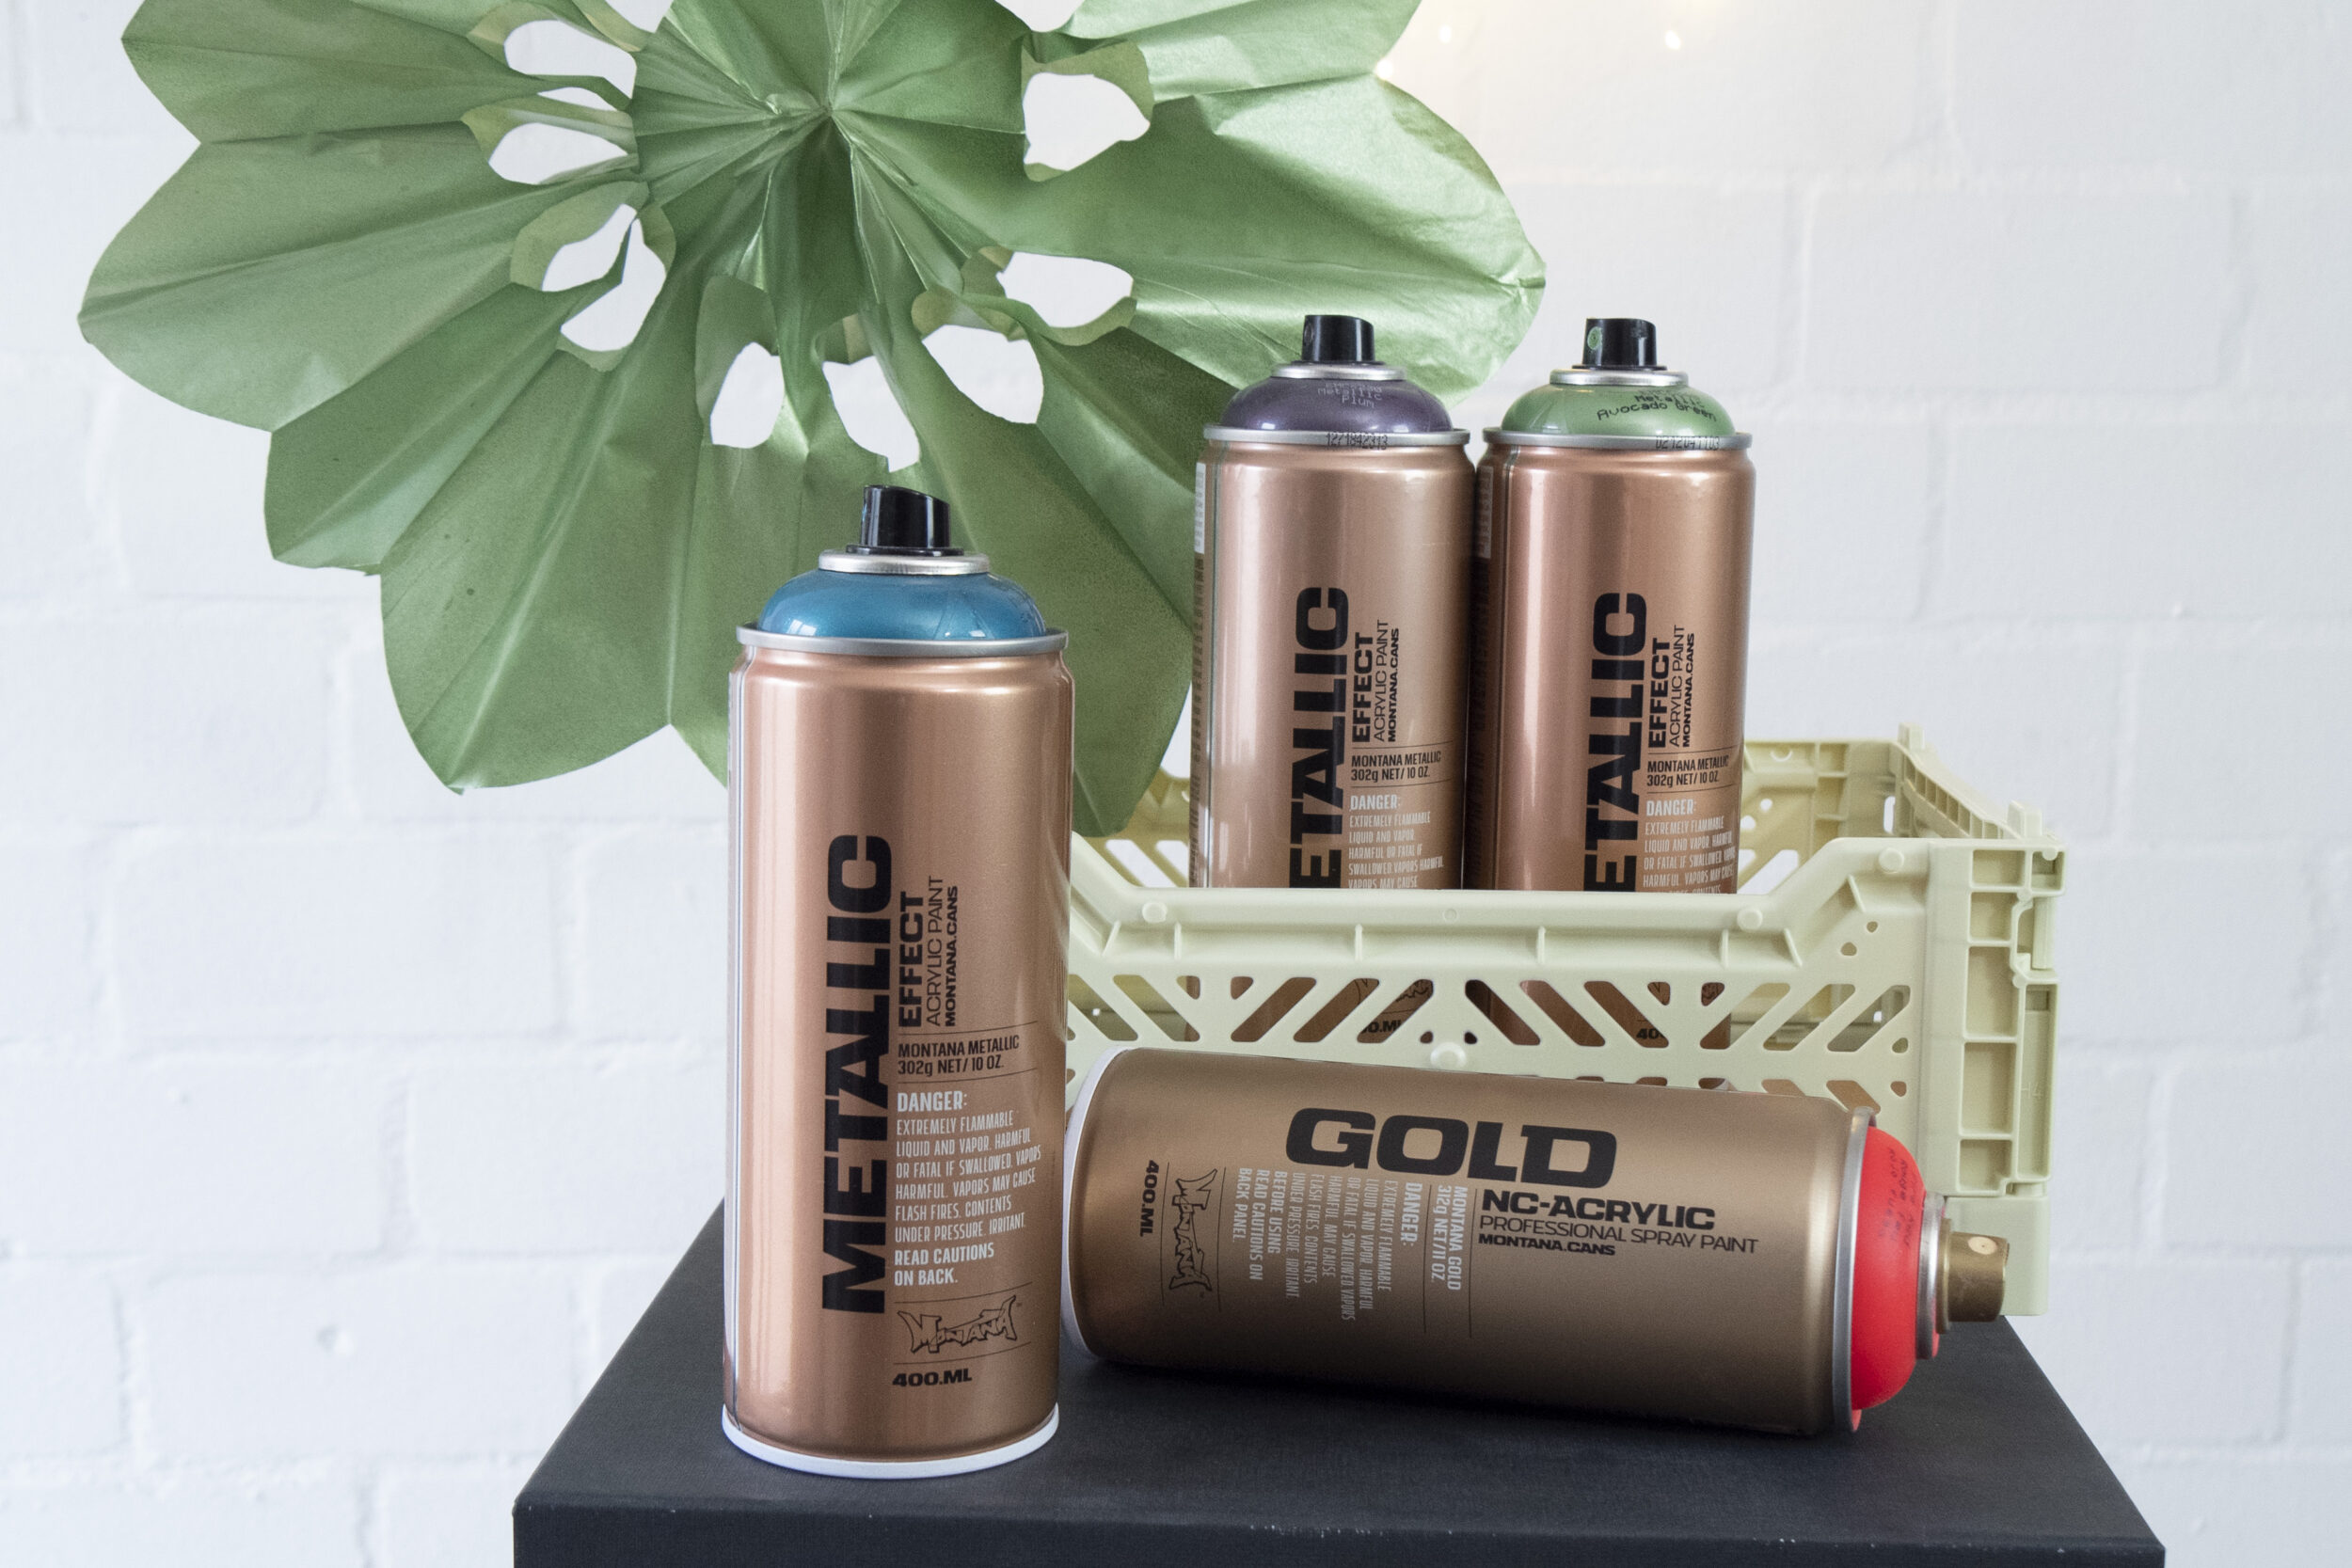
- Montana METALLIC Effect Spray
- Gloves
- Mask
- Drop sheet
How it was done
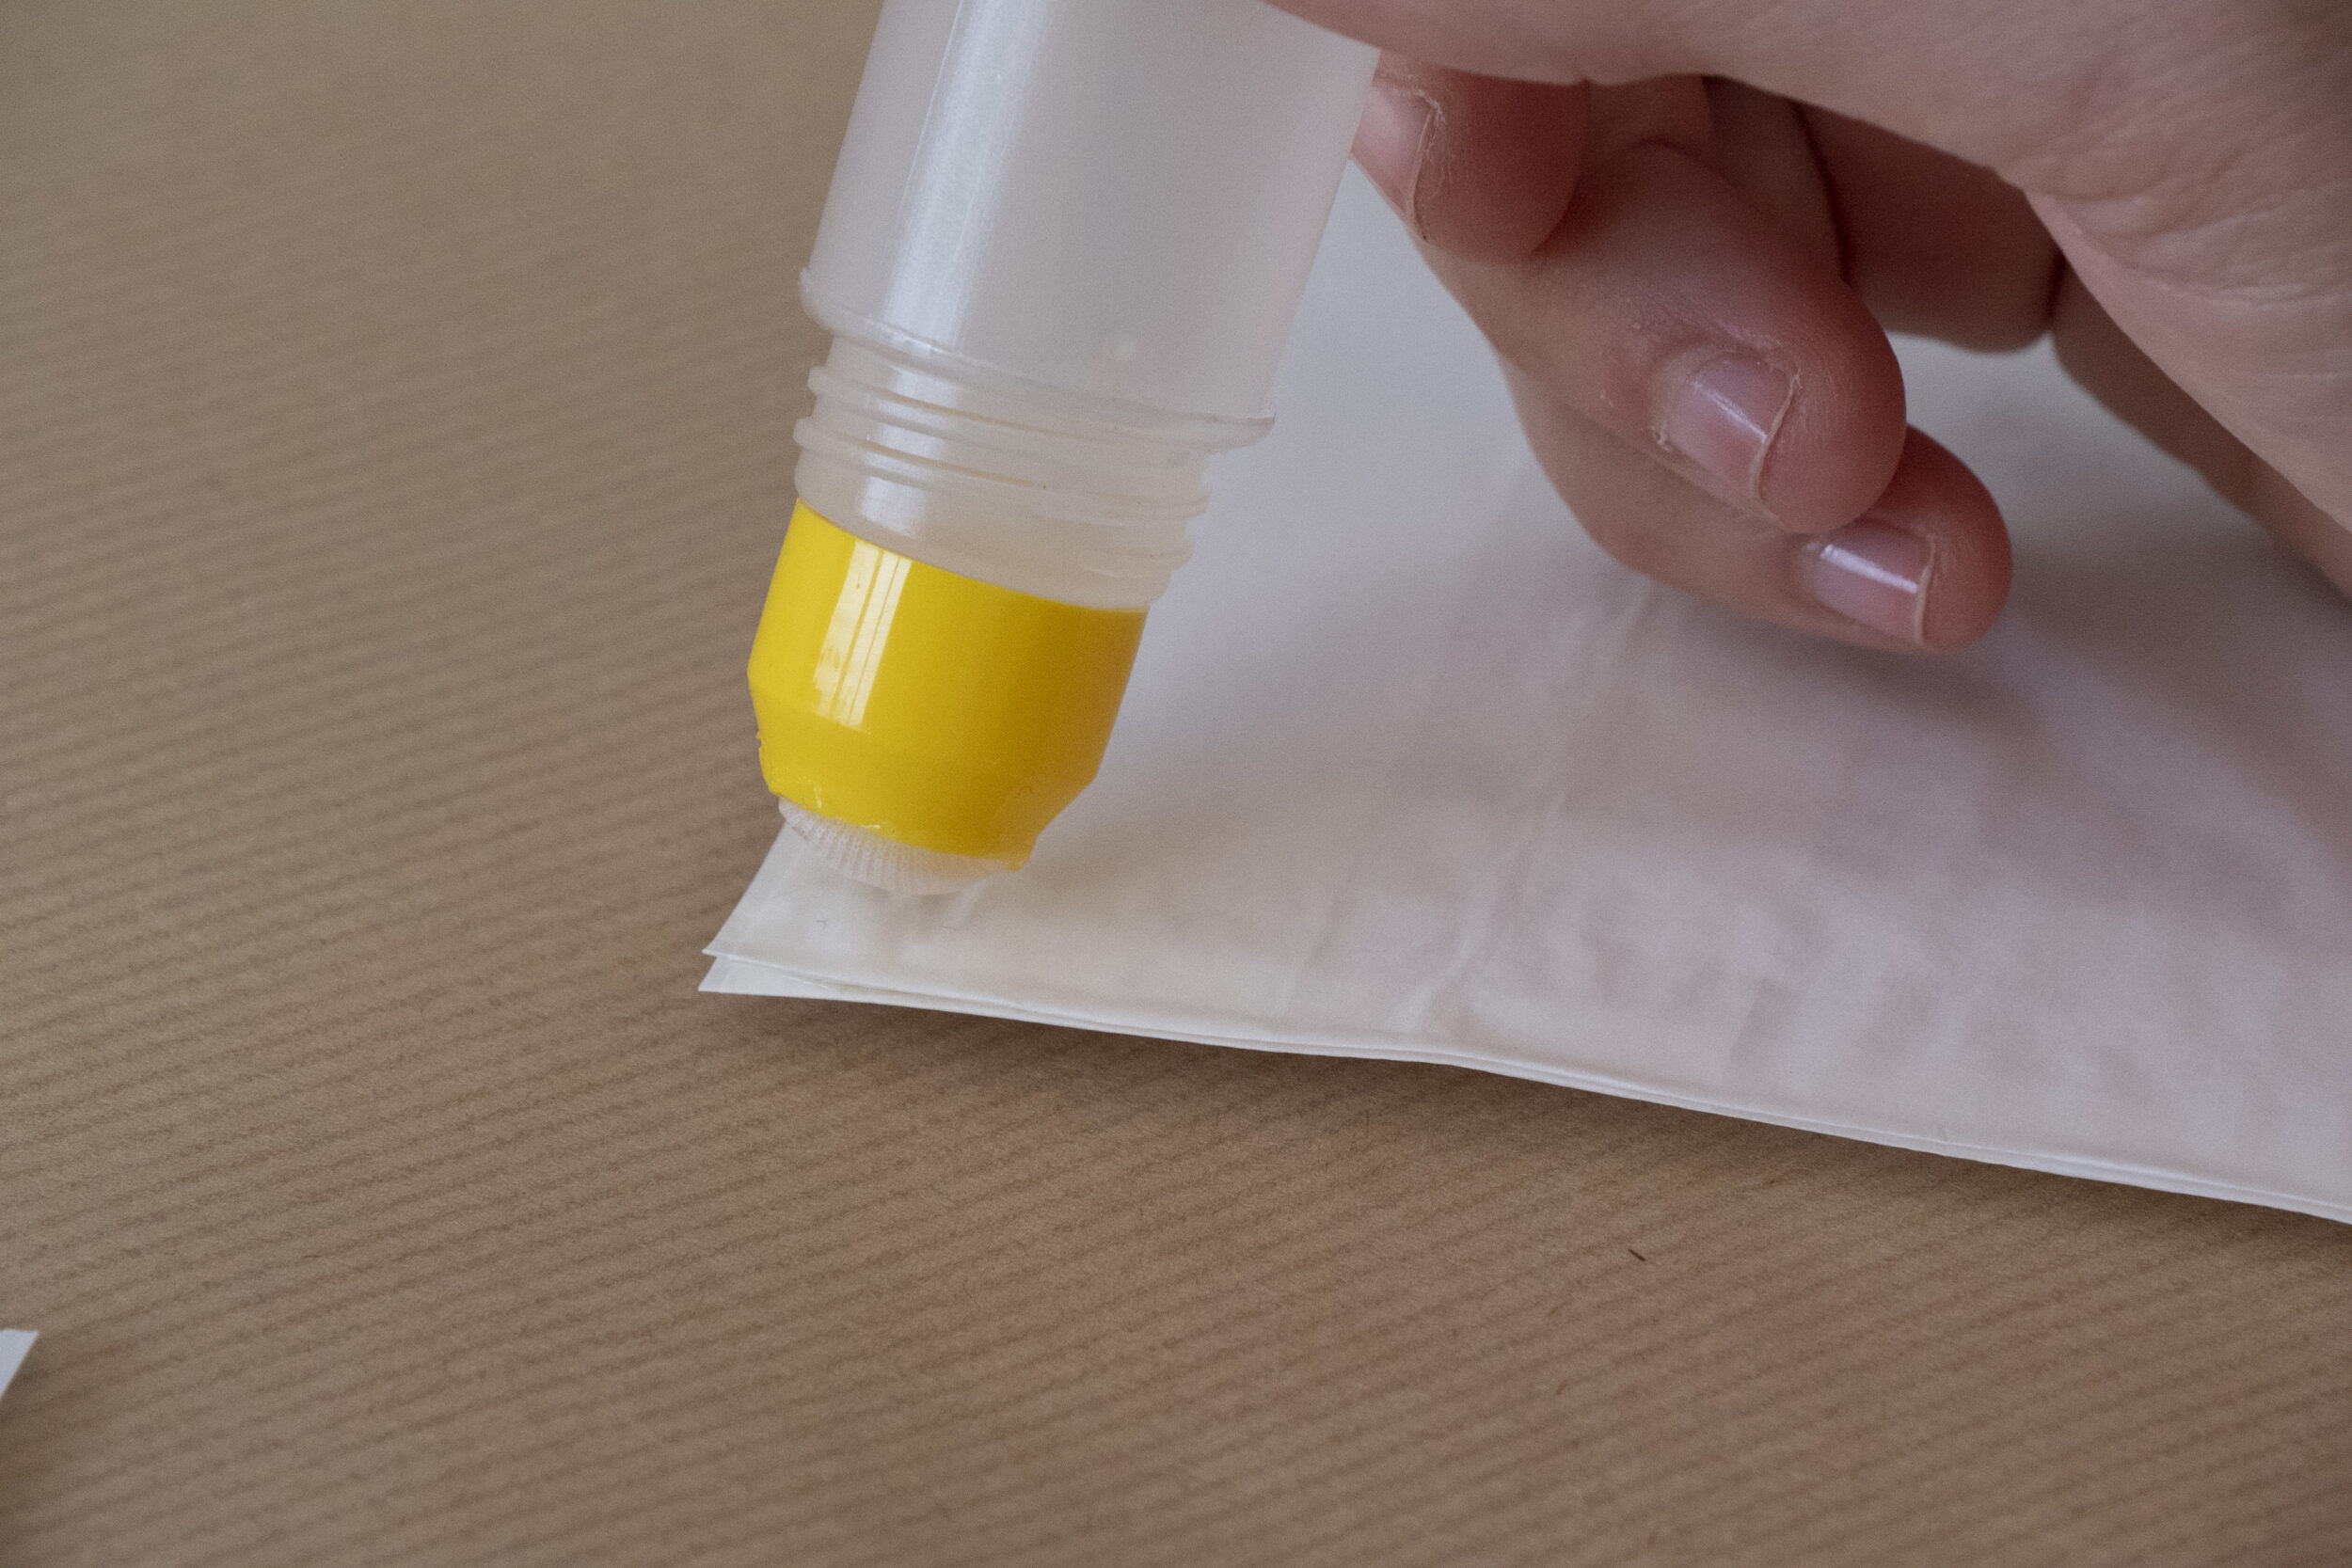
The basis of our stars is simple paper bags, like the ones you receive sandwiches in cafés. We recommend they are rectangular with the length being greater than the width of the opening. You can find these at most supermarkets, stationery supply stores, and craft shops. Taking your glue stick, simply glue all seven bags neatly and evenly together, one on top of the other in a pile. Making sure that all the bags bases are on one side together, and all the bags openings are on the opposite side together.

Grabbing your scissors, and holding the pile of glued bags firmly together, you can now cut into the pile of bags the desired shape, or shapes, that you want. It is very important not to detach them, to cut equally through all 7 bags at once on each cut, and do not open or separate the pile during this process. Whichever designs you have cut into the bags will become a mirrored pattern throughout them all, once opened. Each pile of 7 glued bags will become one star. The more bags you have, the more stars you can make.
Apply some glue on the top of the last bag of the pile, and the underneath of the bottom bag (if required). Then open the pile like a wheel and attach the top bag to the bottom one where you glued. You have now got the main shape of your star and you can see how your cuts have created its shape and pattern.

Now for the part you’re already a professional at. Shake your can vigorously for 2-3 minutes so you can hear the mixing balls moving freely. Remove the nozzle and allow the safety ring to fall out. Re-apply the nozzle and give the can a test spray away from everything, to ensure it’s working, and the paint is flowing freely. Then using smooth, sweeping motions, spray your star which is laying on your drop sheet with the Montana METALLIC Spray colors of your choice.
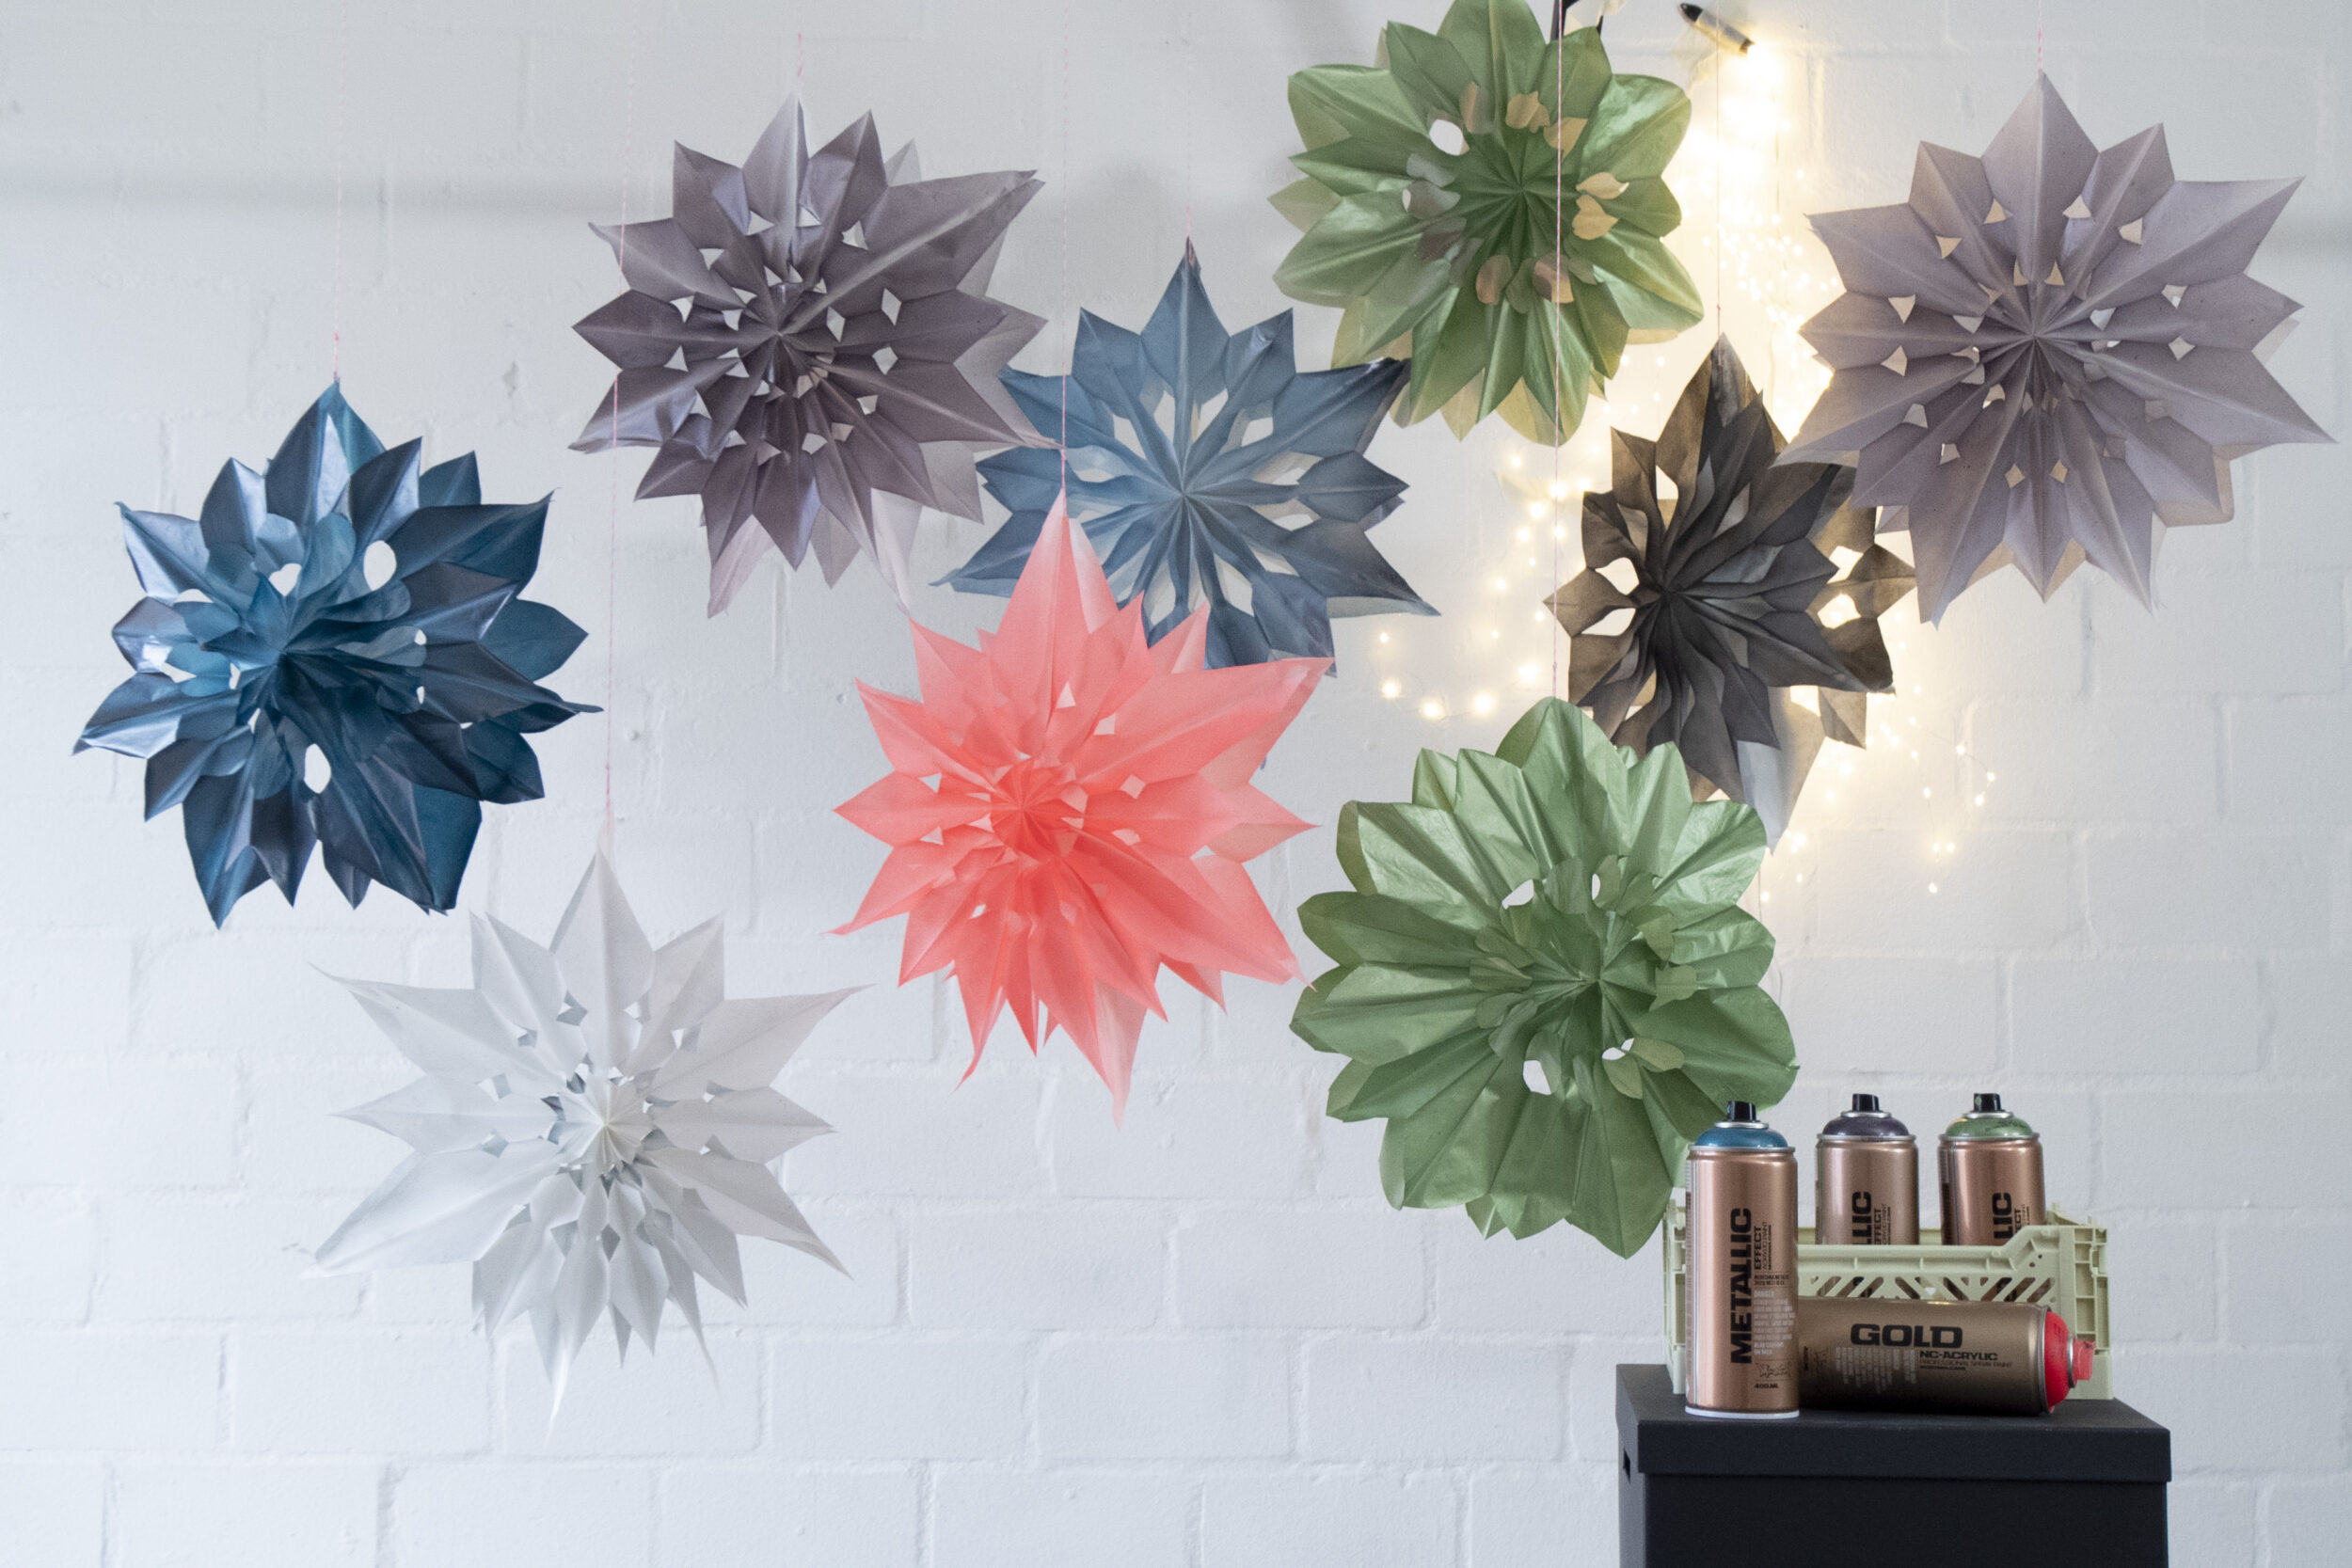
Once this is done, allow it to dry. We used one color per star as the colors themselves are impressive. You don’t need to apply much, and it is better to apply thin multiple coats if desired so that the paper doesn’t get soaked with heavy paint. Remember; as metallic pigments are heavier than normal colors, when using Montana METALLIC colors, it is always important to re-shake during use. Even if you only pause for a moment. This will ensure the perfect mixture, every time.
There is a good chance that you will want to do this more than once! It is so easy, that once you see the first stars come to life, you will become inspired to create even more intricate and ornate patterns. There is no more than 5-10 minutes of actual work time required for each star. Less if you prepare multiple Metallic Paper Stars at once, so your set-up and clean-up times are not repeated.

You won’t be alone if you “forget” to take them down after Christmas. And why not, they look good. The Metallic Paper Stars are also great for birthday parties, house decoration, and children’s bedroom mobiles as well. Great work, and Happy Crafting!