Making professional-looking poster art
OK, the use of the word “professional” may have made a few people nervous. But who is to say you can’t make poster artwork and make it look like it was done by a professional artist? We thought there was something in that so we spoke to the professional artist Carolin Kaiser who gave us a simple recipe for making impressive poster art. Gradients!
Gradients, fading, tonal variations, an incline or decline in color, whichever way you want to describe it, the gradient is an amazing visual tool that can transform simple designs into professional-looking artworks. Or, if you want to forget about the word professional, it is a way that you can create beautiful art regardless of your skill level. We knew that Carolin Kaiser was a master of the gradient when we visited her in her studio and featured her on allspraypainted meets in previous years. So we thought we would she could show us a little more on how to implement gradients into our use of spray paint.
Materials Used
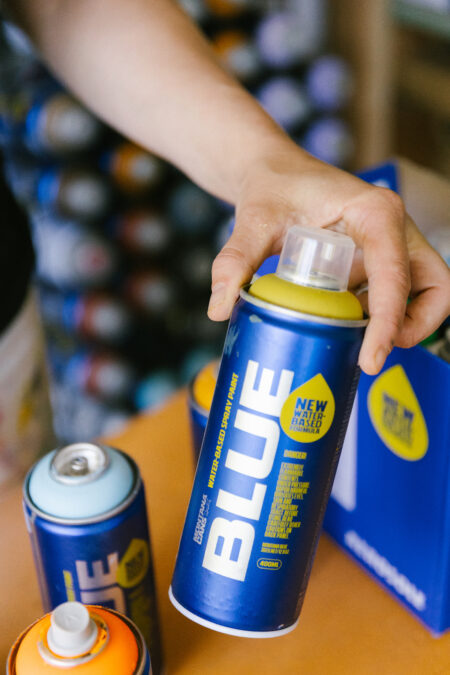
- Montana GOLD Spray colors of your choice
- Masking tape
- A pencil
- Gloves
- Mask
- Drop sheet (plastic preferable for this project)
- Scissors or craft cutter
- Materials used (optional)
- Sturdy or archival paper
- Stretched canvas (alternative to a poster format)
- Cardboard or scrap paper to create masked areas
- Montana Tech or Effect Sprays of your choice
How she did it
The focus of Carolin’s project was to create gradient-based designs for poster art. By gradient we mean designs with faded color, and by poster we mean based on sturdy paper. However, you could use these techniques on other surfaces such as canvas or wooden boards as well. The paper she worked on was high-quality heavy-weight paper with a smooth surface.Check if the sticky tape is easily removable before you get to work.
The higher the GSM (grams per square meter) the thicker and therefore better the paper. The only issue is if your paper is thin, in which case painting on it could make it buckle or crinkle.
Before using any spray paint remember the golden rule, shake your cans well for 2-3 minutes before use, remove the black safety ring from under the can’s nozzle, re-apply it and trigger the can away from anything.
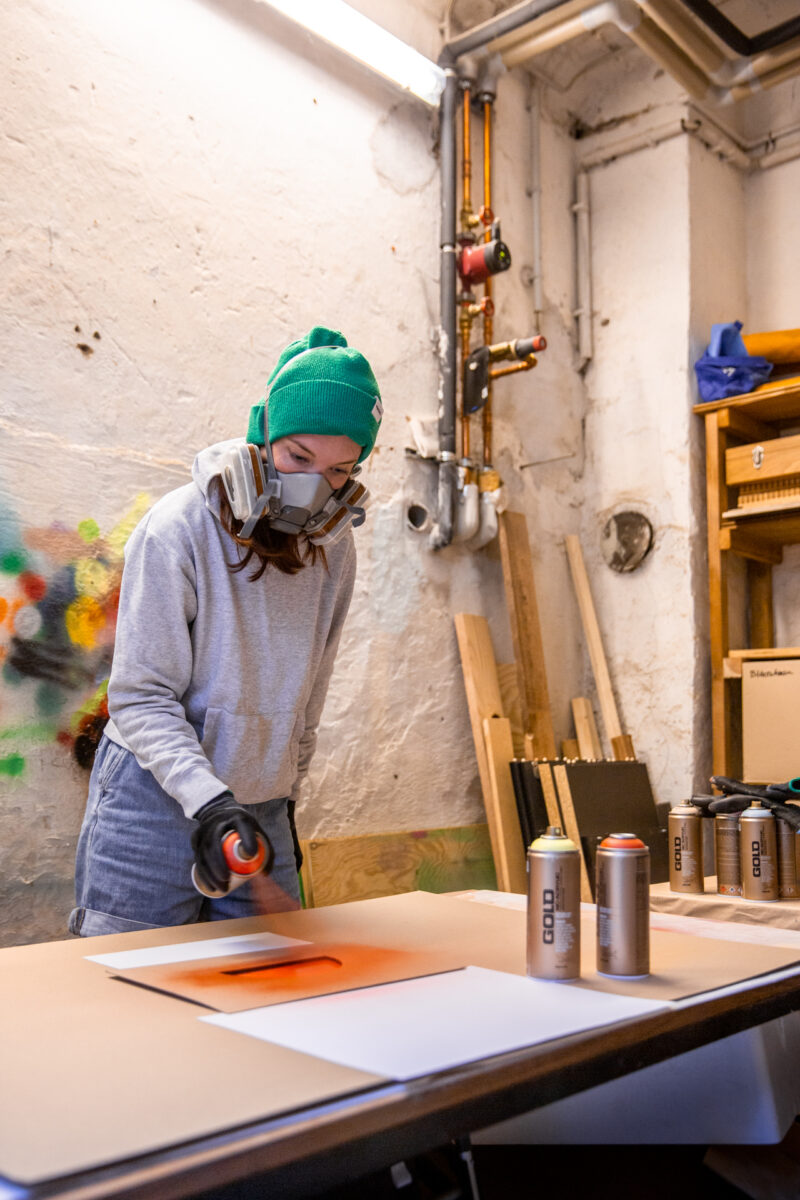
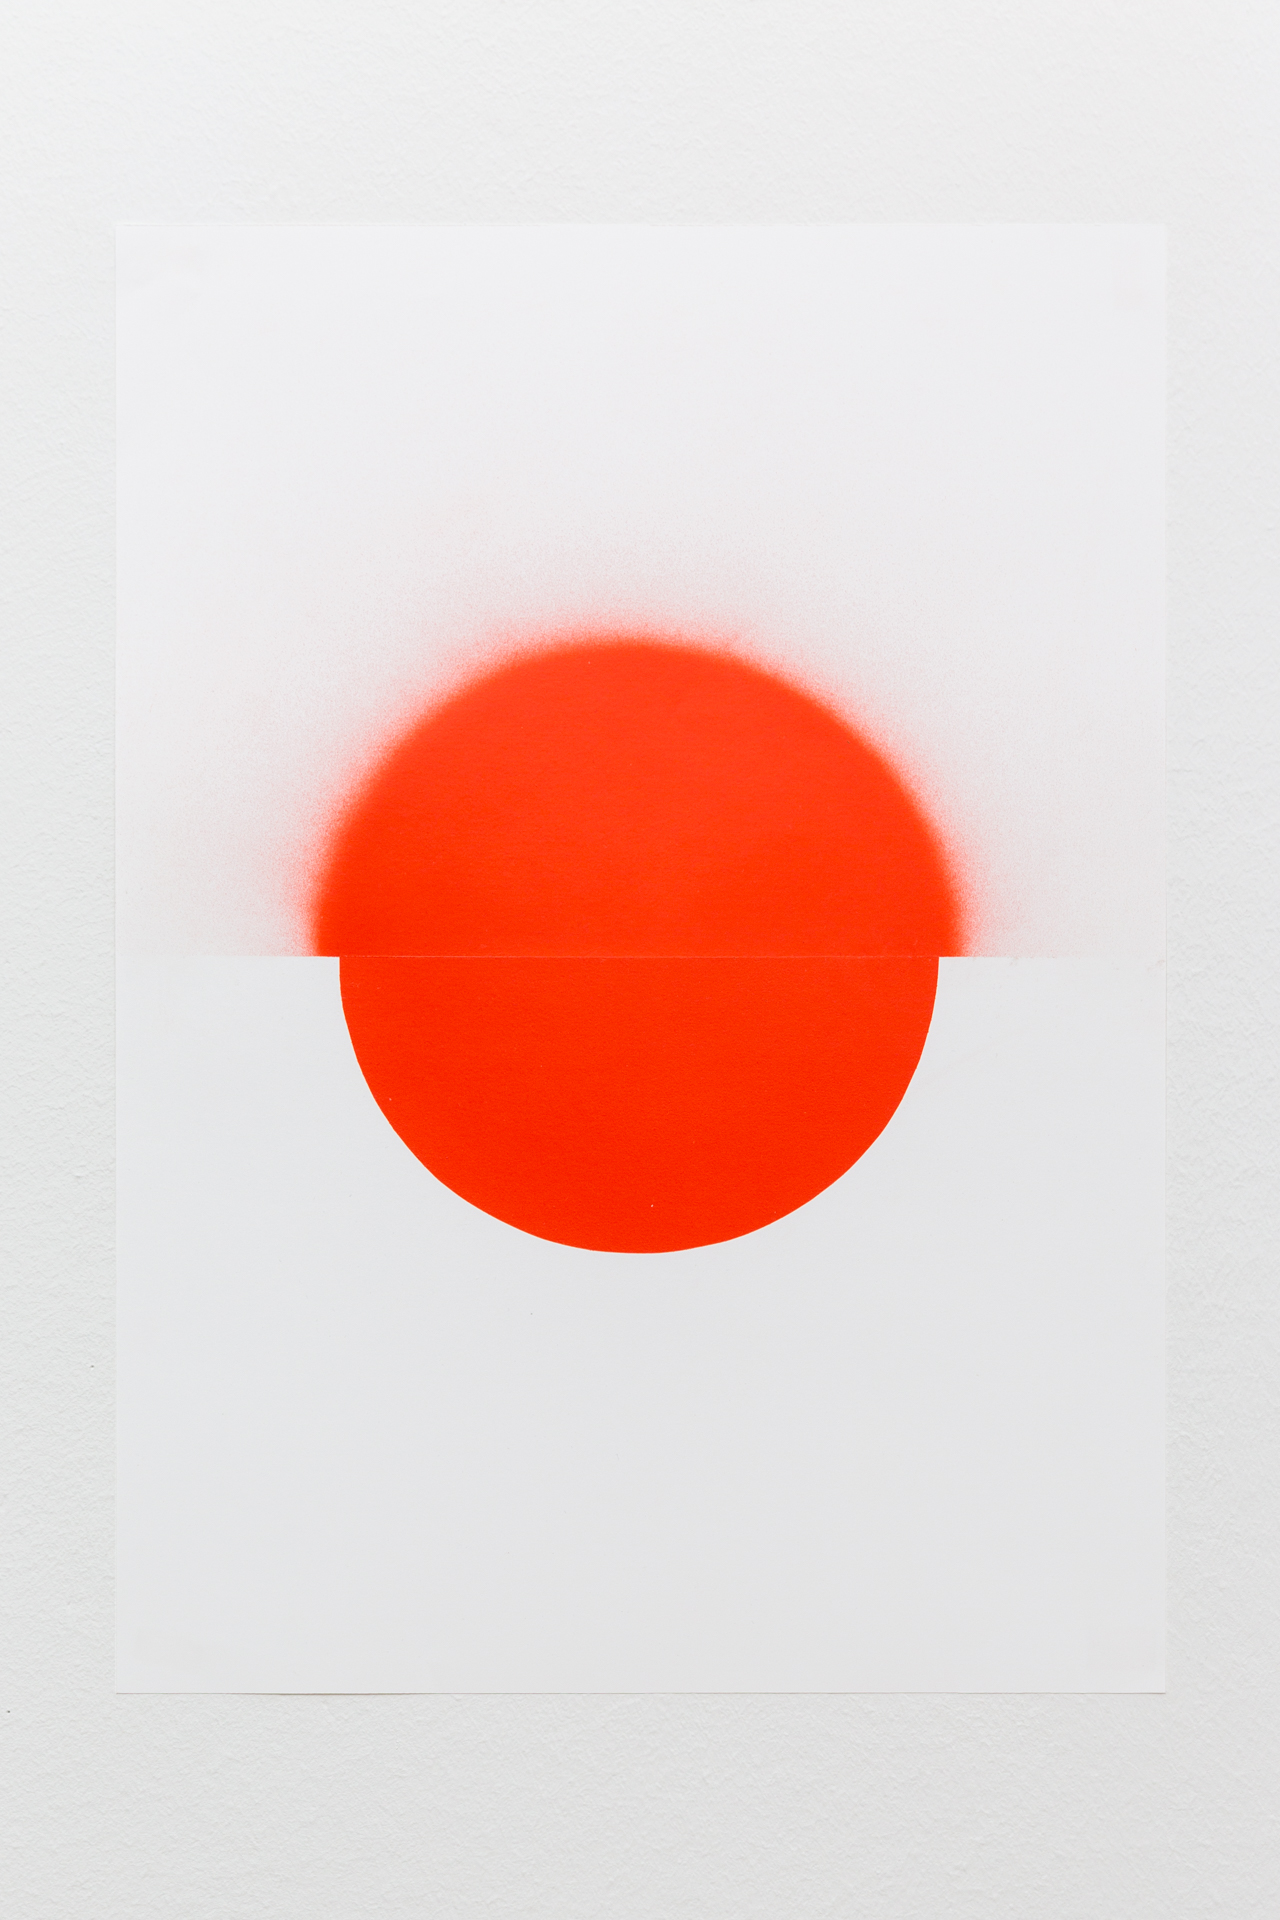
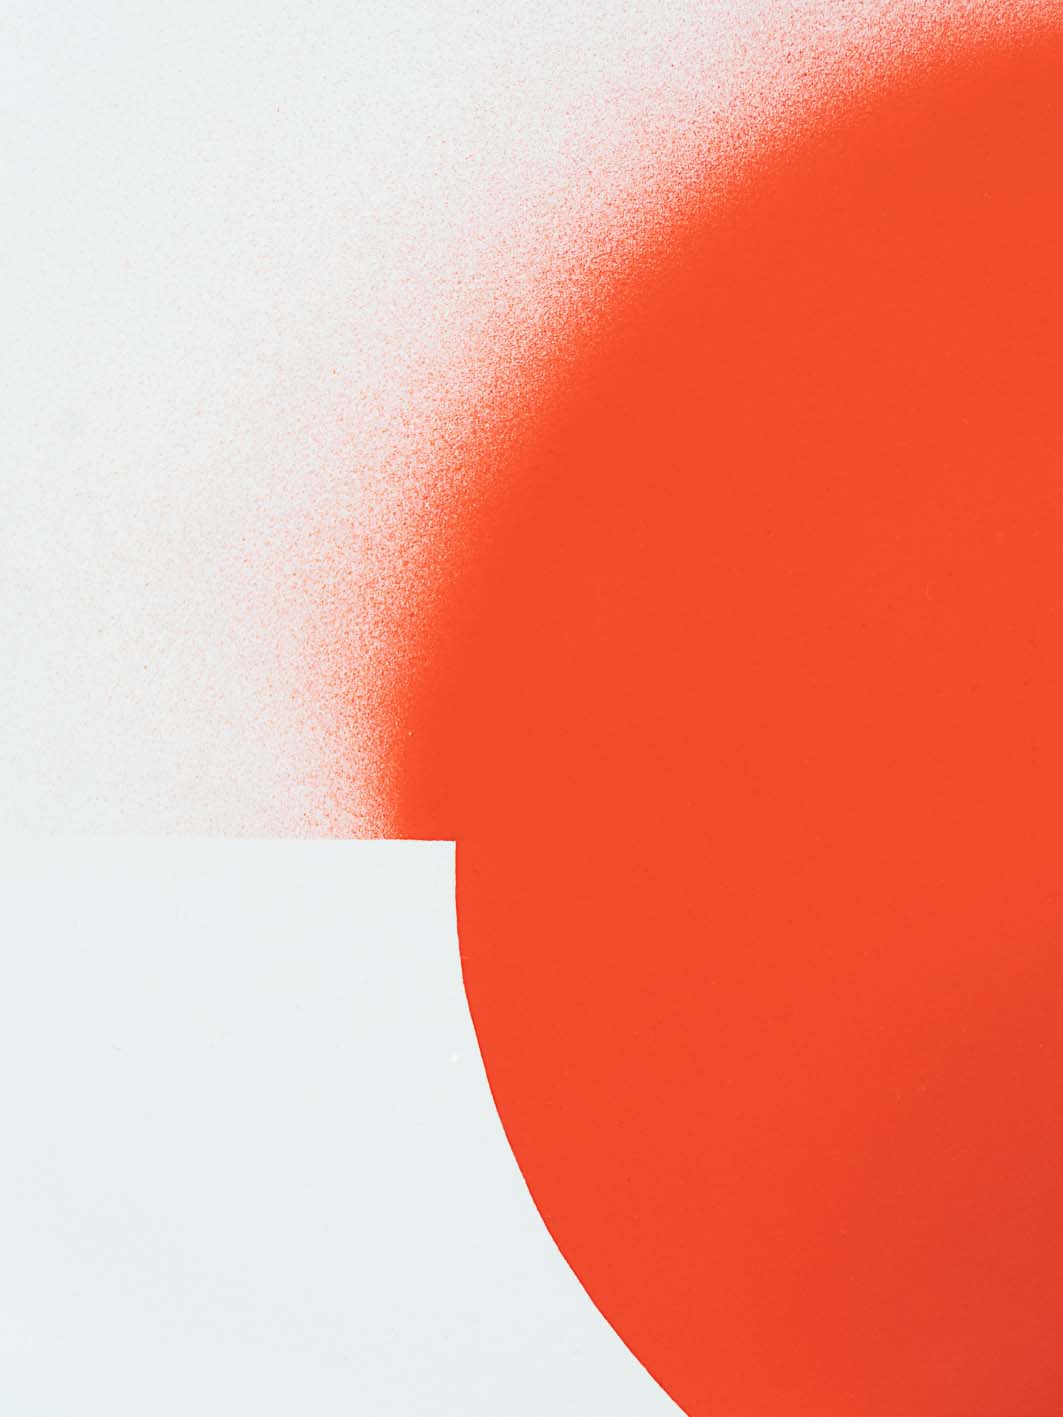
Single color stencil gradients
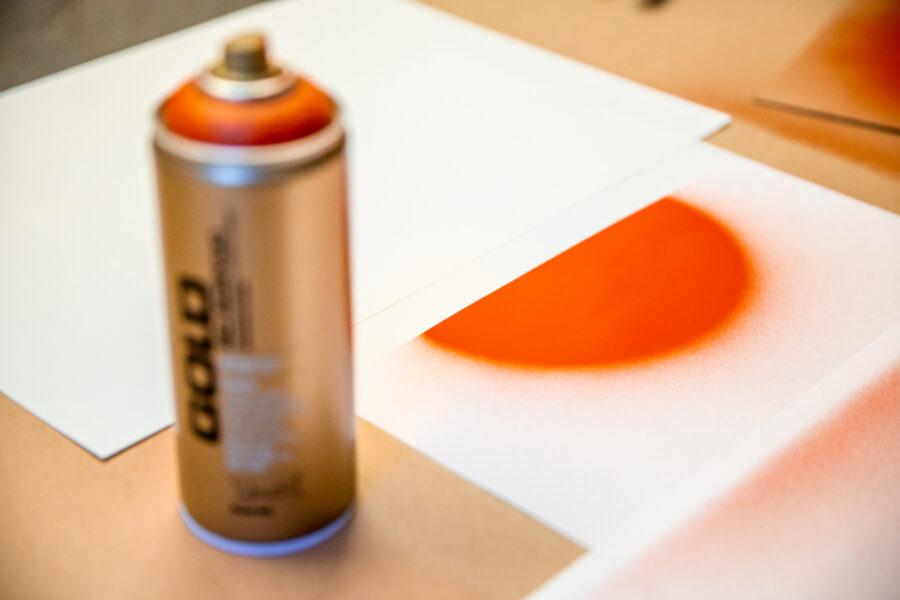
One way to create a gradient with a single color (or more) is to use or make a stencil. In one experiment, Carolin made a semi-circle cut out of cardboard and laid it on her paper base. Attaching the semi-circle with masking tape, she then sprayed from the inside of the semi-circle outwards and made sure she didn’t actively spray to the outer edges of the semi-circle. The result once the stencil was removed was a semi-circle that had clear hard edges on one side, and soft faded edges on its outer. She lifted the stencil cardboard slightly at four points to let some of the color get underneath the circle which created a beautiful gradient.
The three-column fade
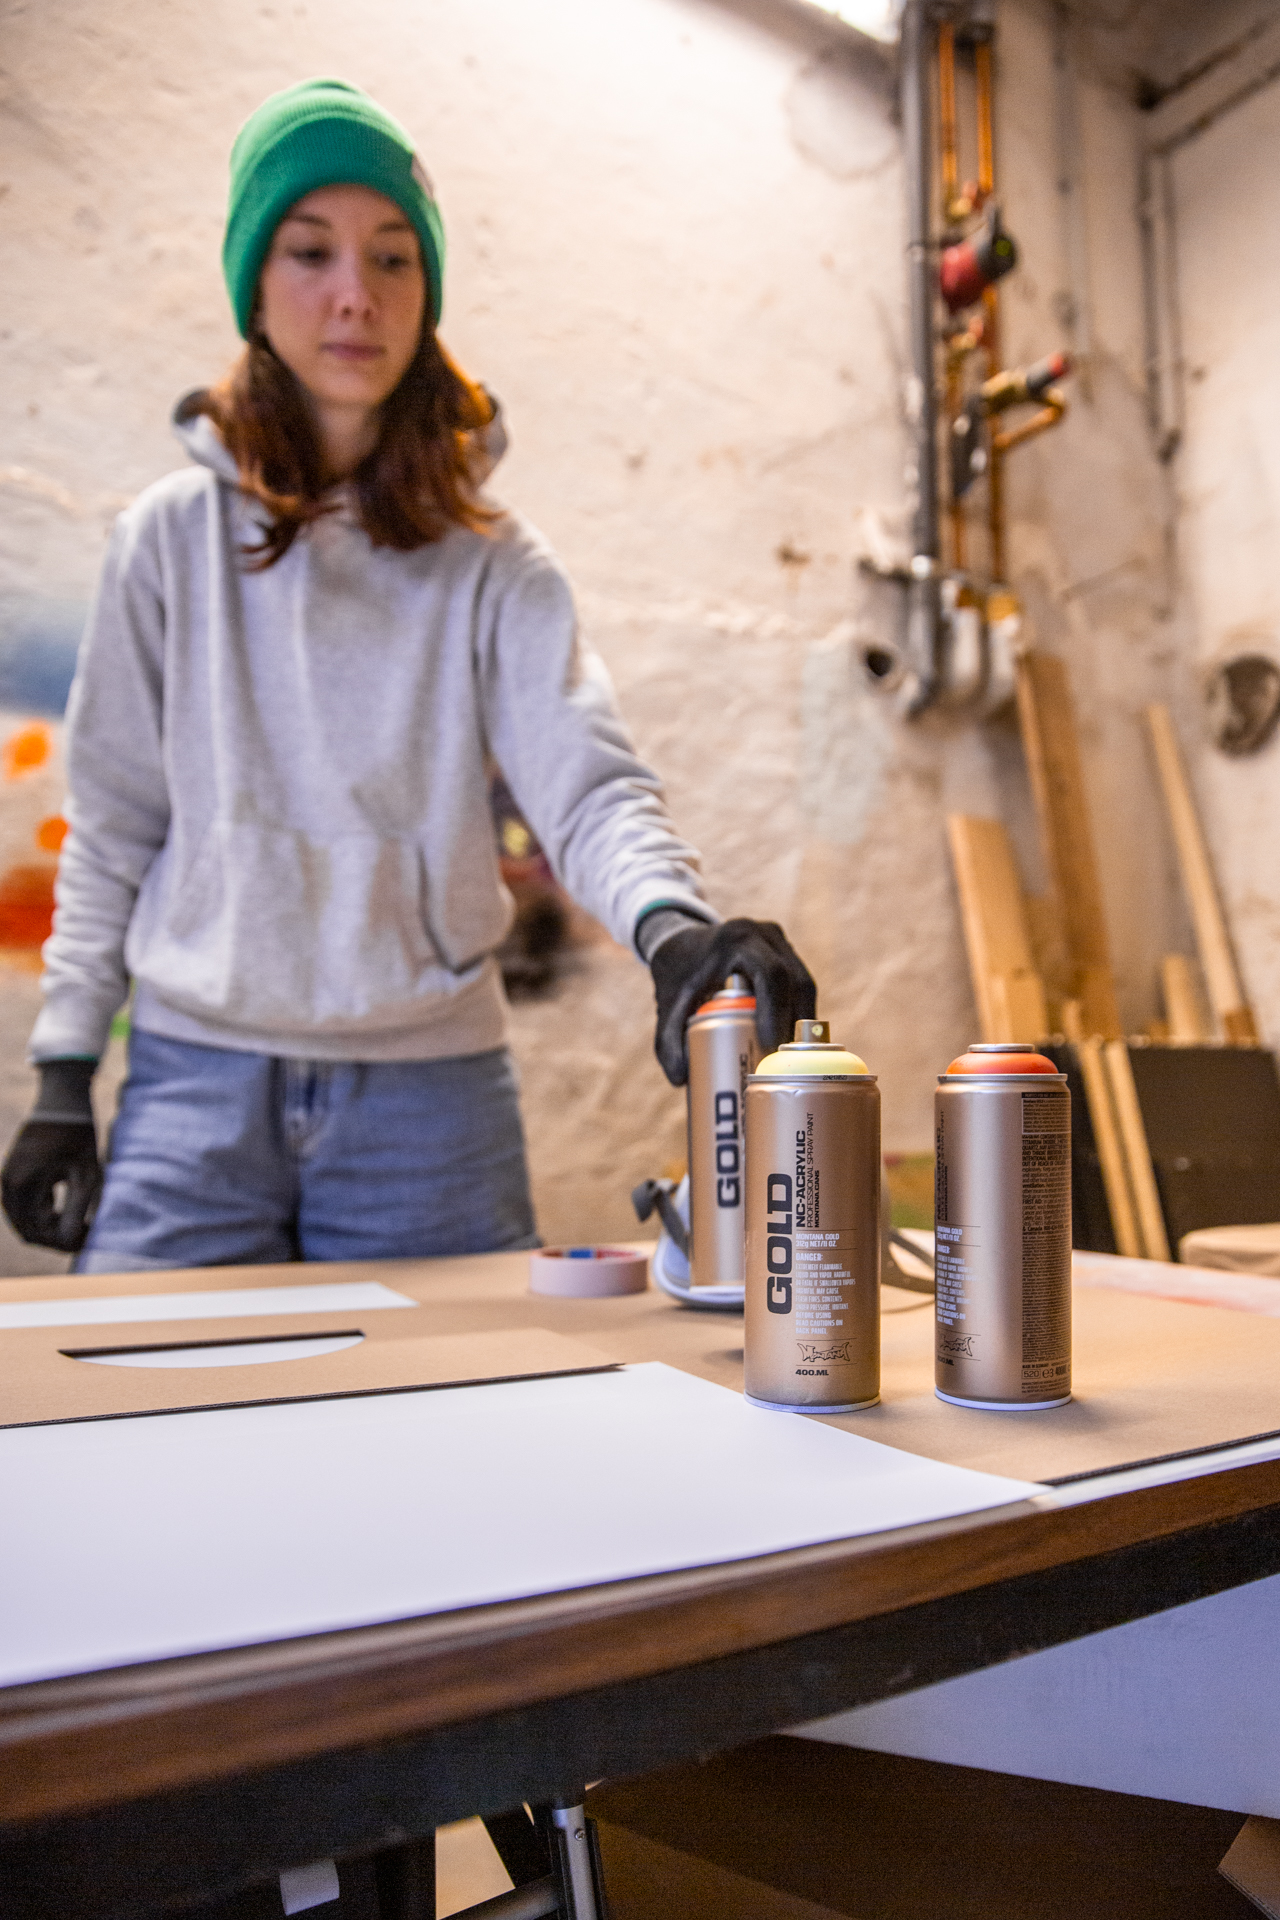
The three-column fade was created with a little more effort. But still easy as it is the same idea repeated 3 times with the colors being applied in different orders. The colors were a variation of Montana GOLD in green, yellow, and pink colors. You could choose any colorway you like.

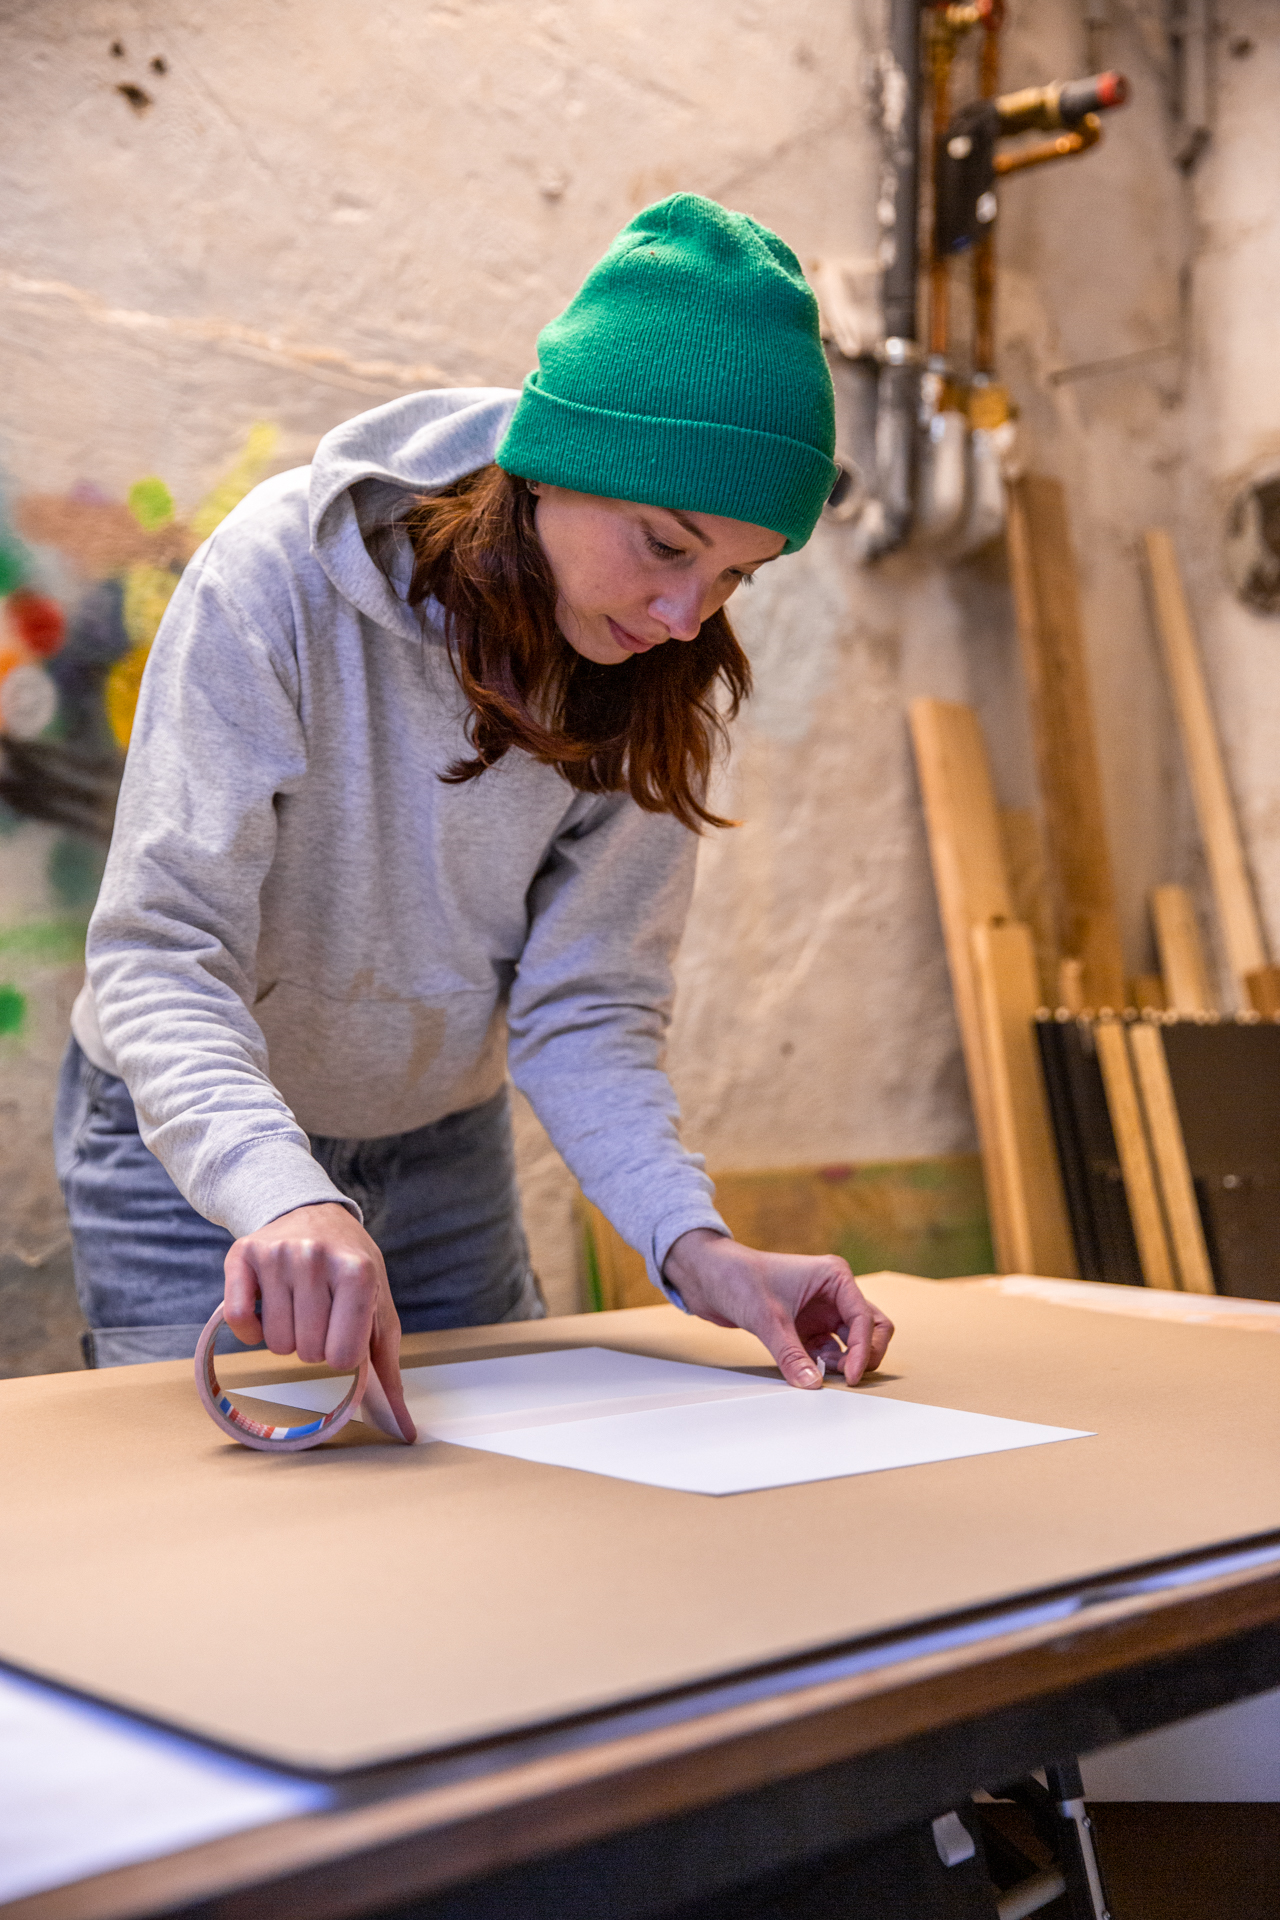
First, mark out a column in the size you desire and stick masking tape around the edges to create a crisp shape. Cover the paper all around your column with other paper or cardboard. This will stop spray mist/dust from landing on the parts of your design you want to remain white. Take your first color and apply it a third of the way down starting at the top. At the end of your color block, release your finger from the nozzle and sweep the can away from the paper.
This will create a fading effect. Take your second color and do the same, this time starting from the bottom and fading upward. Your goal is to cover the middle third of your column. Repeat the process with the third color filling the last third of the column, and fading the color up to the second color. This is your first column completed. Remove the masking tape and allow it to dry. Once dry, mark out an equal-sized column next to it in the middle of the paper, apply masking tape to create the sharp edges, and again cover all the rest of the paper to protect it from color.
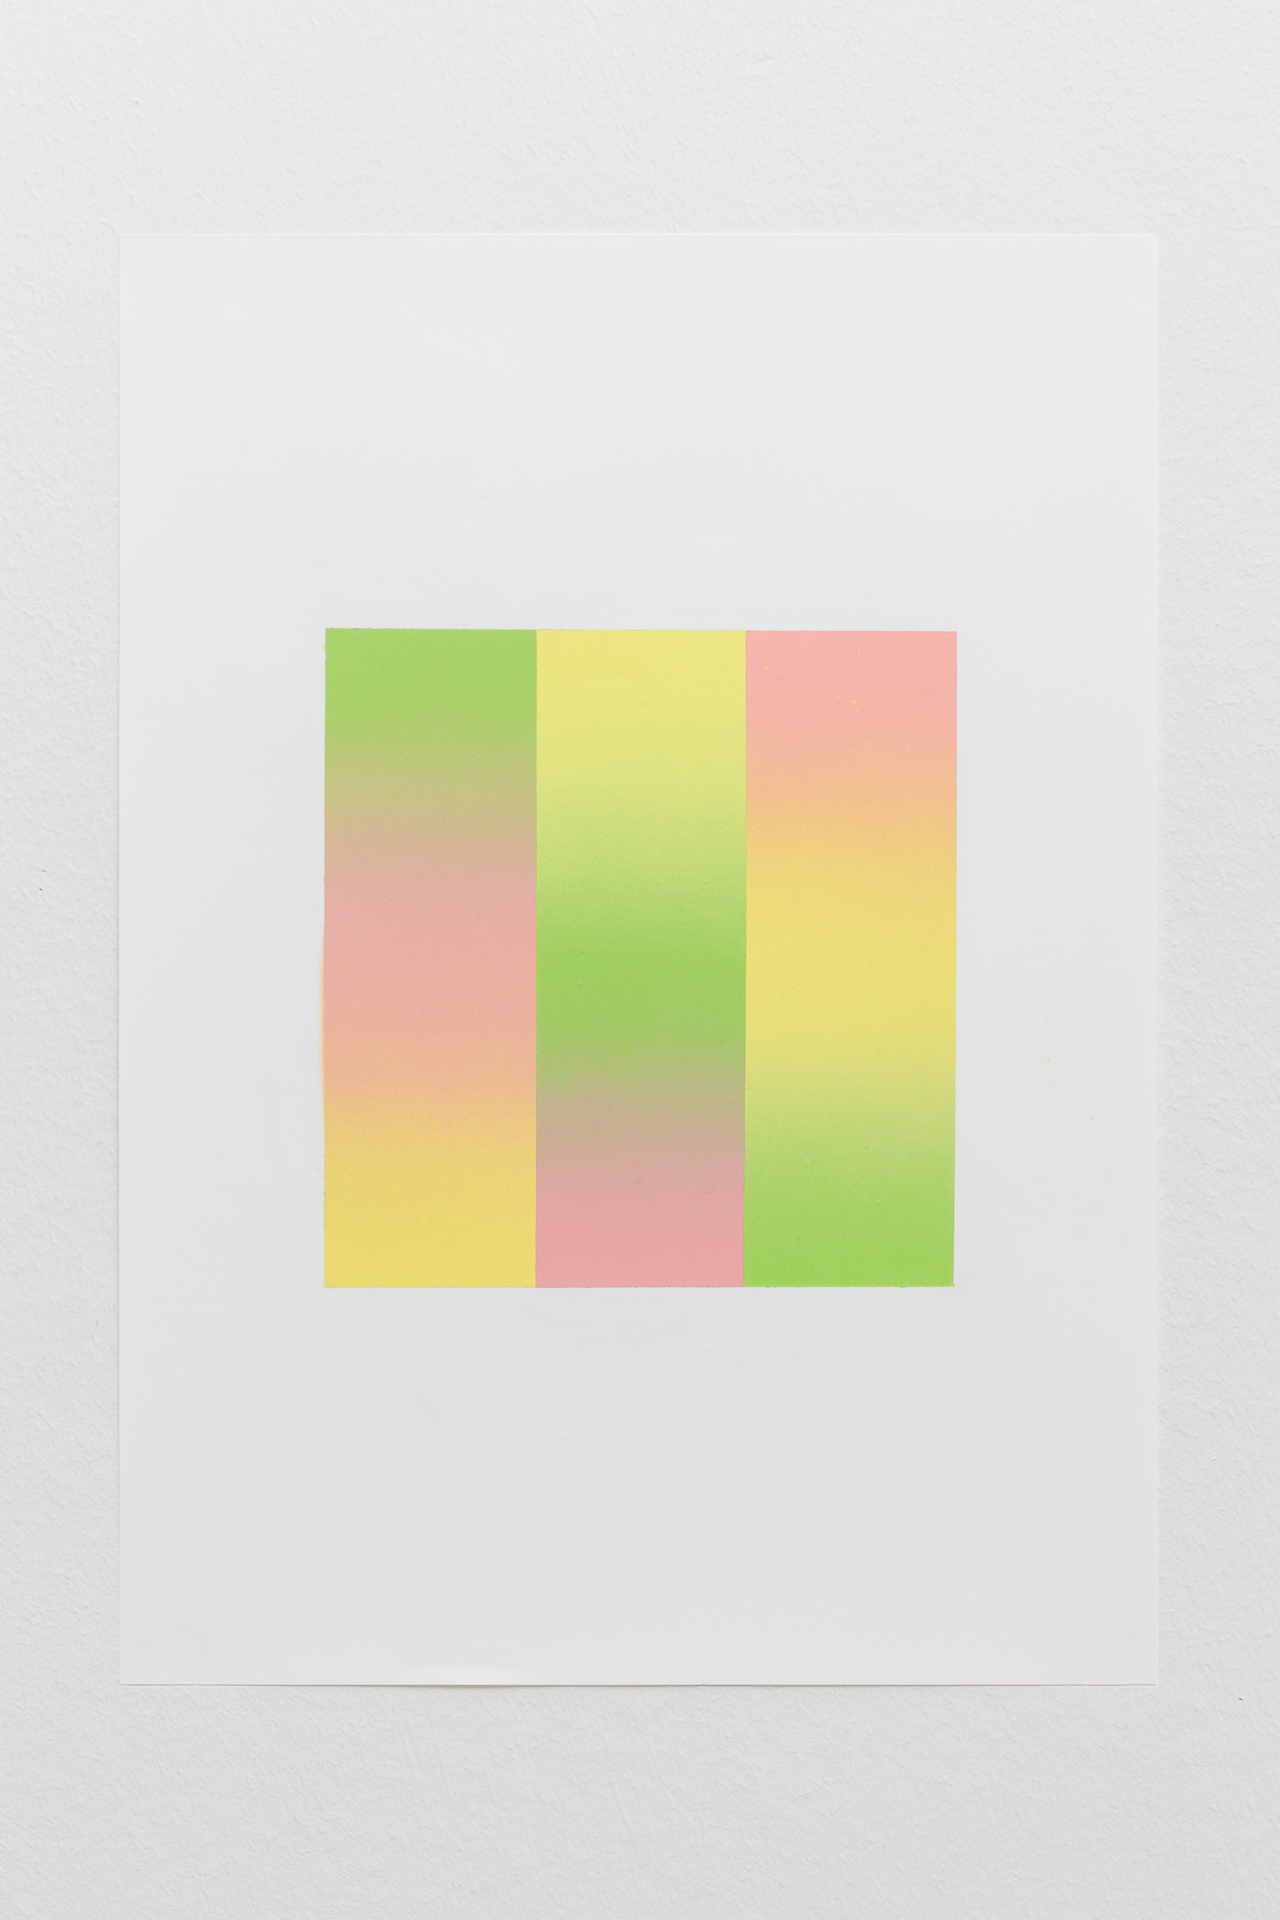
Repeat the same process, however, this time change the order you apply your colors. Use a different color on top, in the middle, and at the bottom. Repeat the process for the third column and remember to switch the color order again so that it is not equal to the other 2 columns. Remove all the masking tape and be impressed by what you have created.
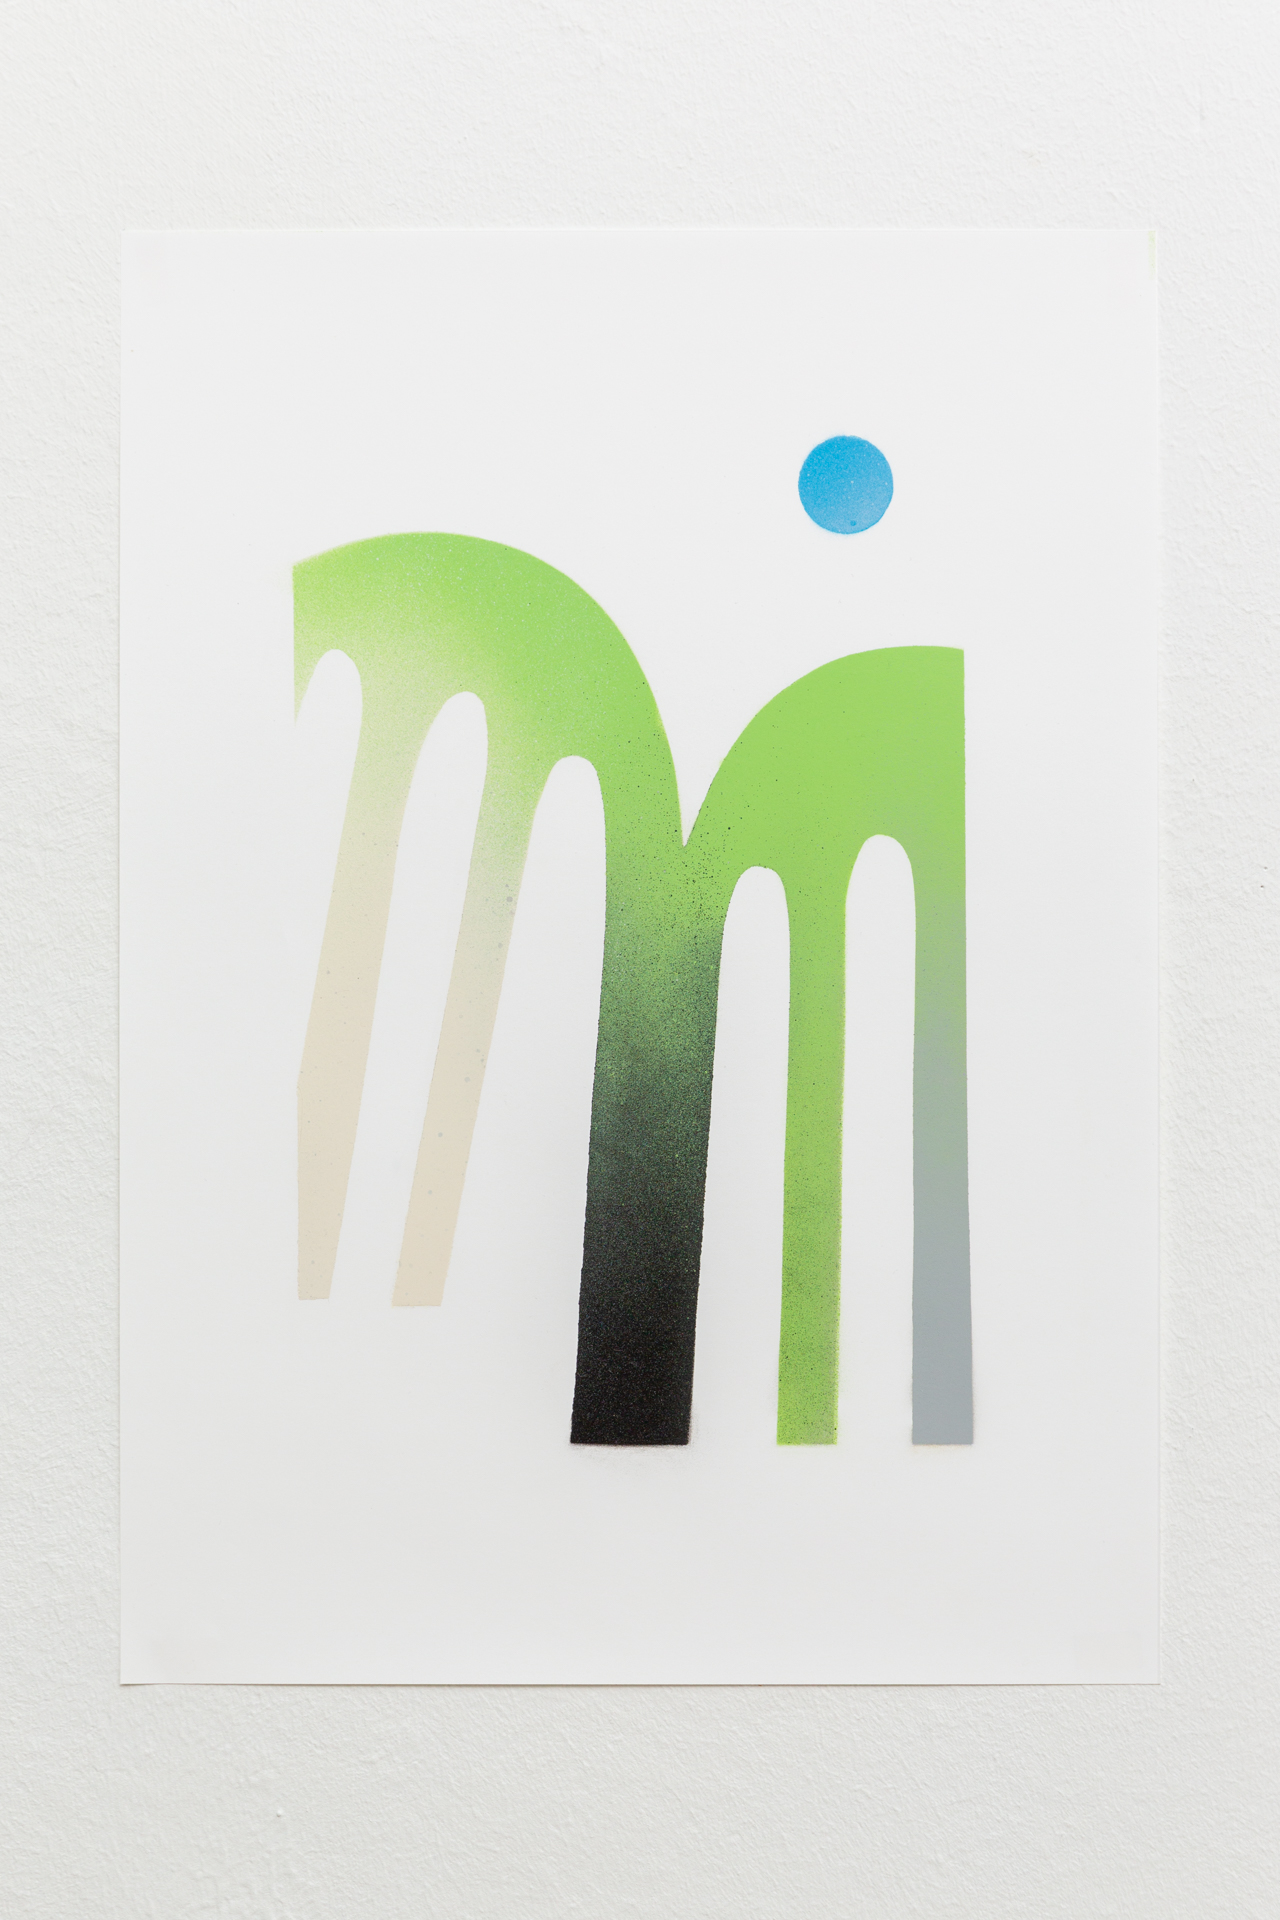
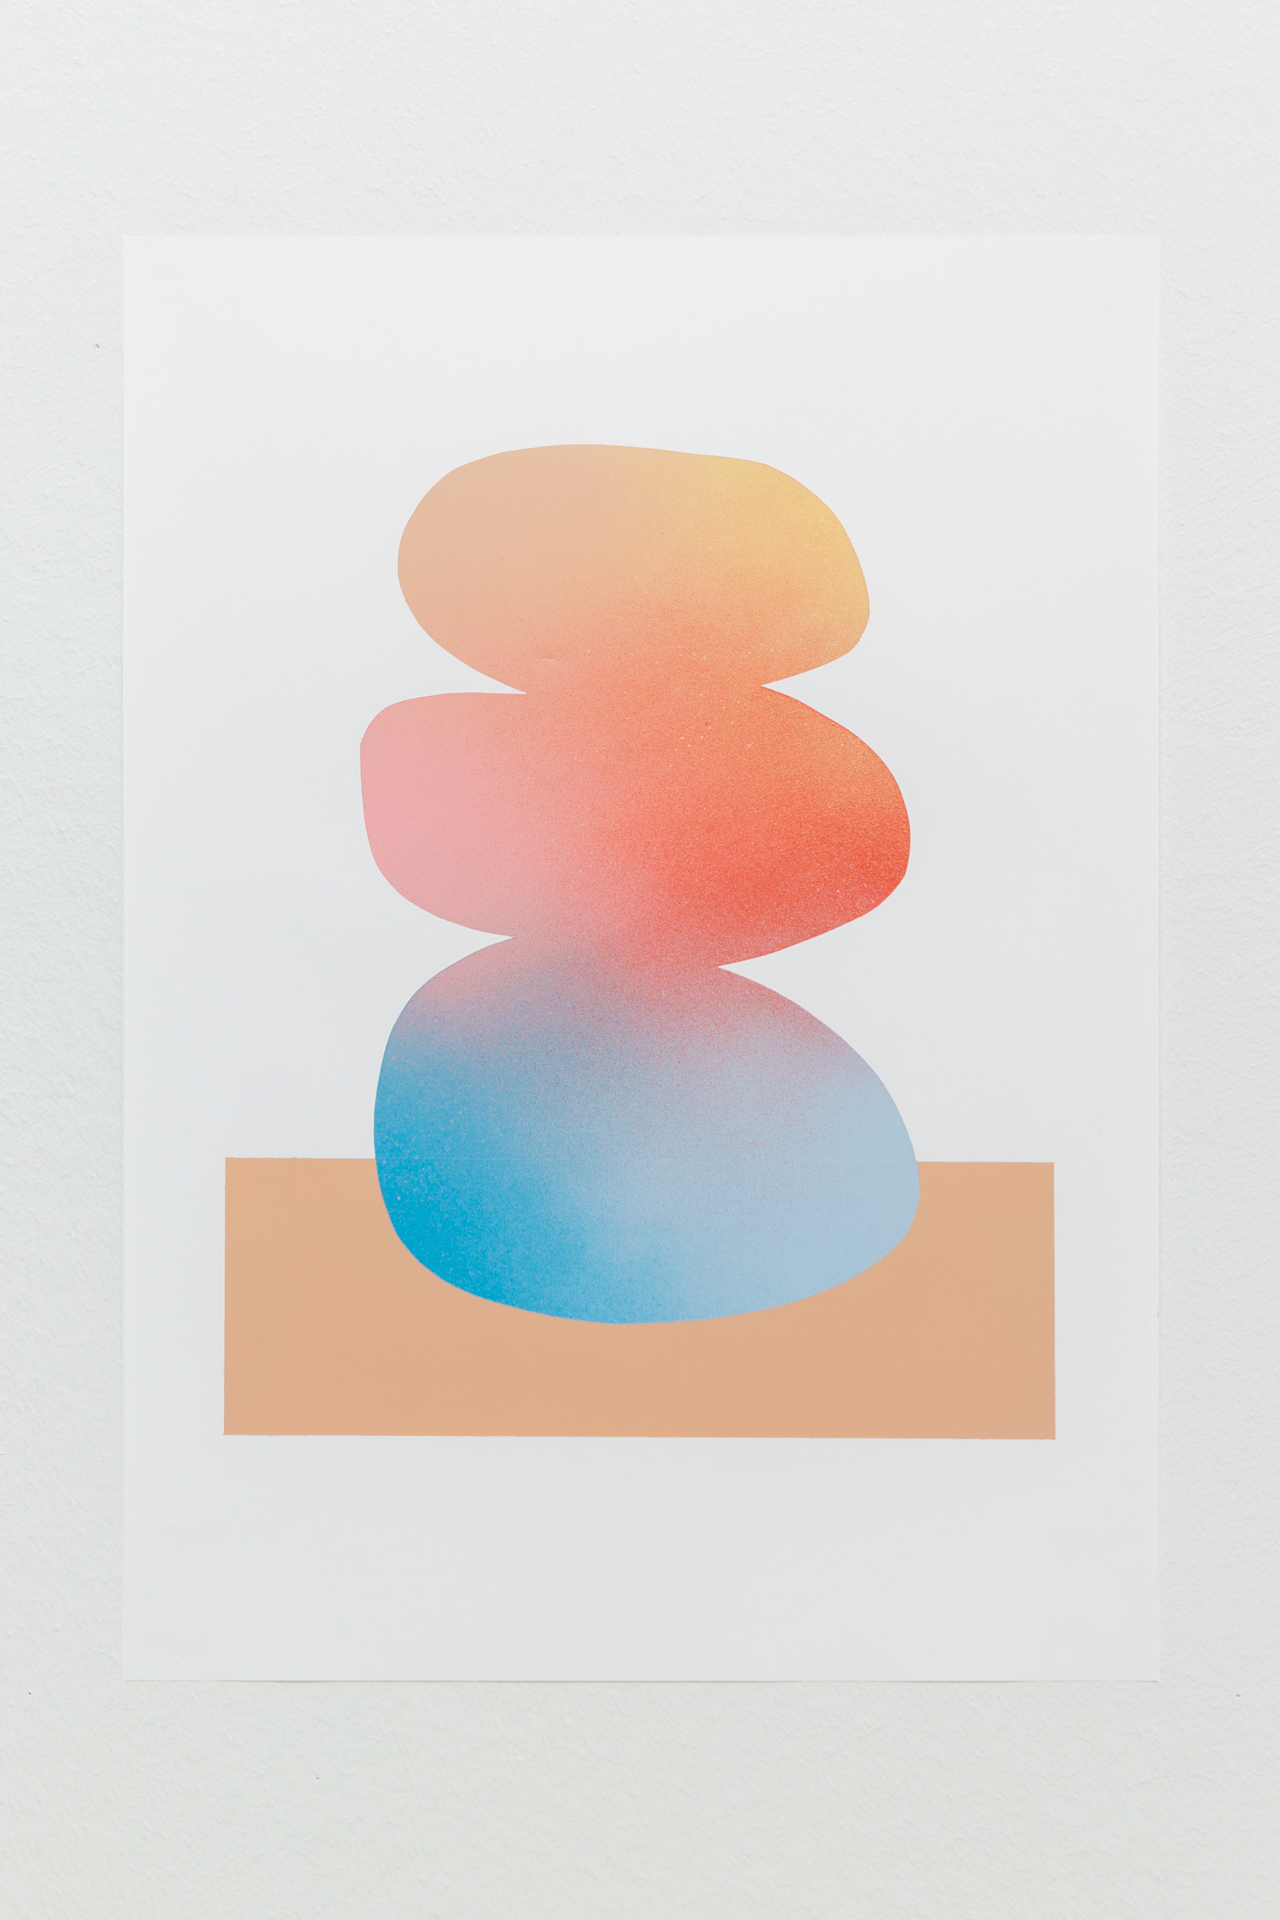
Gradient shapes
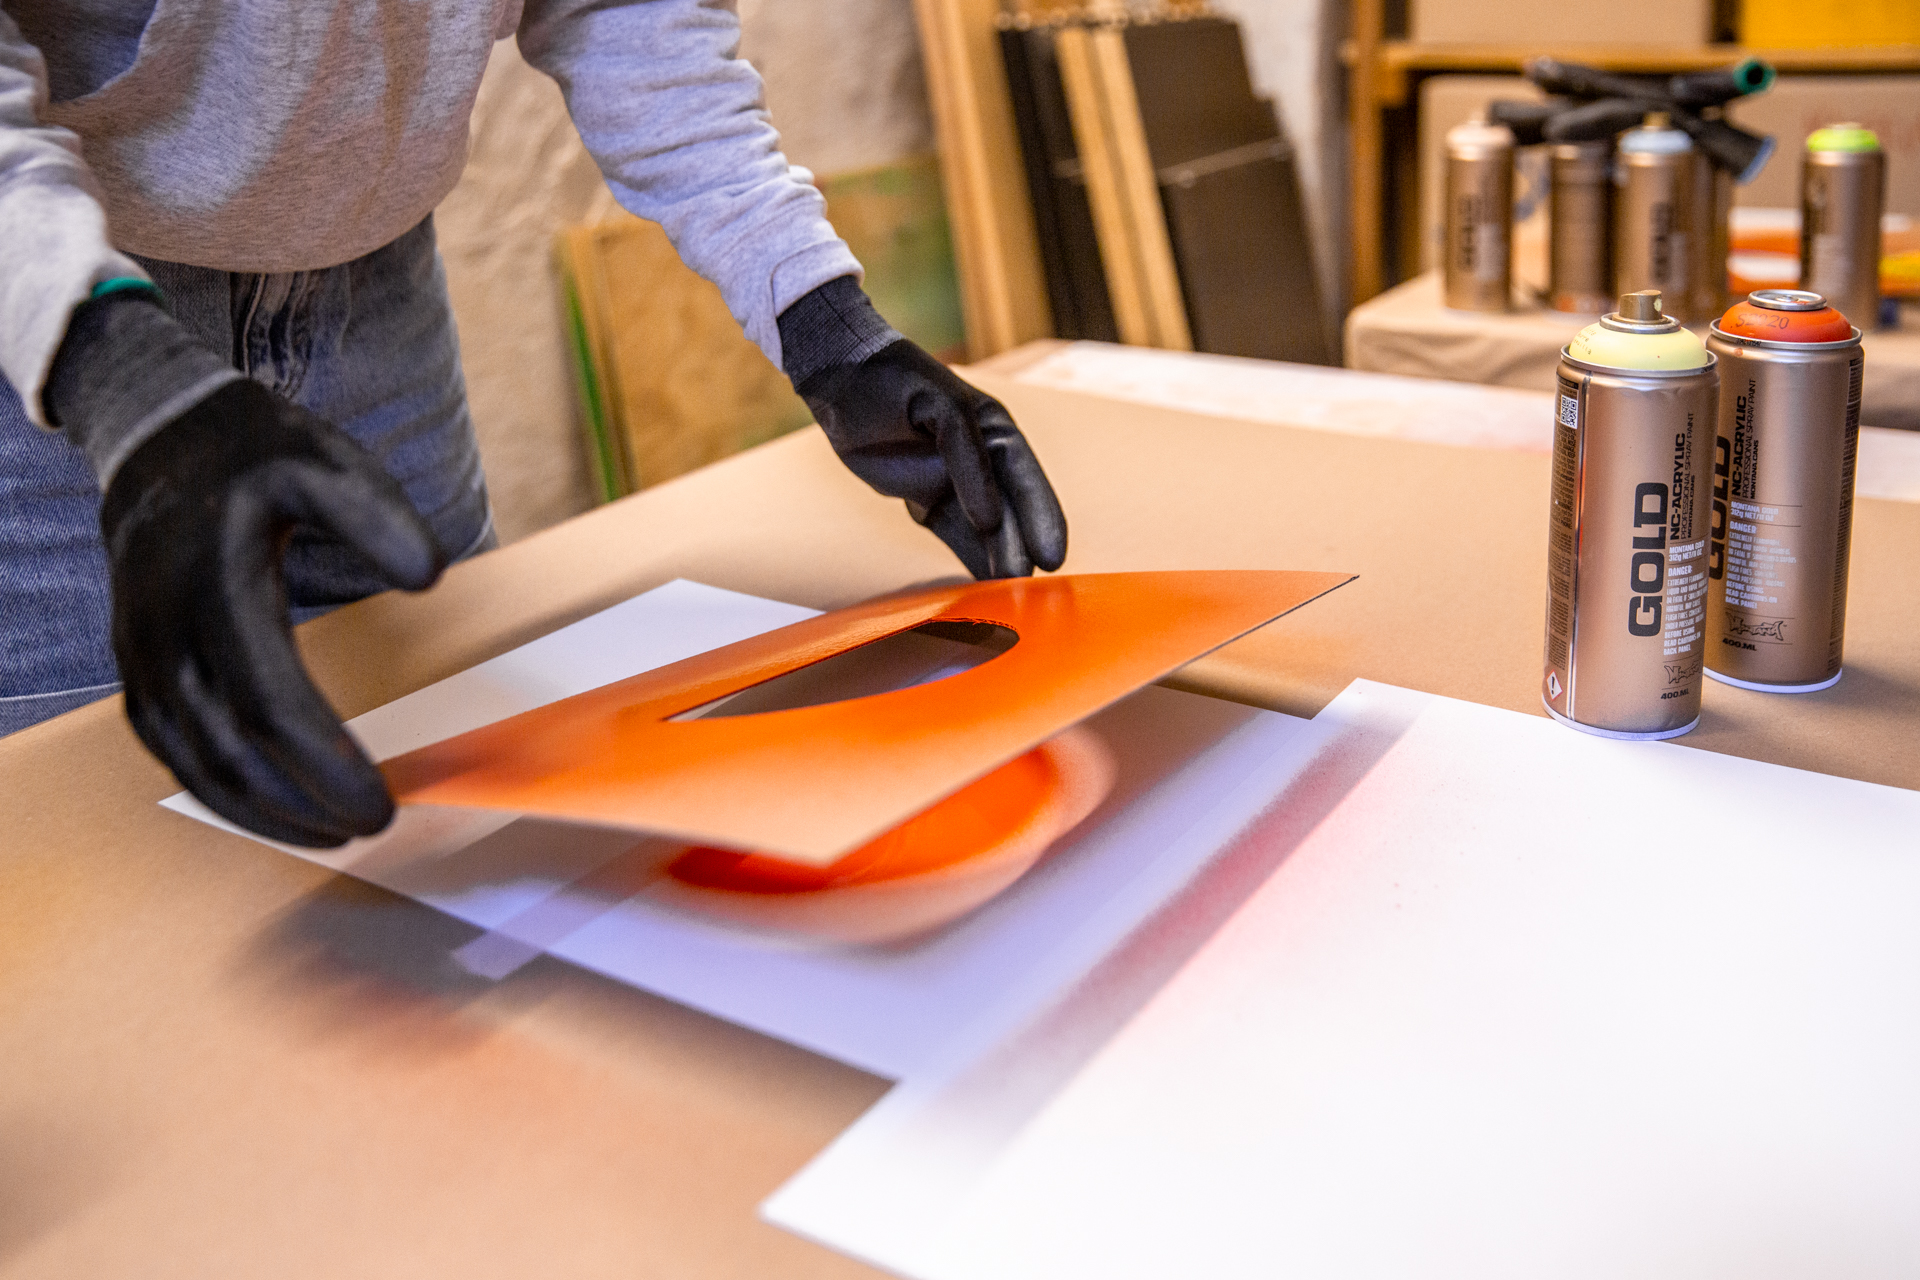
Using the skills we have learned from the previous steps, you can take the gradient idea a lot further with not much extra effort. Think of your design as a series of simple shapes. Arches, circles, squares, organic forms, or whatever you like. Using sturdy paper or thin cardboard, cut out the external structure of your main shape with a craft cutter so you have created a stencil for it. Place this over your clean paper surface and apply some masking tape in areas to hold it firmly down if required. The removed shape you have cut out is now the area exposed on the paper base that you can paint.

Using the Montana GOLD colors you desire, create fades as you wish. Once dry remove the outer paper, revealing a beautiful poster with white background and a faded gradient block in the shape you cut out. The same can be done in reverse by placing a shape you have cut out on the paper base. Fix it as required so it’s firm and won’t move, and then apply faded color around that shape as desired. Once you remove the shape you will be left with a white space where the color was blocked out and a faded background where it was allowed to hit the surface of the paper. This is then the door opener to either continuing to cut, cover, and paint new layers, or create designs that need multiple shapes that are applied at various times. Guess what, you’re an artist!
These experiments with gradients can be applied to any surface or project that you can physically create a fade on. However, in the context of poster art, you have just created some amazing artworks that didn’t need to be done by a professional. You could also expand your ideas by using various Montana TECH and EFFECT cans with the same technique.
These ideas can be for beginners, intermediate, or as experienced as you like. And a simple one-color gradient can take as little as 5 minutes to cut out a shape and press the nozzle after shaking. Through to hours of layering for those who want to make elaborate collages with their gradient shifts. The sky is the limit.
Well done and Happy Crafting.