

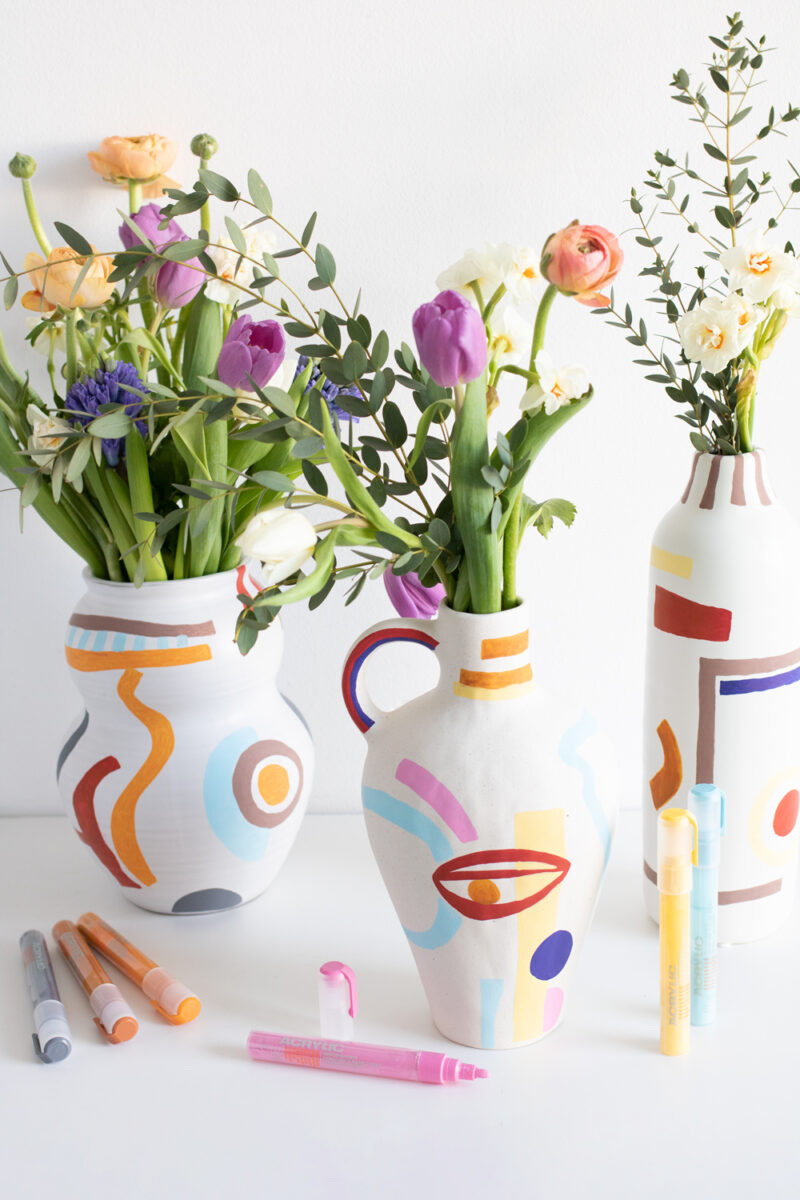
Redesigning vases with markers and color
Imagine you have that itching feeling to create something that will brighten up your home, office, or living space but you don’t need anything and you’re not sure where to start. Sound familiar? You may see this as a small creative mental block, but we see it as an opportunity to do something just for fun. We have a solution so you can get your hands dirty faster than you think. We like to call it “The marker and vases project”. Although brushes are also allowed. Read on and get inspired.
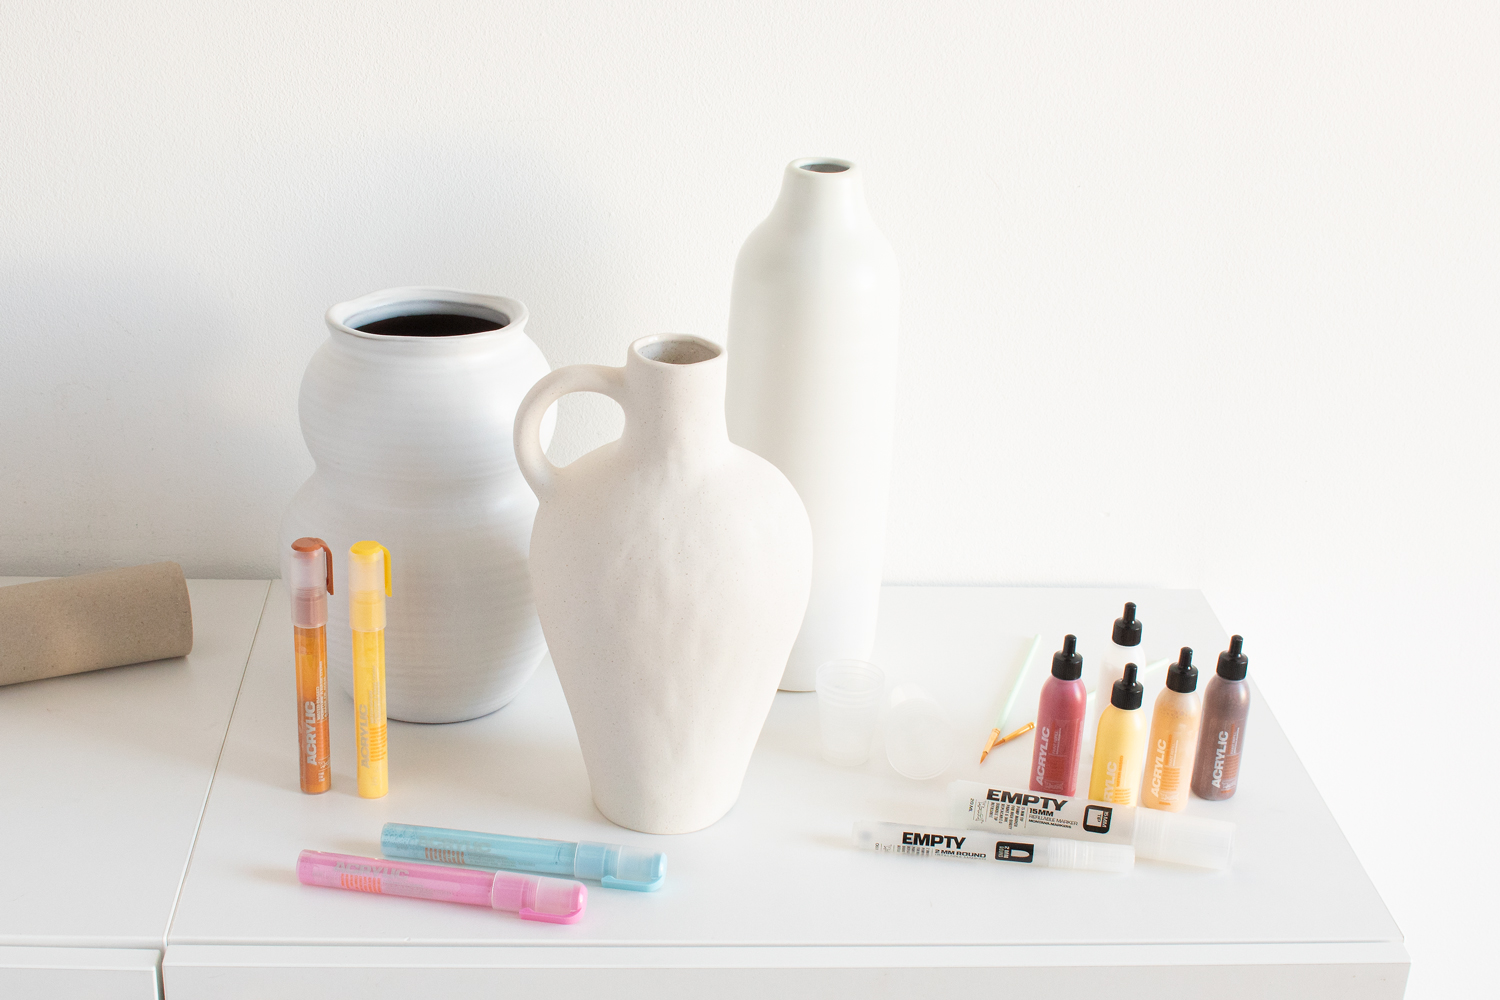
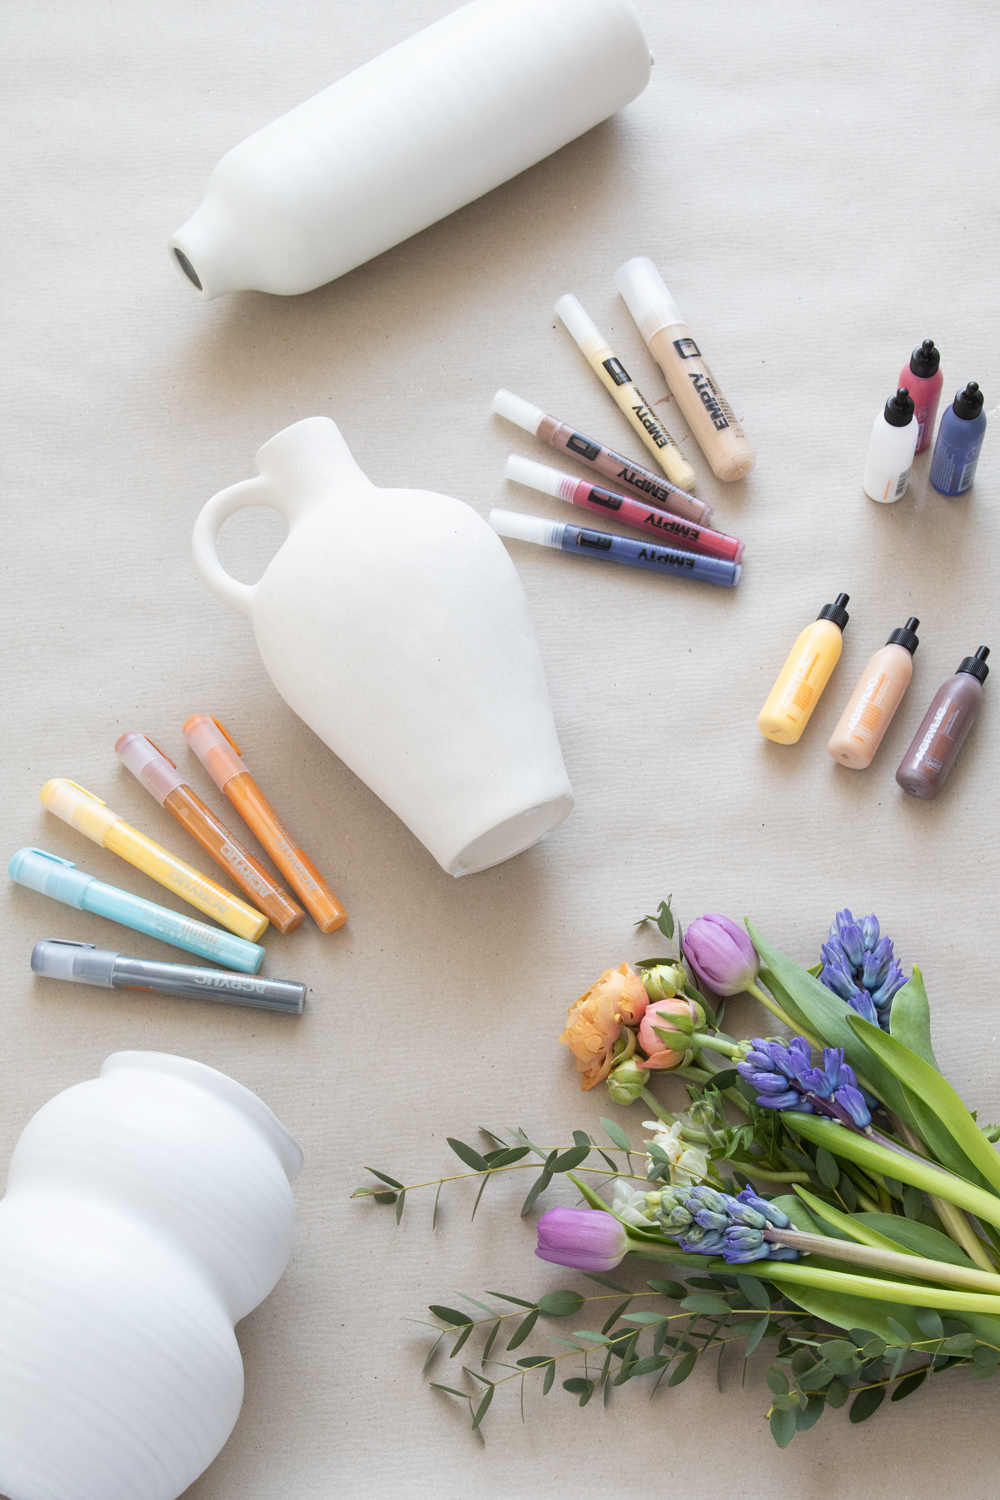
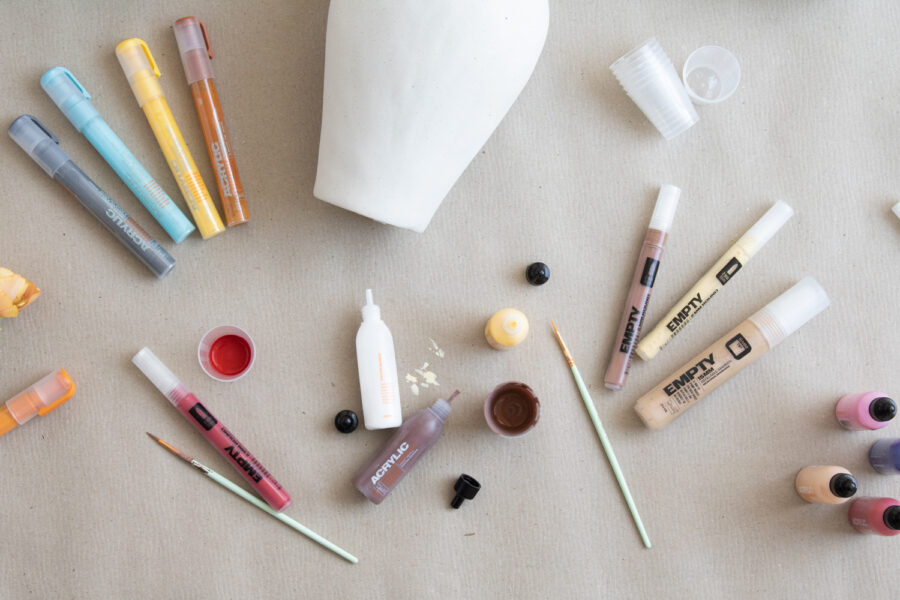
Materials Used
- Vases (Ceramic or natural materials preferable)
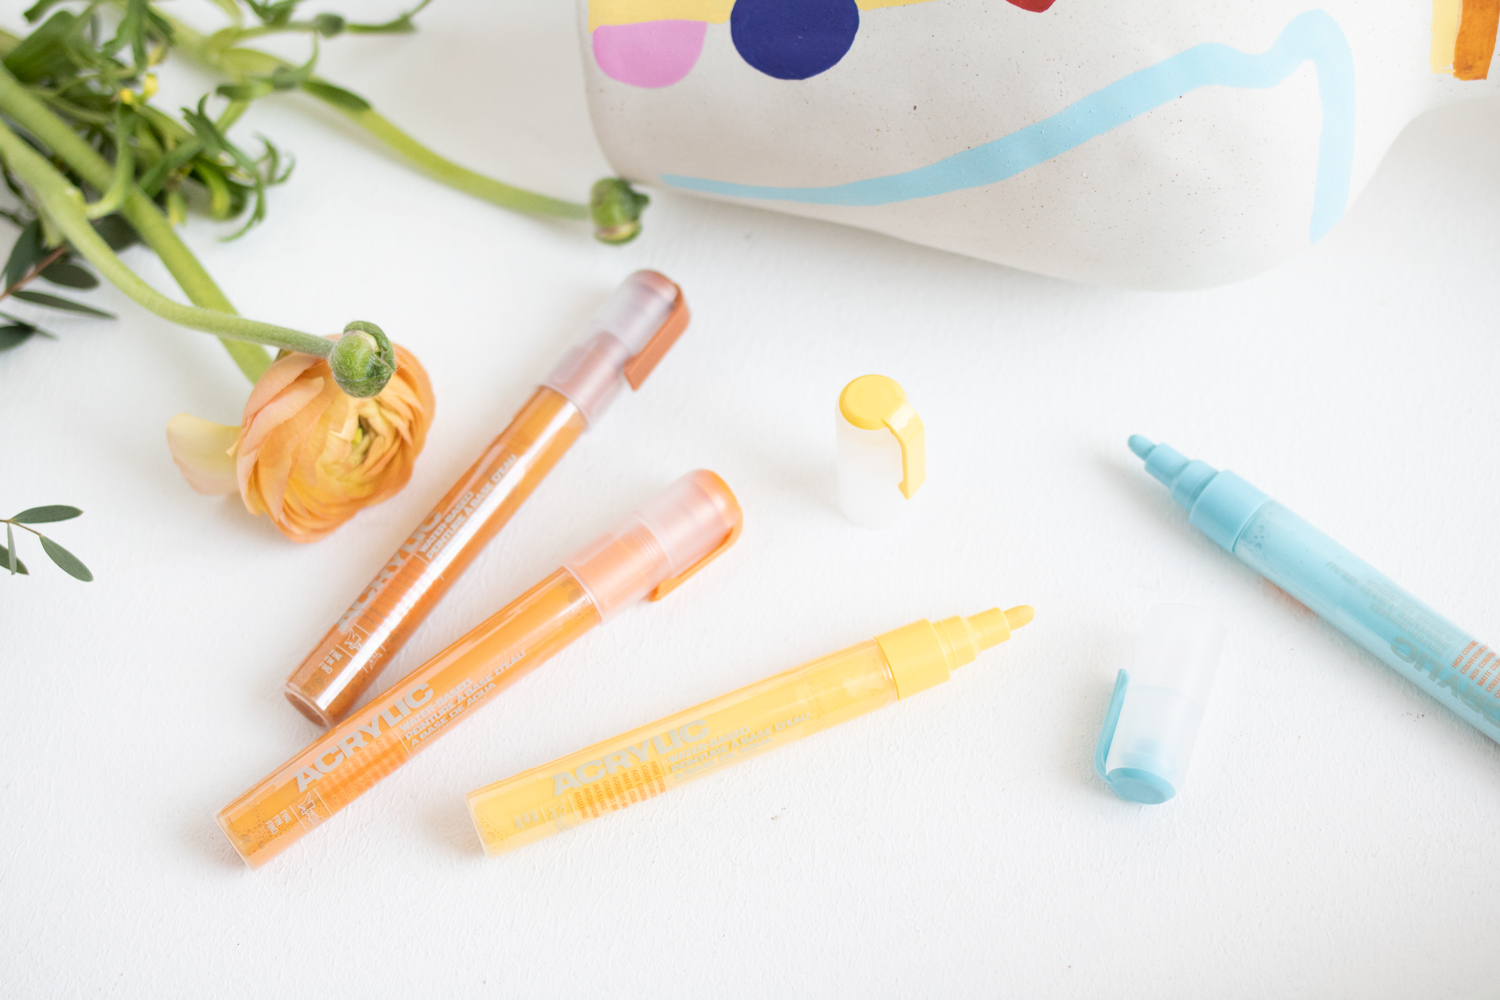
- Montana ACRYLIC markers (Sizes of your choice. We used FINE)
- Montana EMPTY or ACRYLIC EMPTY Markers (Sizes of your choice. We used 2mm and 15mm)
- Montana Paint Refill 25ml (Colors of your choice)
- Paintbrushes (size of your choice)
- Montana Universal PRIMER (Optional)
- Montana VARNISH (Optional. Finish of your choice)
- Gloves, mask (If using Montana Universal PRIMER)
- White acrylic paint (if not using Montana Universal PRIMER)
- Cups or containers to mix paint
- Drop sheet or surface cover
How we did it
This project is another one of those moments where you may think, “why didn’t I think of this before”. When you go to second-hand shops, yard sales, hardware stores, or home furnishing stores, how often have you seen simple ceramic vases that have great shapes but not always great designs on them? You may even have some of them at home now or in the basement gathering dust. The adventure starts here! Grab your vases and give them a good clean removing any dust, dirt, oils, or residues. Ensure they are completely dry and grab some white acrylic paint or a Montana Universal PRIMER can and prepare for the next step.

If your vases are not already white, we first need to make them white so we can paint and draw on them. For surfaces that are smooth or glazed, shake your Montana Universal PRIMER well for 2-3 minutes till you hear the mixing balls moving freely. Then turn the can upside down, remove the nozzle to allow the black safety ring under it to fall out, and then re-apply it spraying in a neutral direction to ensure it is working correctly. Place your vase(s) on your drop sheet and spray in thin even coats till you have coated it completely. If required, leave 5 minutes or more, and then re-apply. If your surface was sandable with some fine sandpaper, we recommend this before application but ensure your vase(s) are clean again before priming.
If your vase(s) is uncoated or matt in finish, you also have the option to prime it with white acrylic paint. The better quality of the paint, the better the finish. But if you’re just having fun, even leftover house paint will do the job but not last as long. Paint it on with a brush as desired and allow it to dry completely.
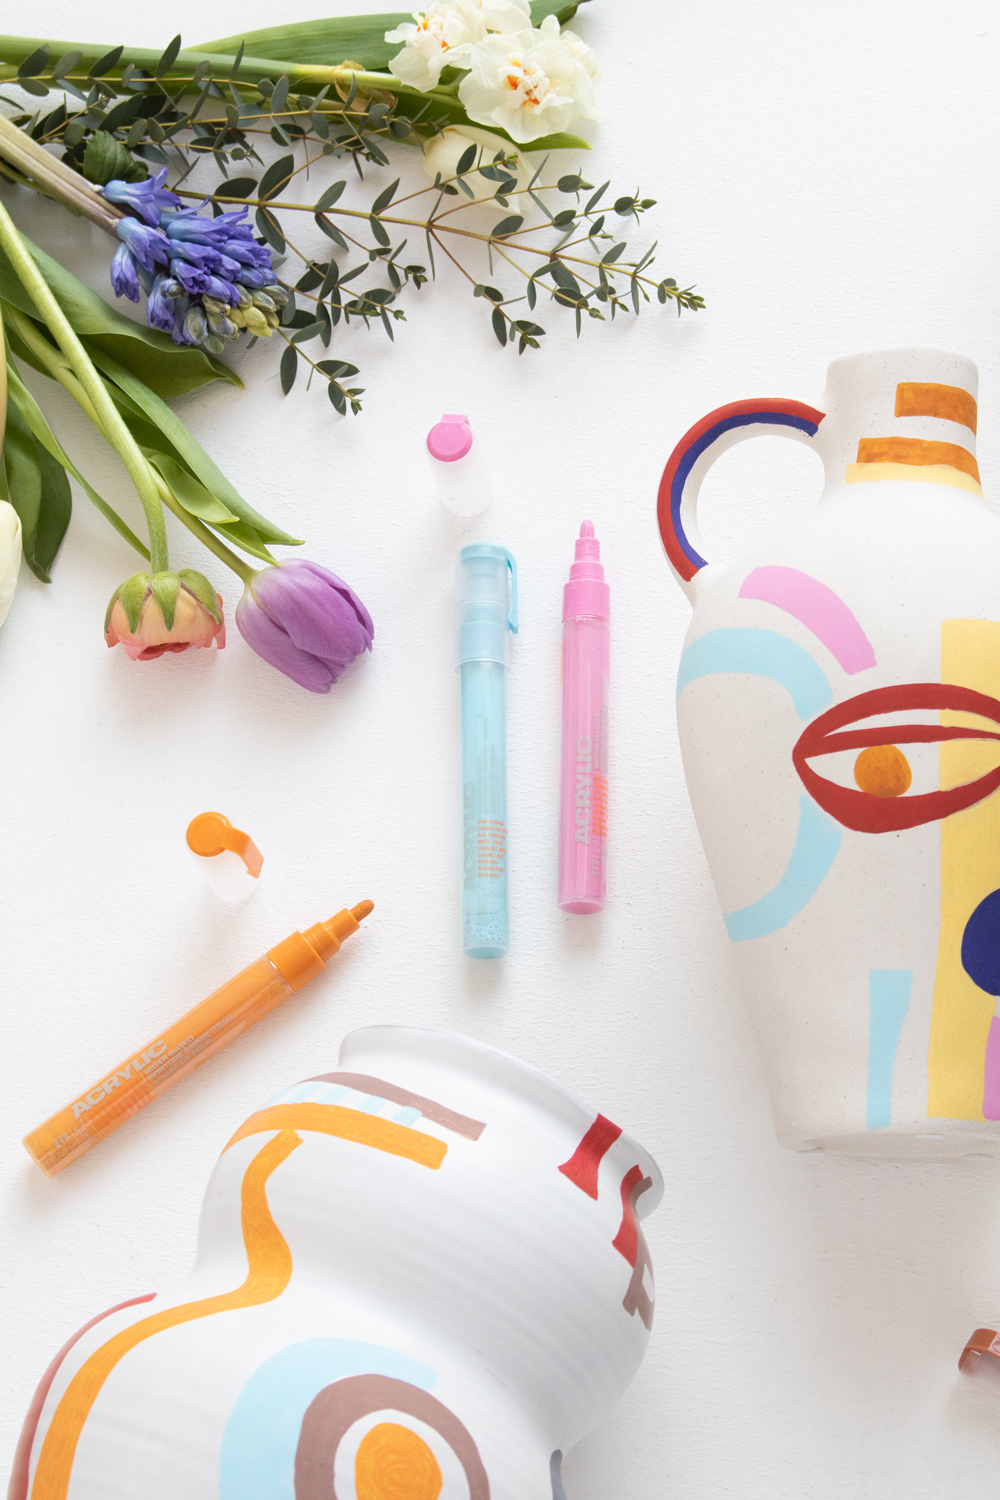
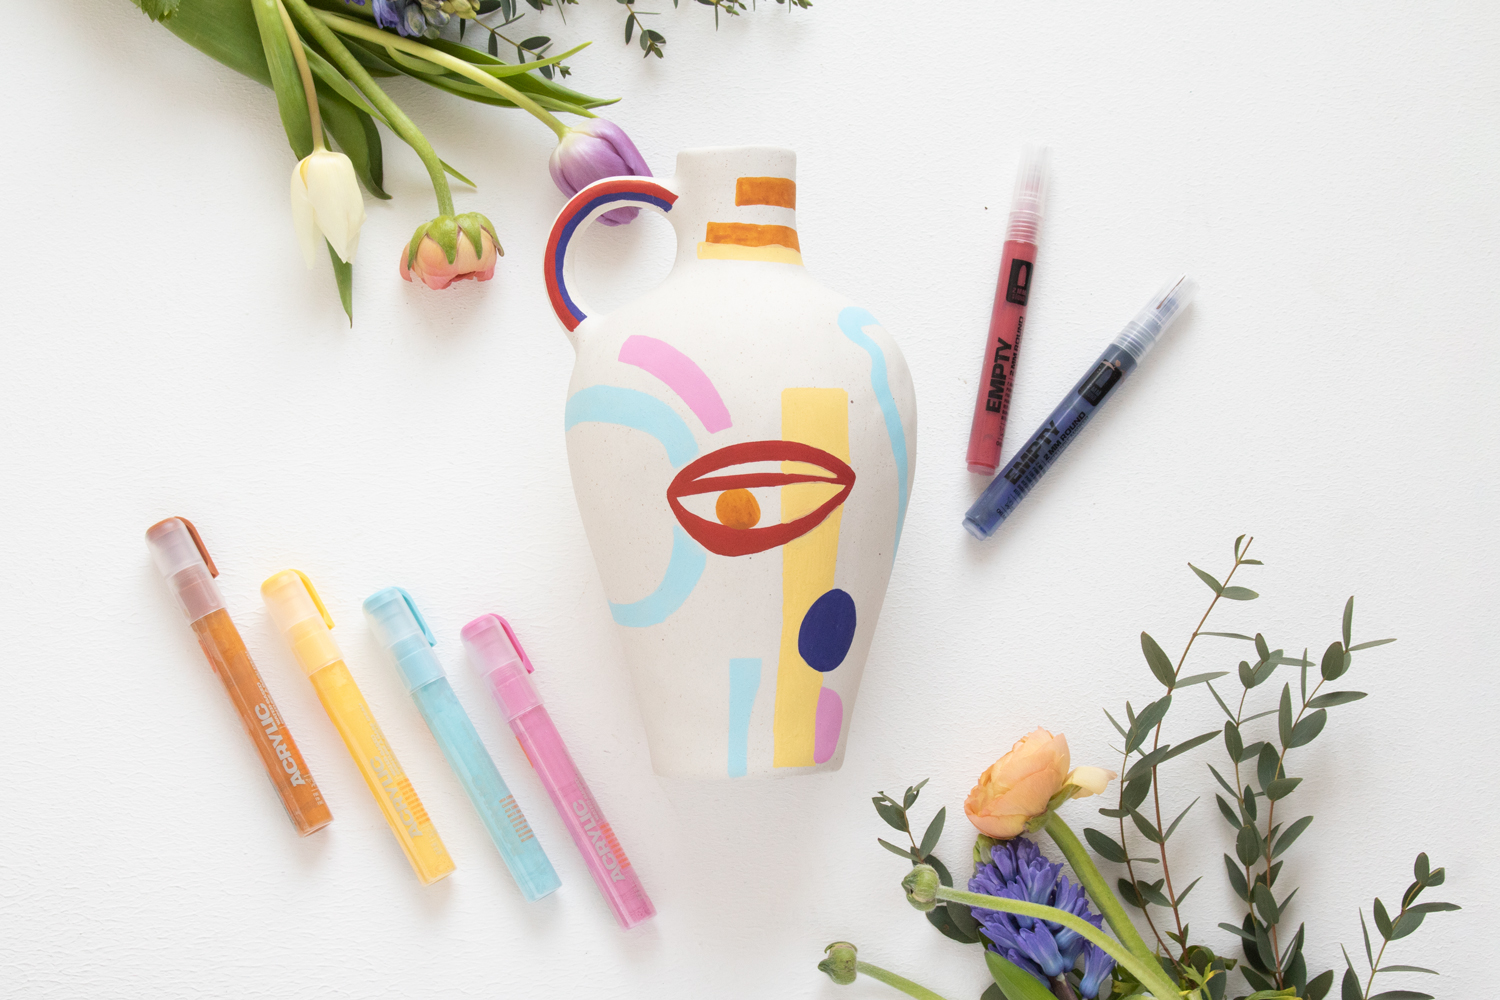
Your primed white vases are dry and now begging for attention. Using your collection of prefilled Montana ACRYLIC markers, your Montana EMPTY markers, Montana ACRYLIC Paint Refills, and your paintbrushes prepare your space for drawing and painting.
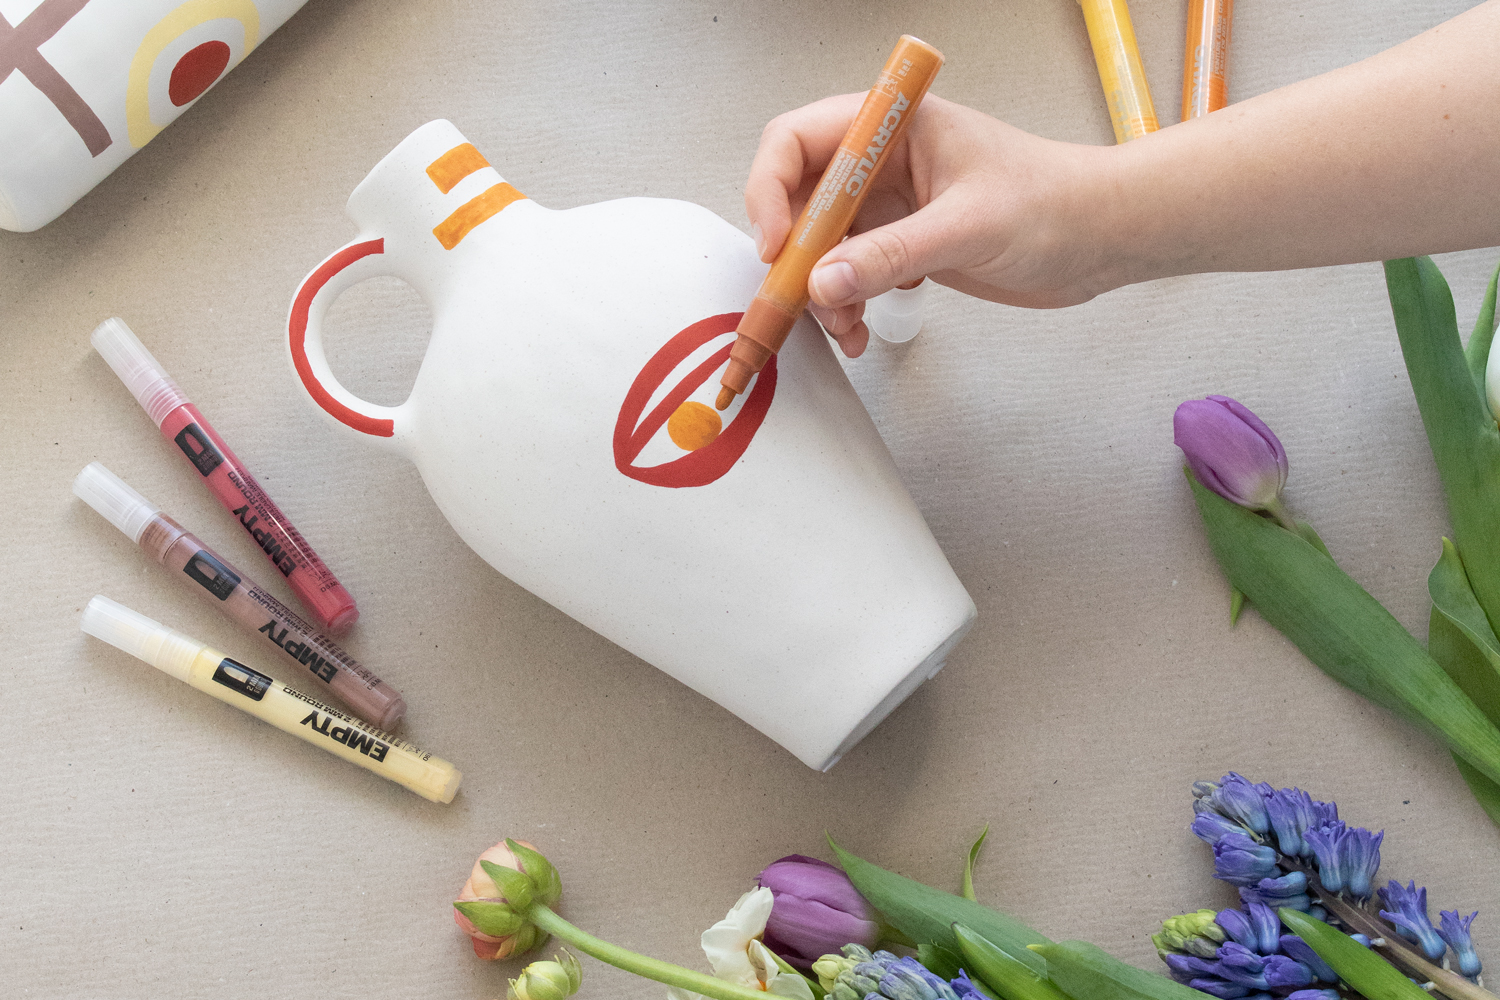
The Montana ACRYLIC Markers simply need to be shaken, unwrapped, and then pumped softly a few times on a scrap piece of paper to start the flow of paint to the tip. Once they are flowing, the occasional shake and re-pump are required to keep the paint flowing at your desired rate.
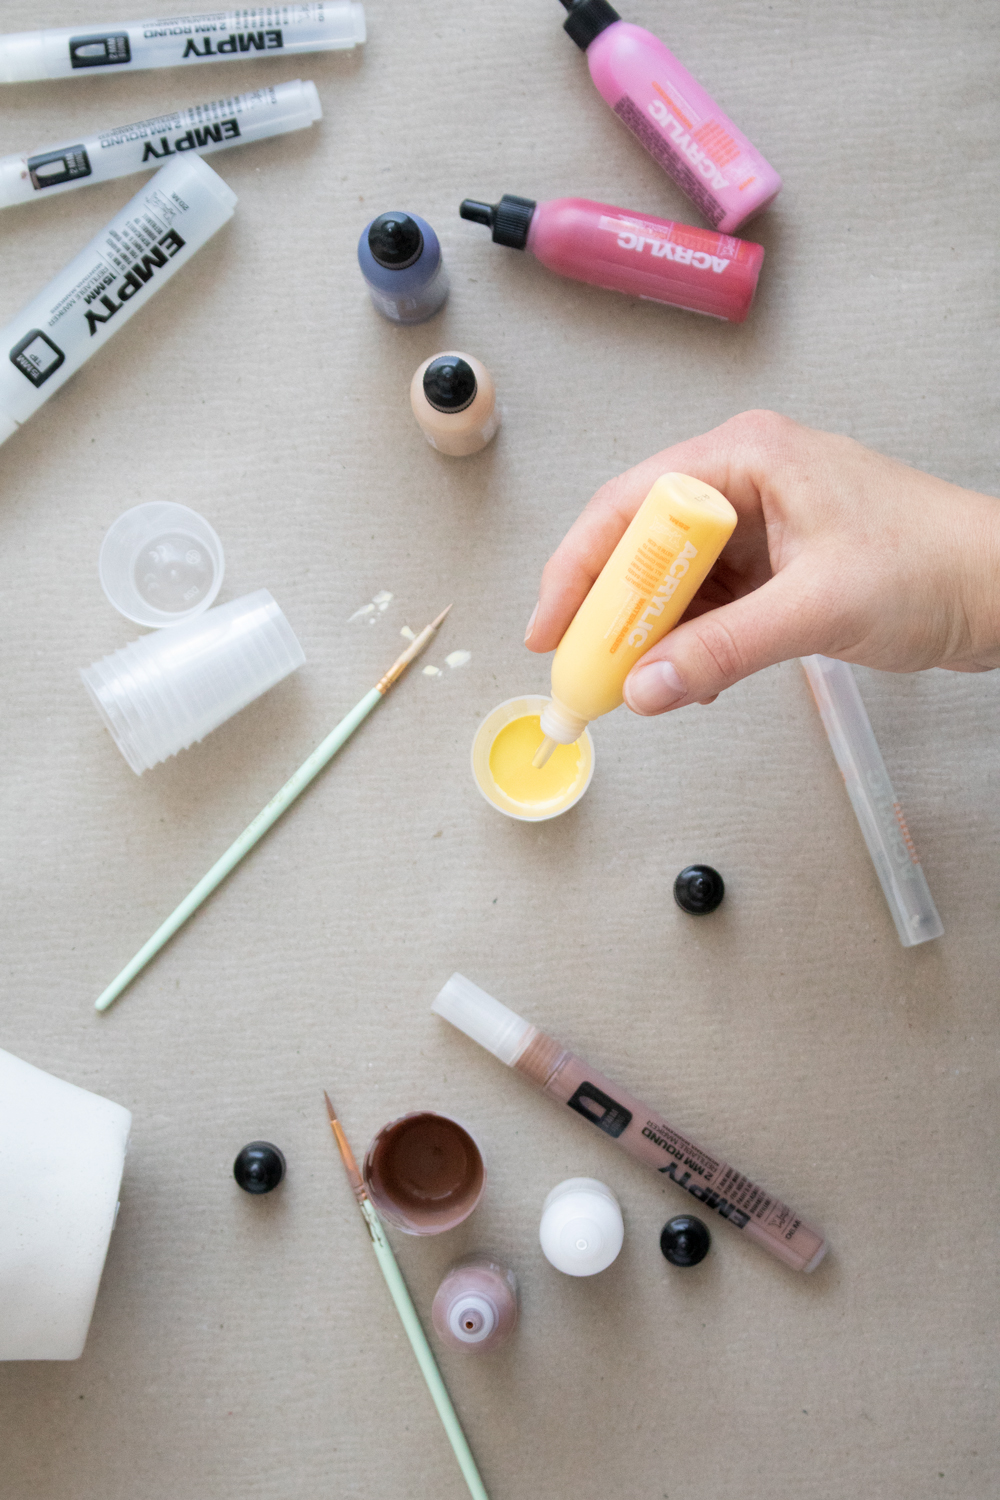
The Montana EMPTY or ACRYLIC EMPTY markers work the same as the ACRYLIC markers mentioned above, with the exception that you can fill them with whichever color you want. Unscrew the head of your EMPTY marker (anti-clockwise for Montana EMPTY, clockwise for Montana ACRYLIC EMPTY), and remove the plastic valve so the marker barrel is clear. Using your Montana 25ml ACRYLIC Refill Paint colors of your choice, squirt the color or mix of colors into the marker barrel leaving enough space in the barrel to re-insert the plastic valve, and re-screw the maker head on, in the appropriate direction. Then shake and pump as mentioned previously.
If you are using brushes, simply squirt your chosen Montana Paint Refill Colors in any kind of cup or container you like so that you can dip the brush in to re-load it. Should you want to do this project over an extended time, or want to keep the colors you are creating, consider using sealable air-tight containers that you can re-use at any time.
The designs you apply can be as complicated or as simple as you like. Either just look at your vase and see what comes out of you, or maybe do a little research for inspiration before you get started. And if you still have a creative block, think about where you want to show off your vase, or what you want to put in it? A theme may come to you in this process that you didn’t think of previously. And at the very worst, look at the shape of your vases and create shapes and patterns that complement their form. Sometimes the simplest things, or the colors you combine with each other, can be the art you didn’t realize you had within you. If it is a creative block your trying to break, don’t think too much. Put a marker or brush to the surface and let your instinct take over.

This is a super simple project for all skill levels. Depending on the priming required and the sizes of your vases, you can spend as little as 10-30 minutes on each vase, or lose yourself for hours. If you want to store the vases outside, we recommend applying Montana VARNISH in the finish of your choice to resist the elements. Ensure that each vase has dried for over 24 hours before varnishing. If your vase is indoors with minimal chance of unwanted touching or scratching, this may not be required.
Who knows, you may have created a historic urn for generations to come to discover? And if not, the most important thing was that you had fun.
Well done and Happy Crafting!


