


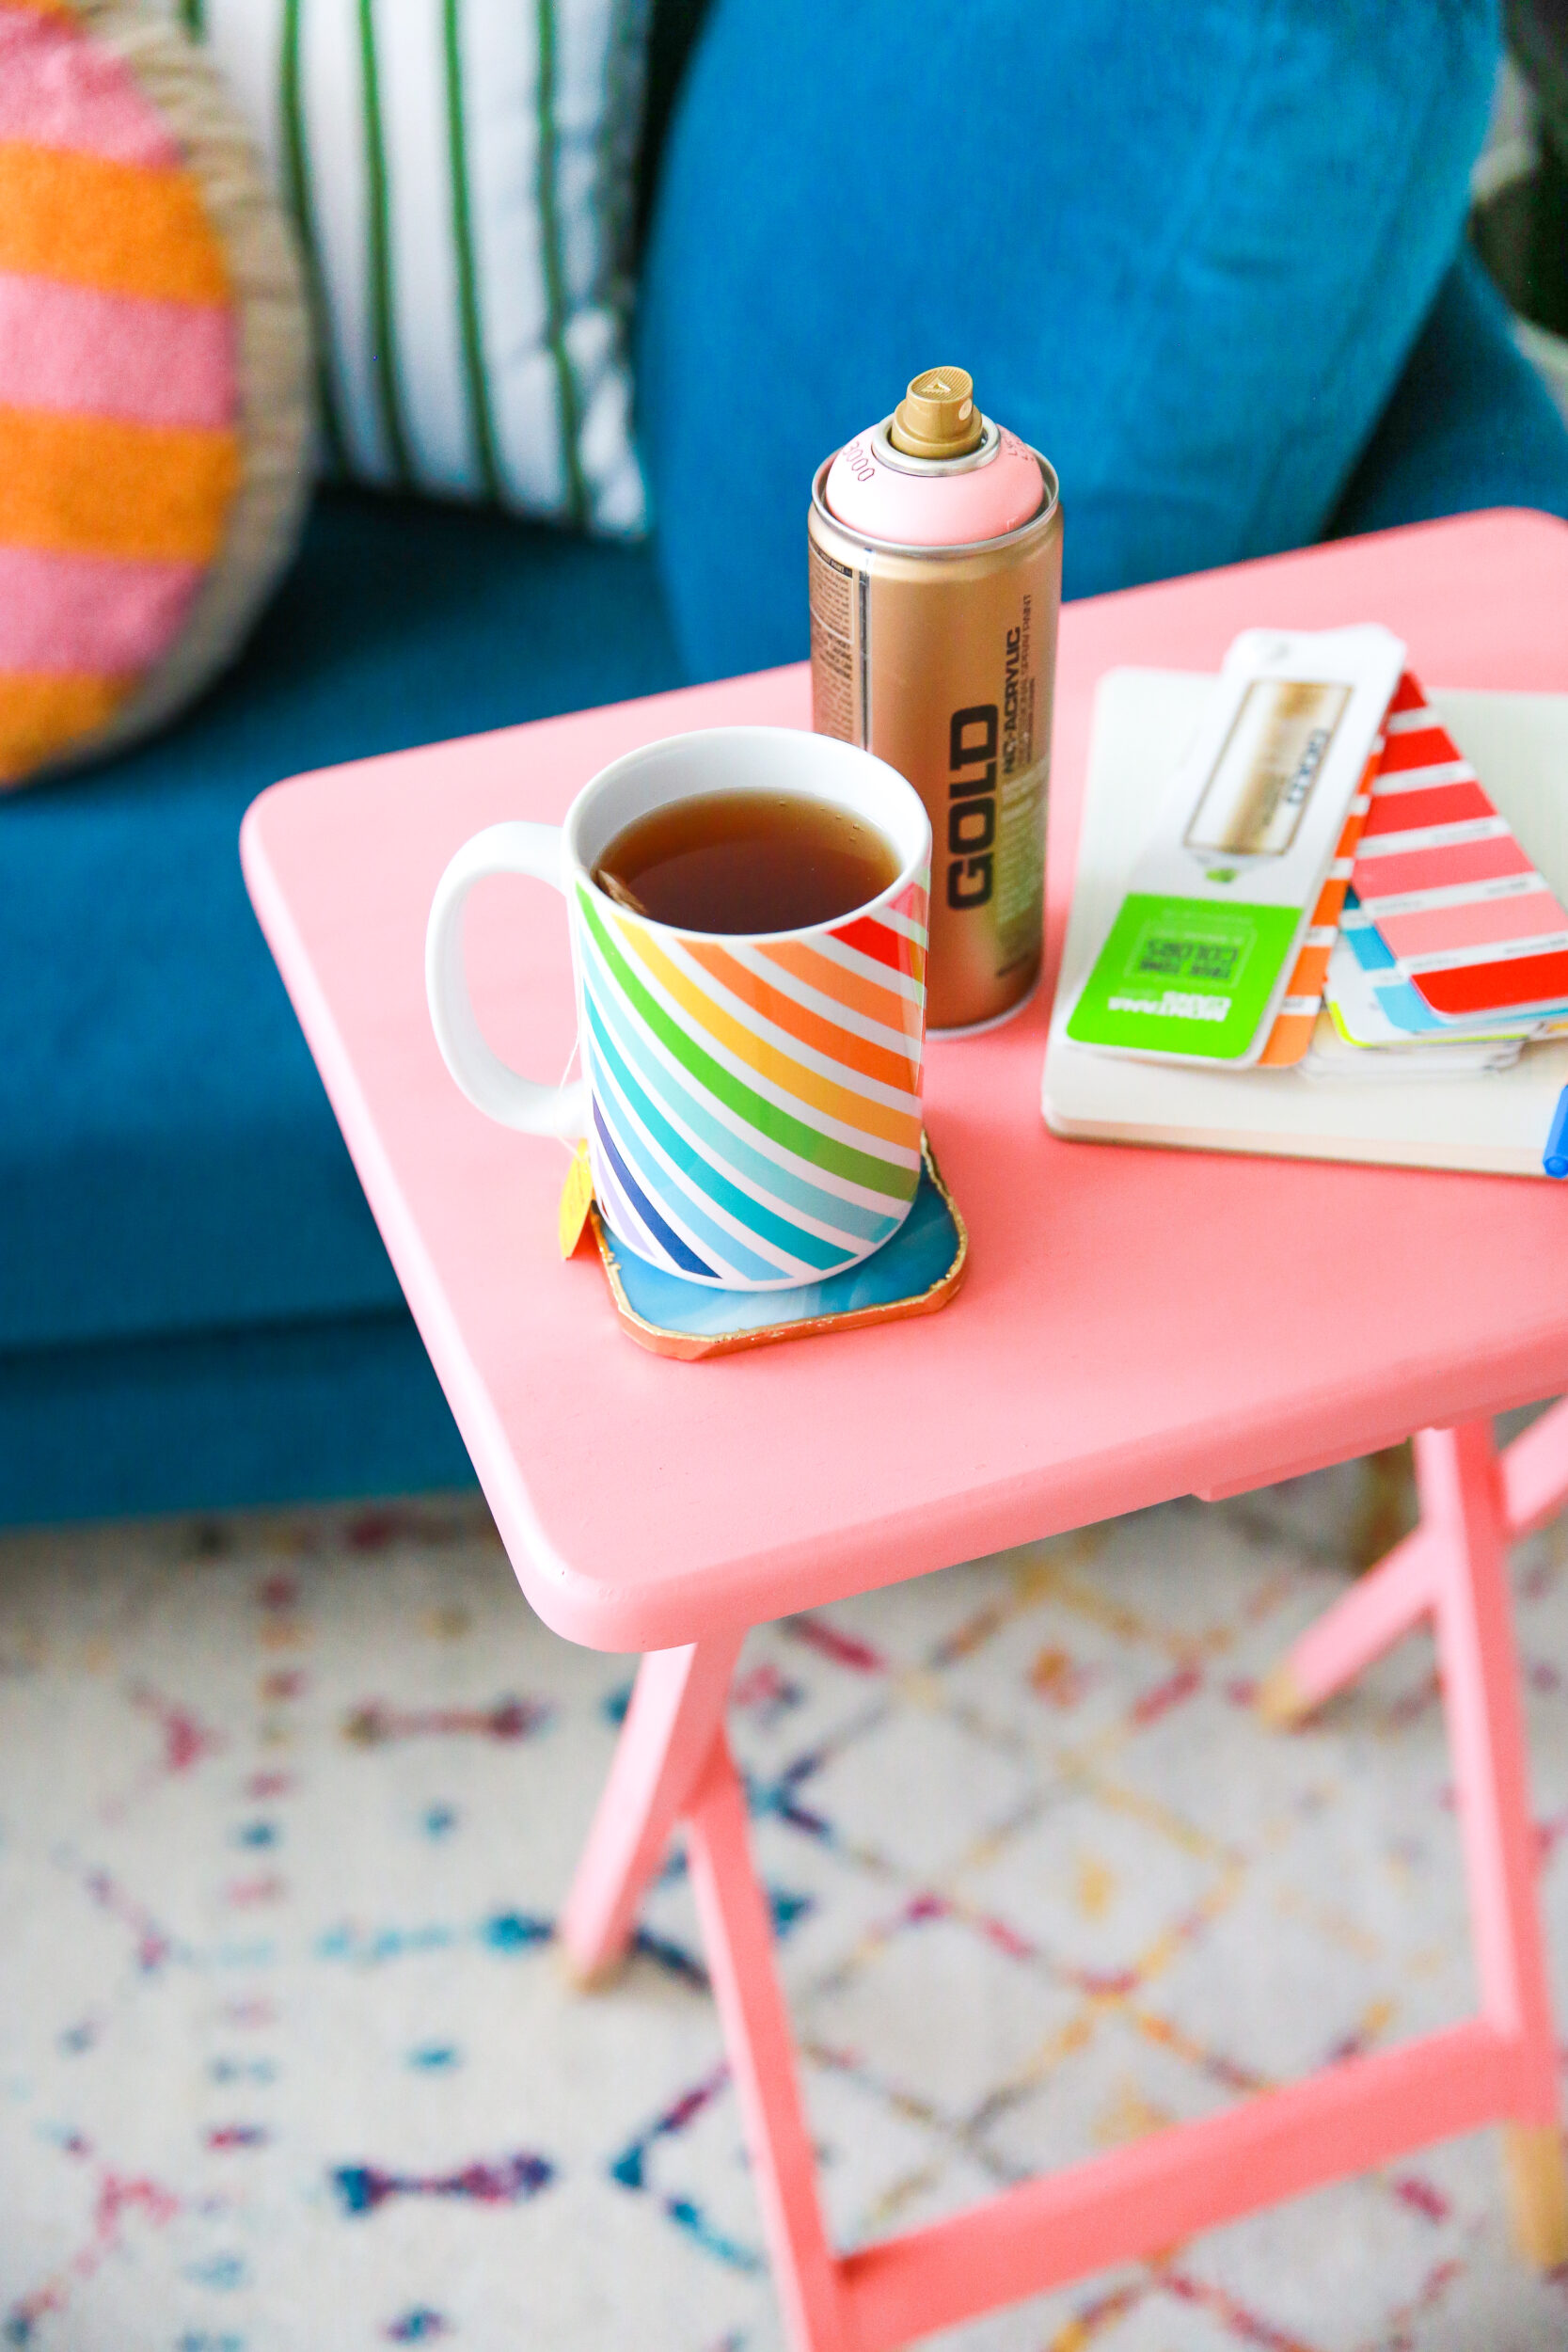
FOLD-UP TABLES TO EASILY PUT AWAY
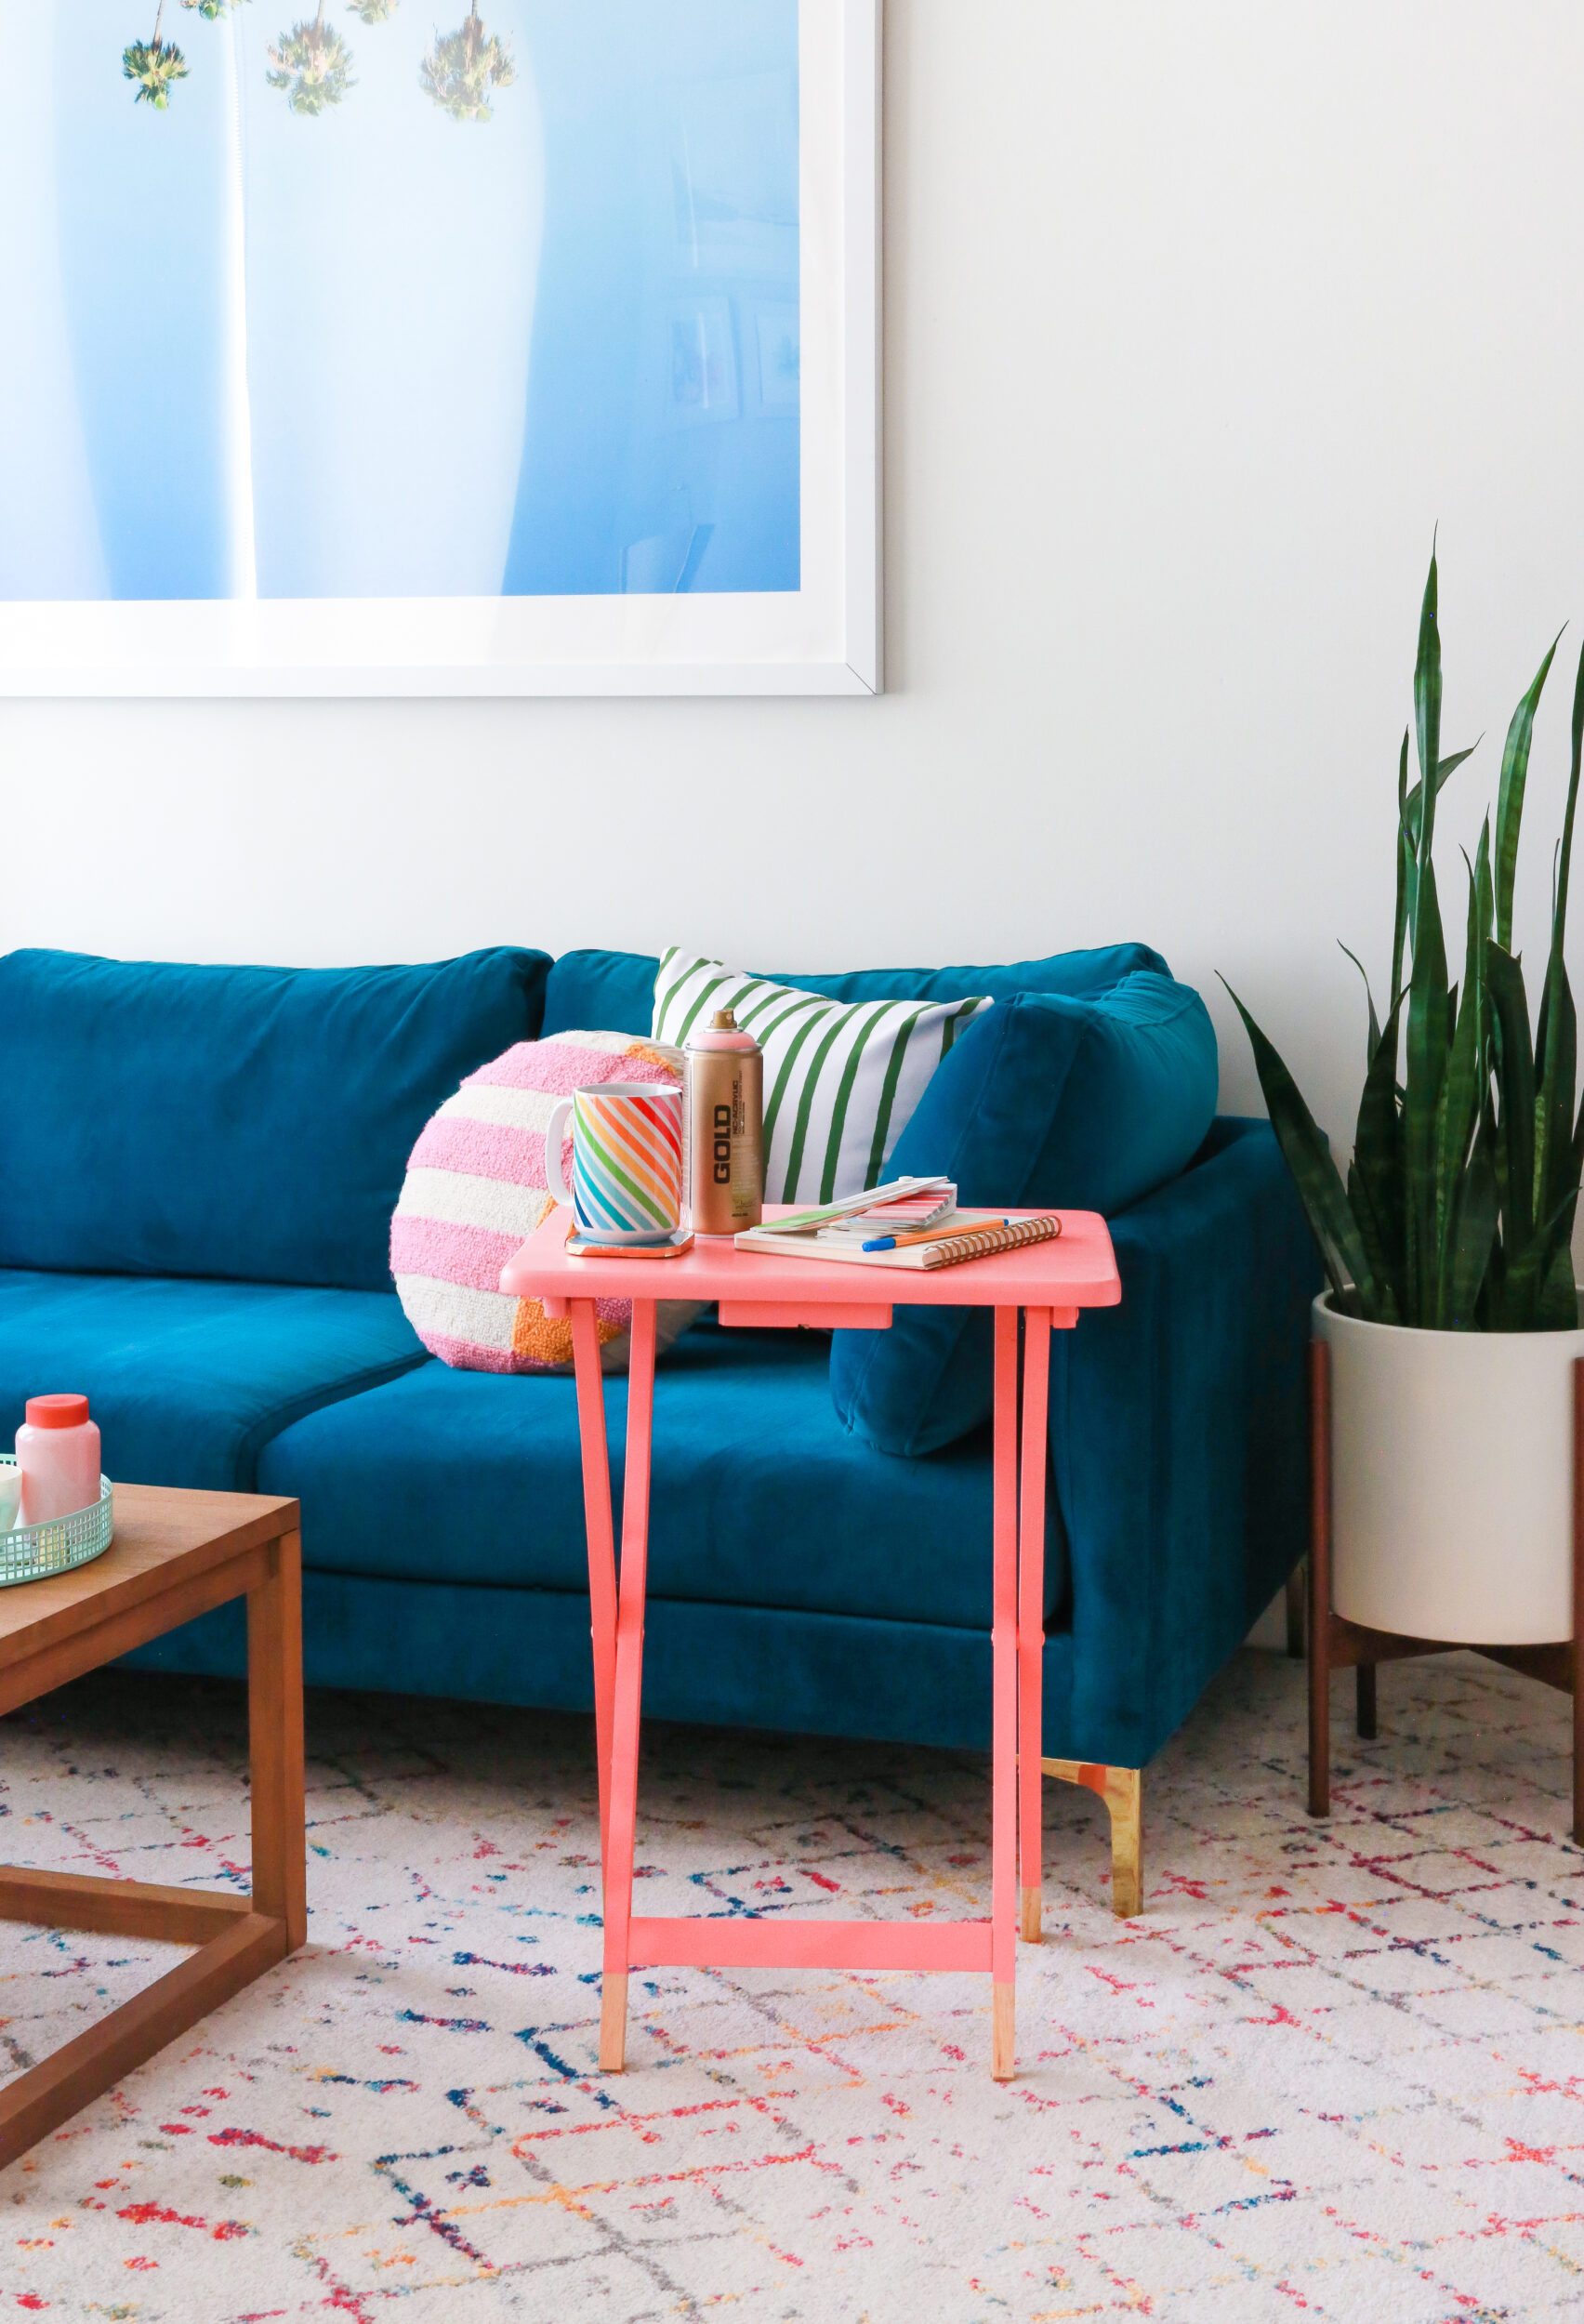
There is never a wrong time to have a TV tray. Why? Not only because you can put your laptop or magazines on them, but also because they double as cool side tables, bedside trays, or reading trays. As a bonus, you can put these small foldable tables away whenever they are not in use. This way, you could save a lot of space in your living room. Sound inspiring? Read on and see how you too can add the Pink and Purple Trays project to your next successful DIY adventure.
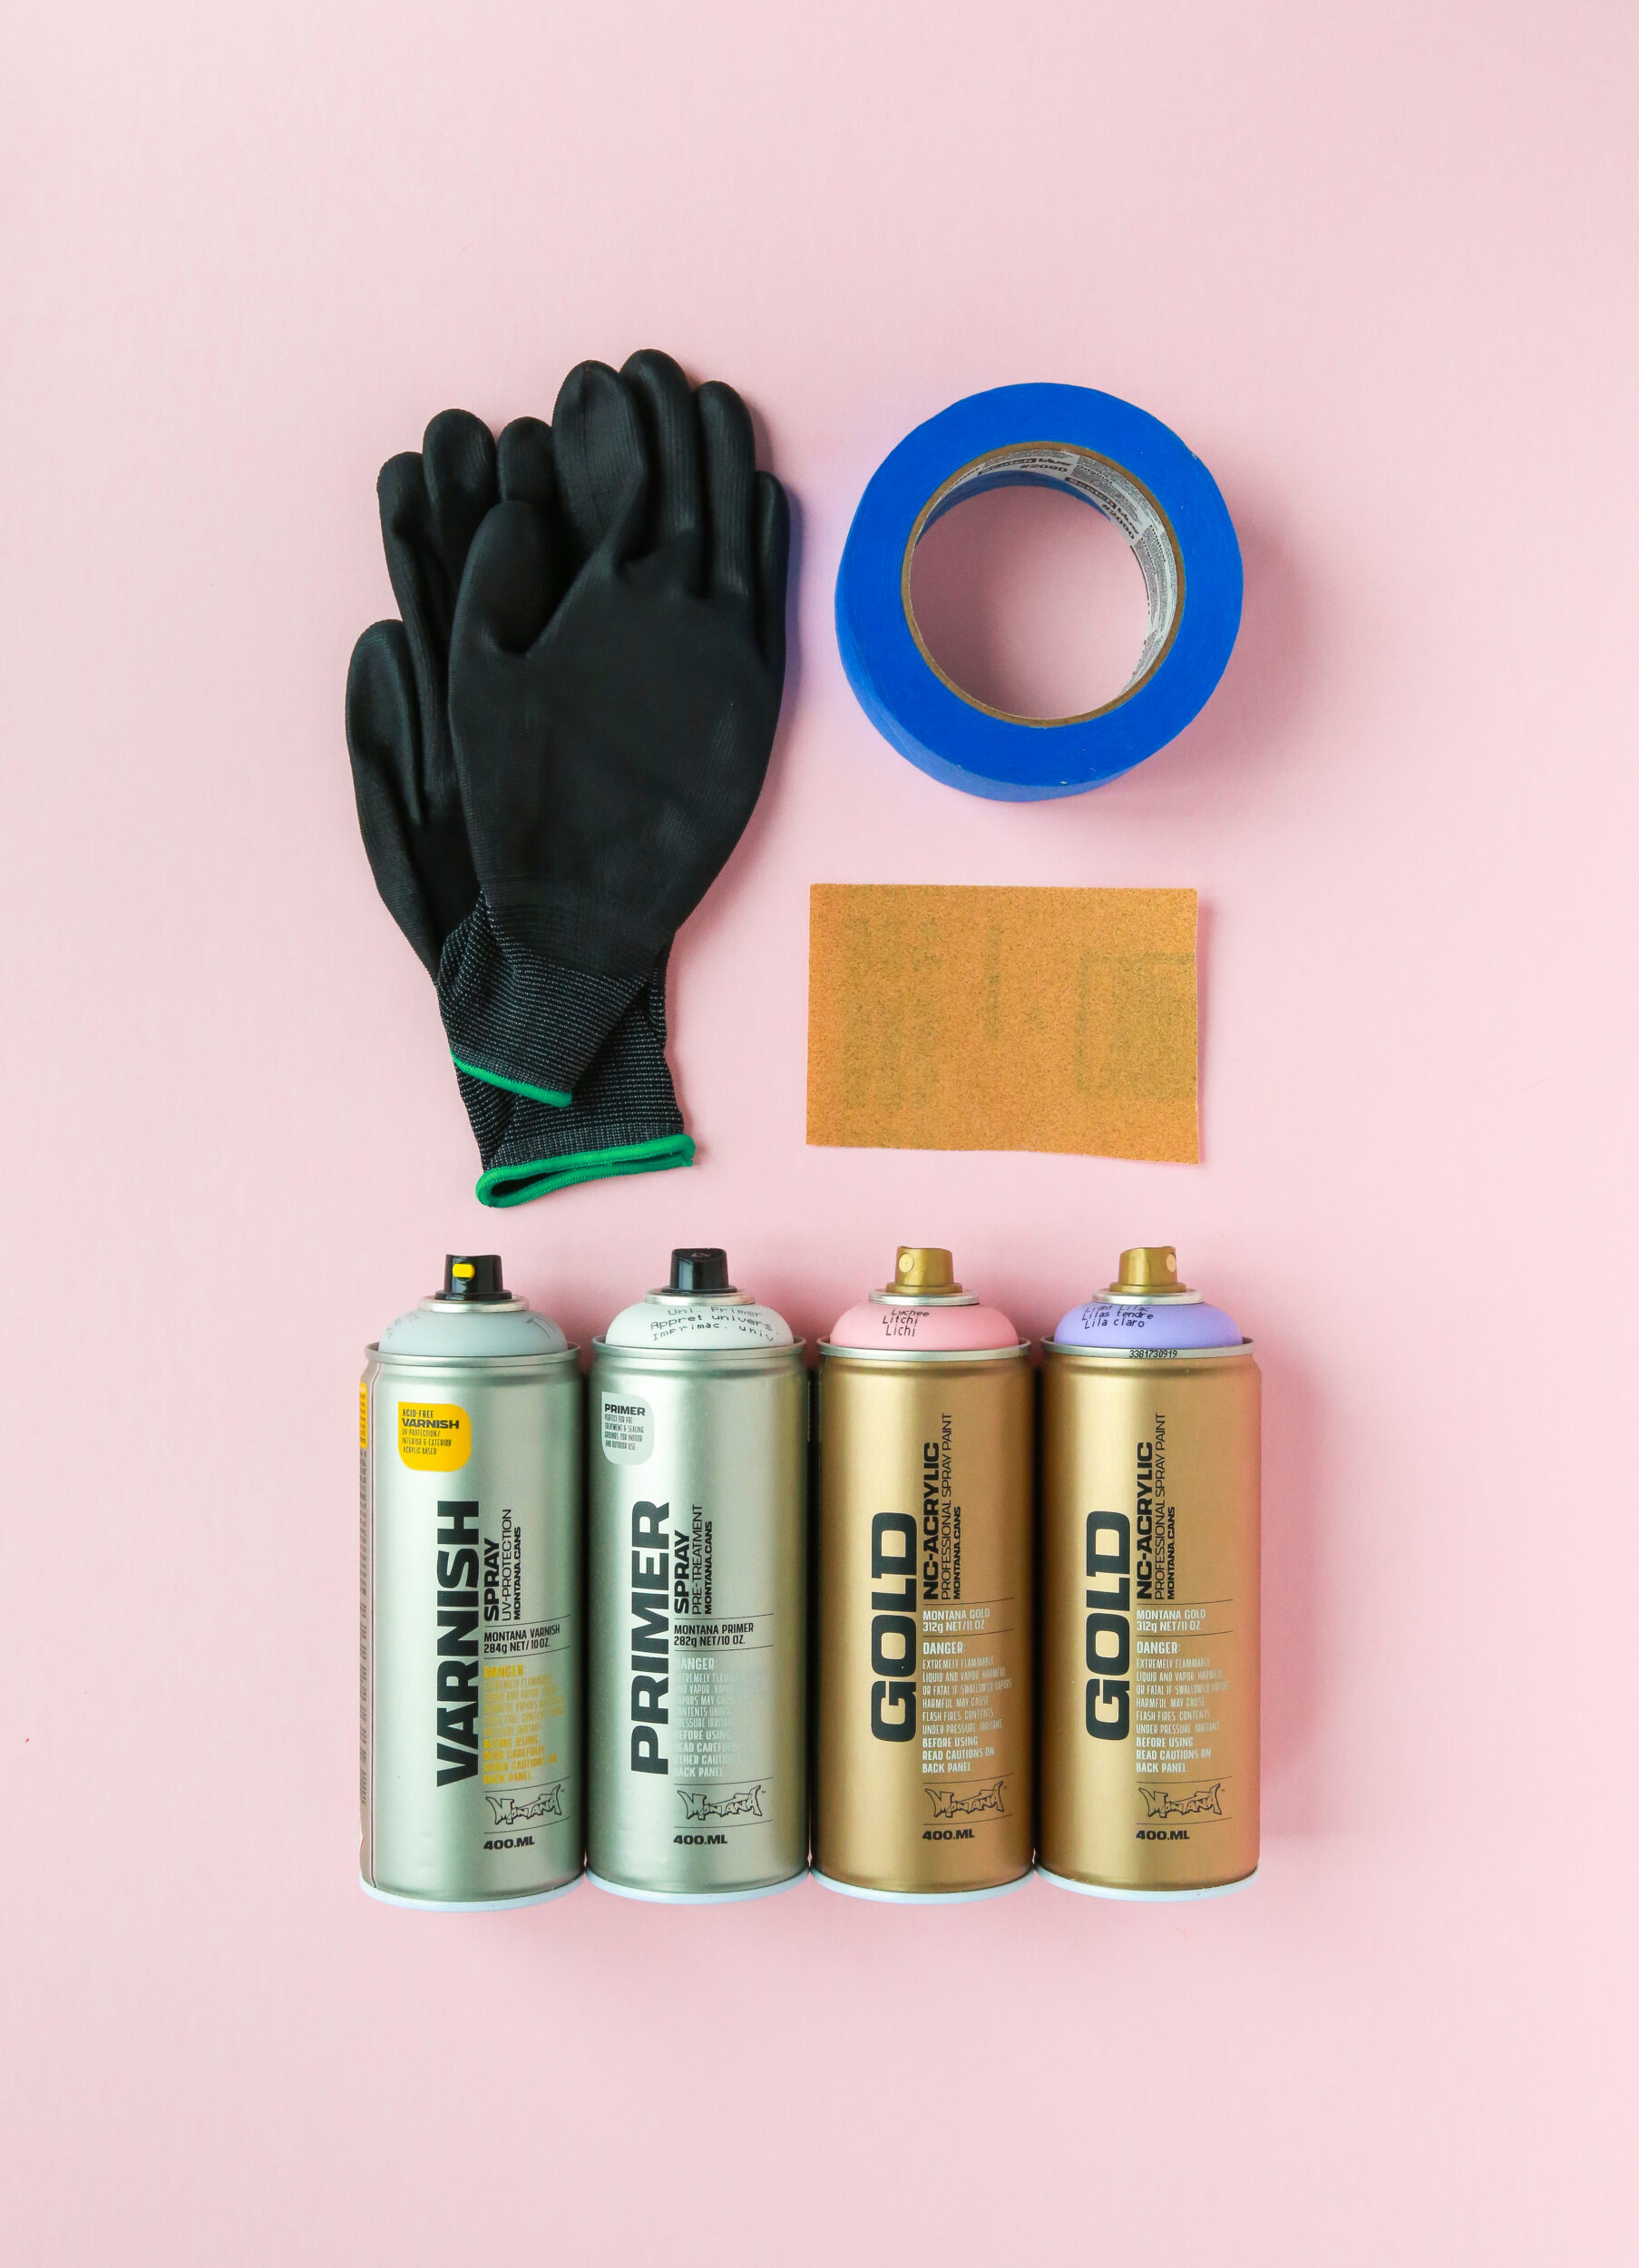
Materials Used
- Wooden fold-up tray
- Sandpaper
- Masking tape
- Gloves
- Mask
- Drop Sheet
- Montana Universal PRIMER
- Montana GOLD Lychee
- Montana GOLD Light Lilac
- Montana VARNISH Spray Gloss
HOW IT WAS DONE
After struggling with a beautiful but small sofa table for too long, it dawned us, that adding a piece of furniture might be the solution. We found these cute fold-up tables that you could even put away if they were not currently in use.
And being made of wood, Montana GOLD was the perfect tool for the job. If you don‘t have such a tray, you will be able to find them in furniture stores, Ikea, and some bigger hardware stores. And if you have time, look for an up-cycling possibility at your next yard sale outing.
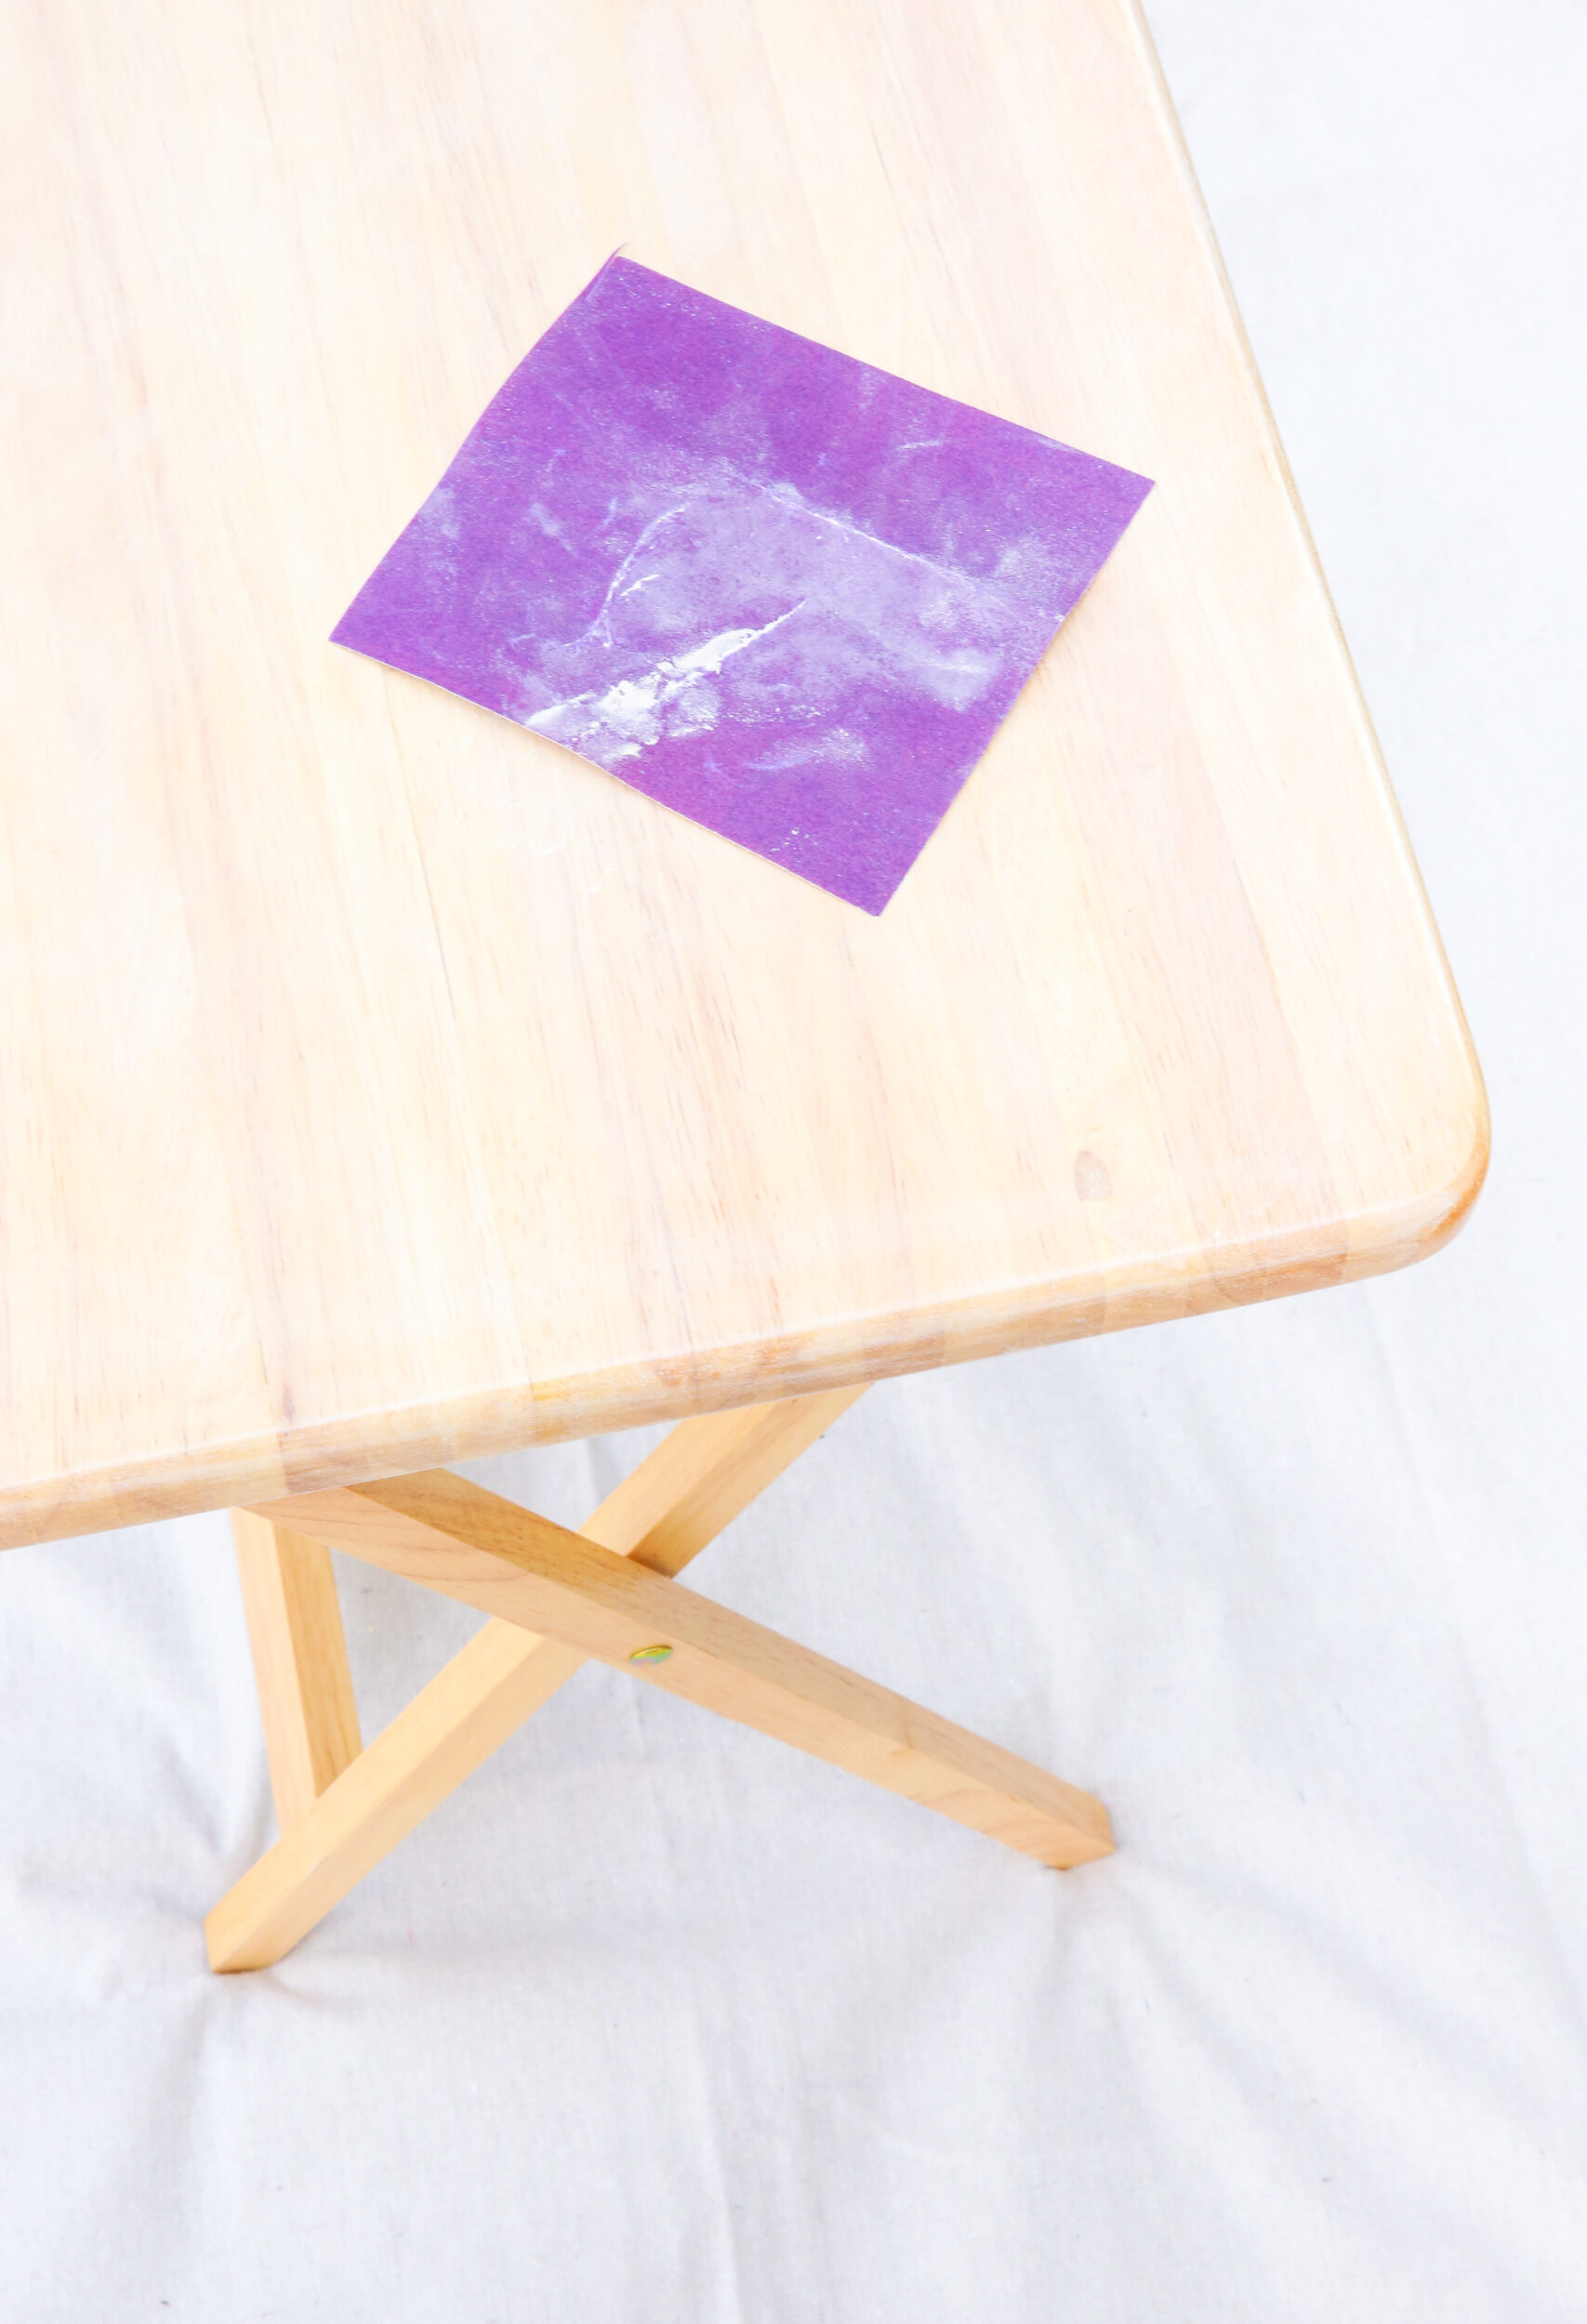
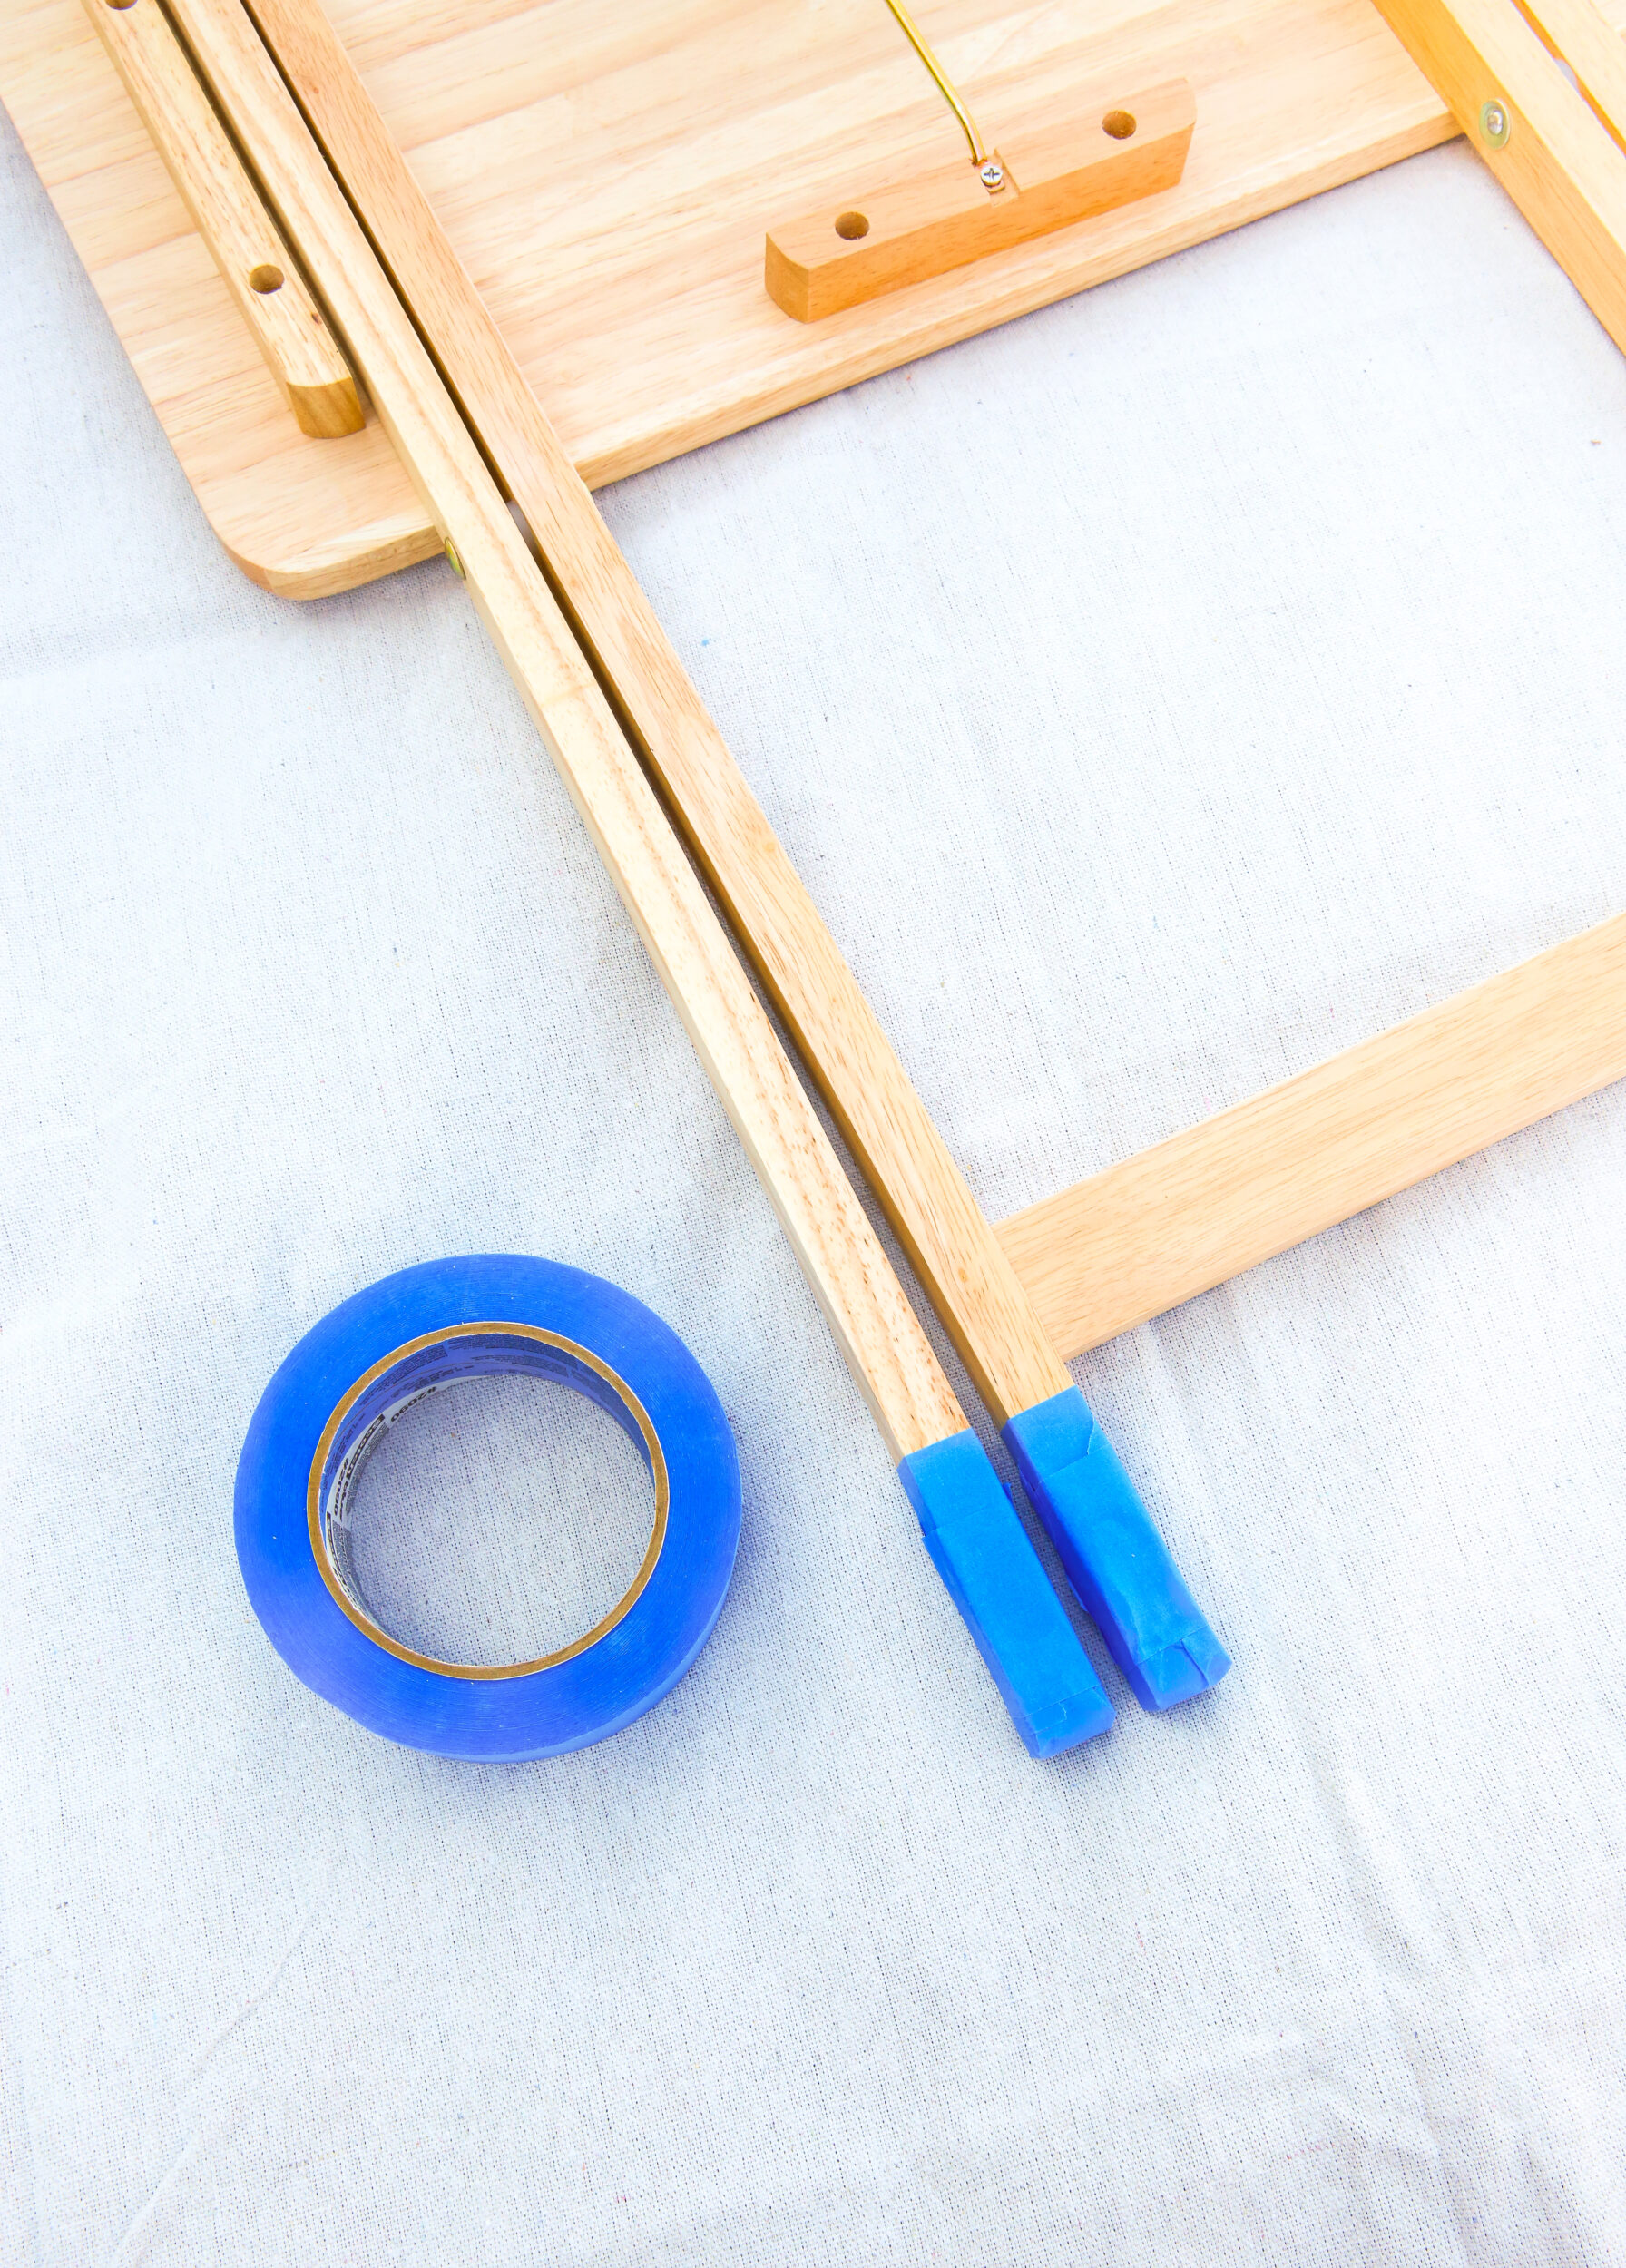
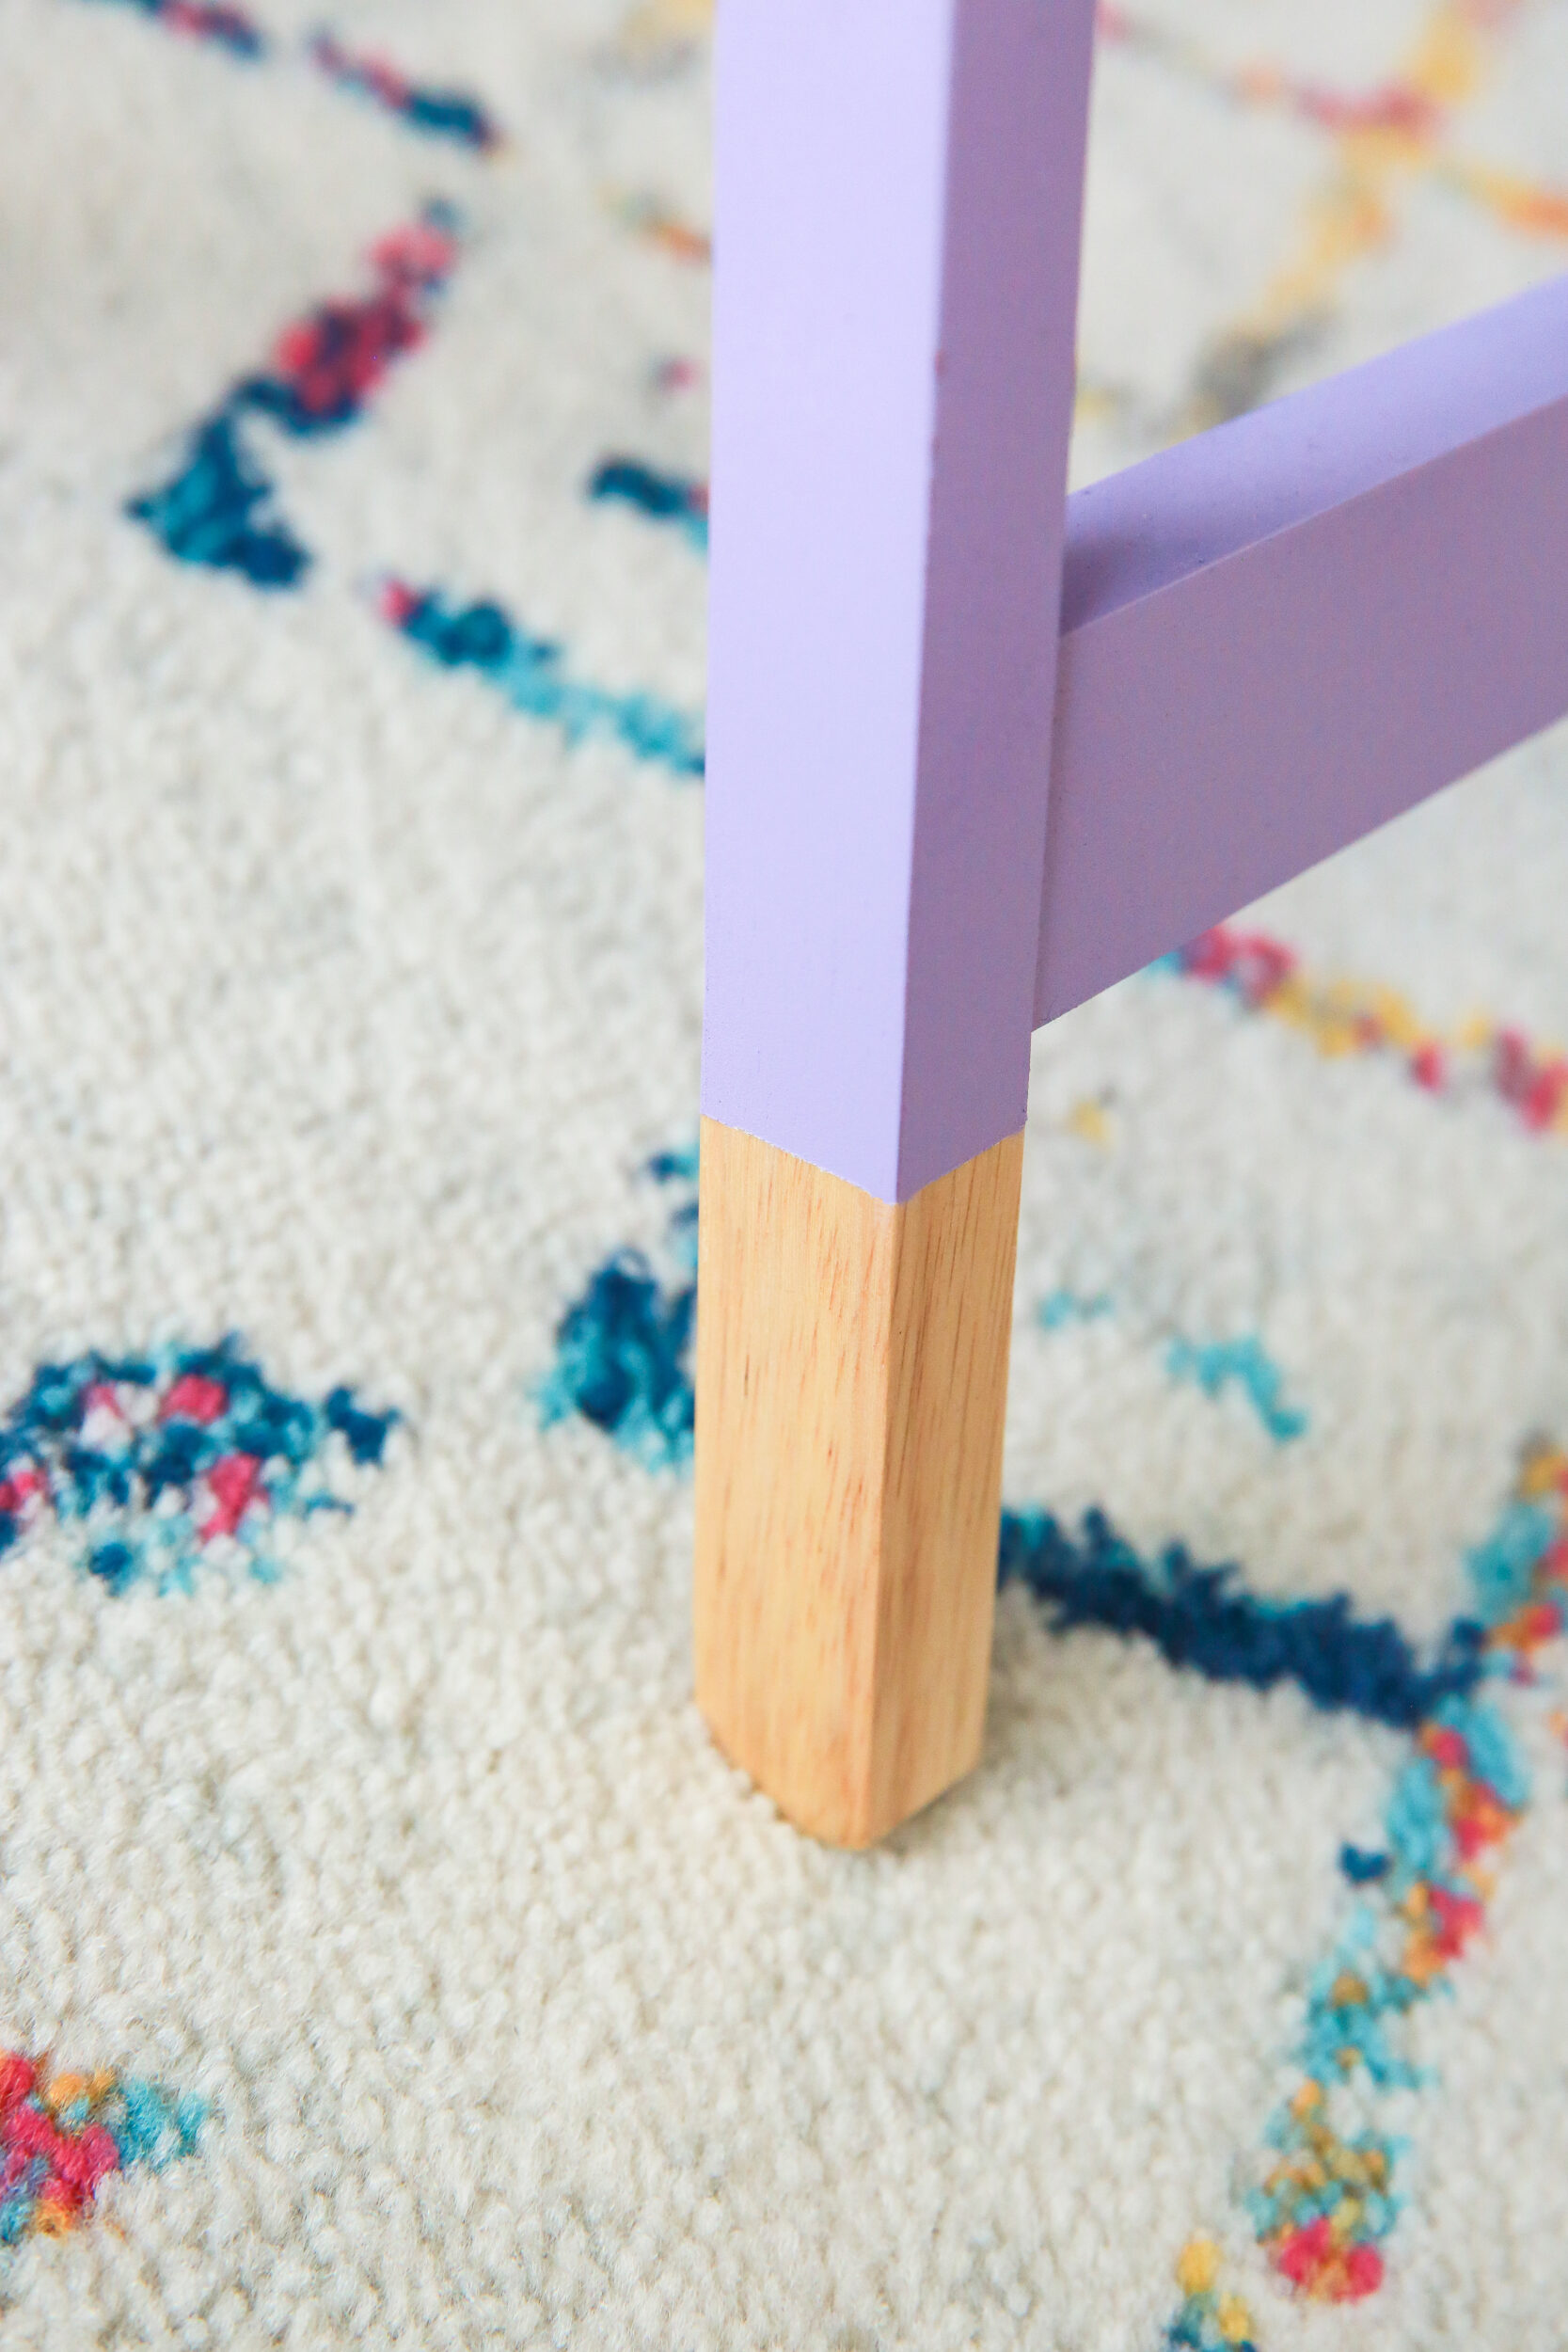
With some fine sandpaper, lightly sand back the surface of the wood so that it smooth and ready for painting. If your tray was covered in an oil-based lacquer, it is best if you can sand it down to the natural wood of the tray. Once this is done, clean your tray, freeing it of all dust, oils, or dirt. This is important as you now need to mask off the bases of the legs of the tray. If any dust is still left on the legs, the masking tape will not stick properly. Pick the height you think looks best on one leg, then apply the tape at the same level on all legs. Make sure no wood is exposed.
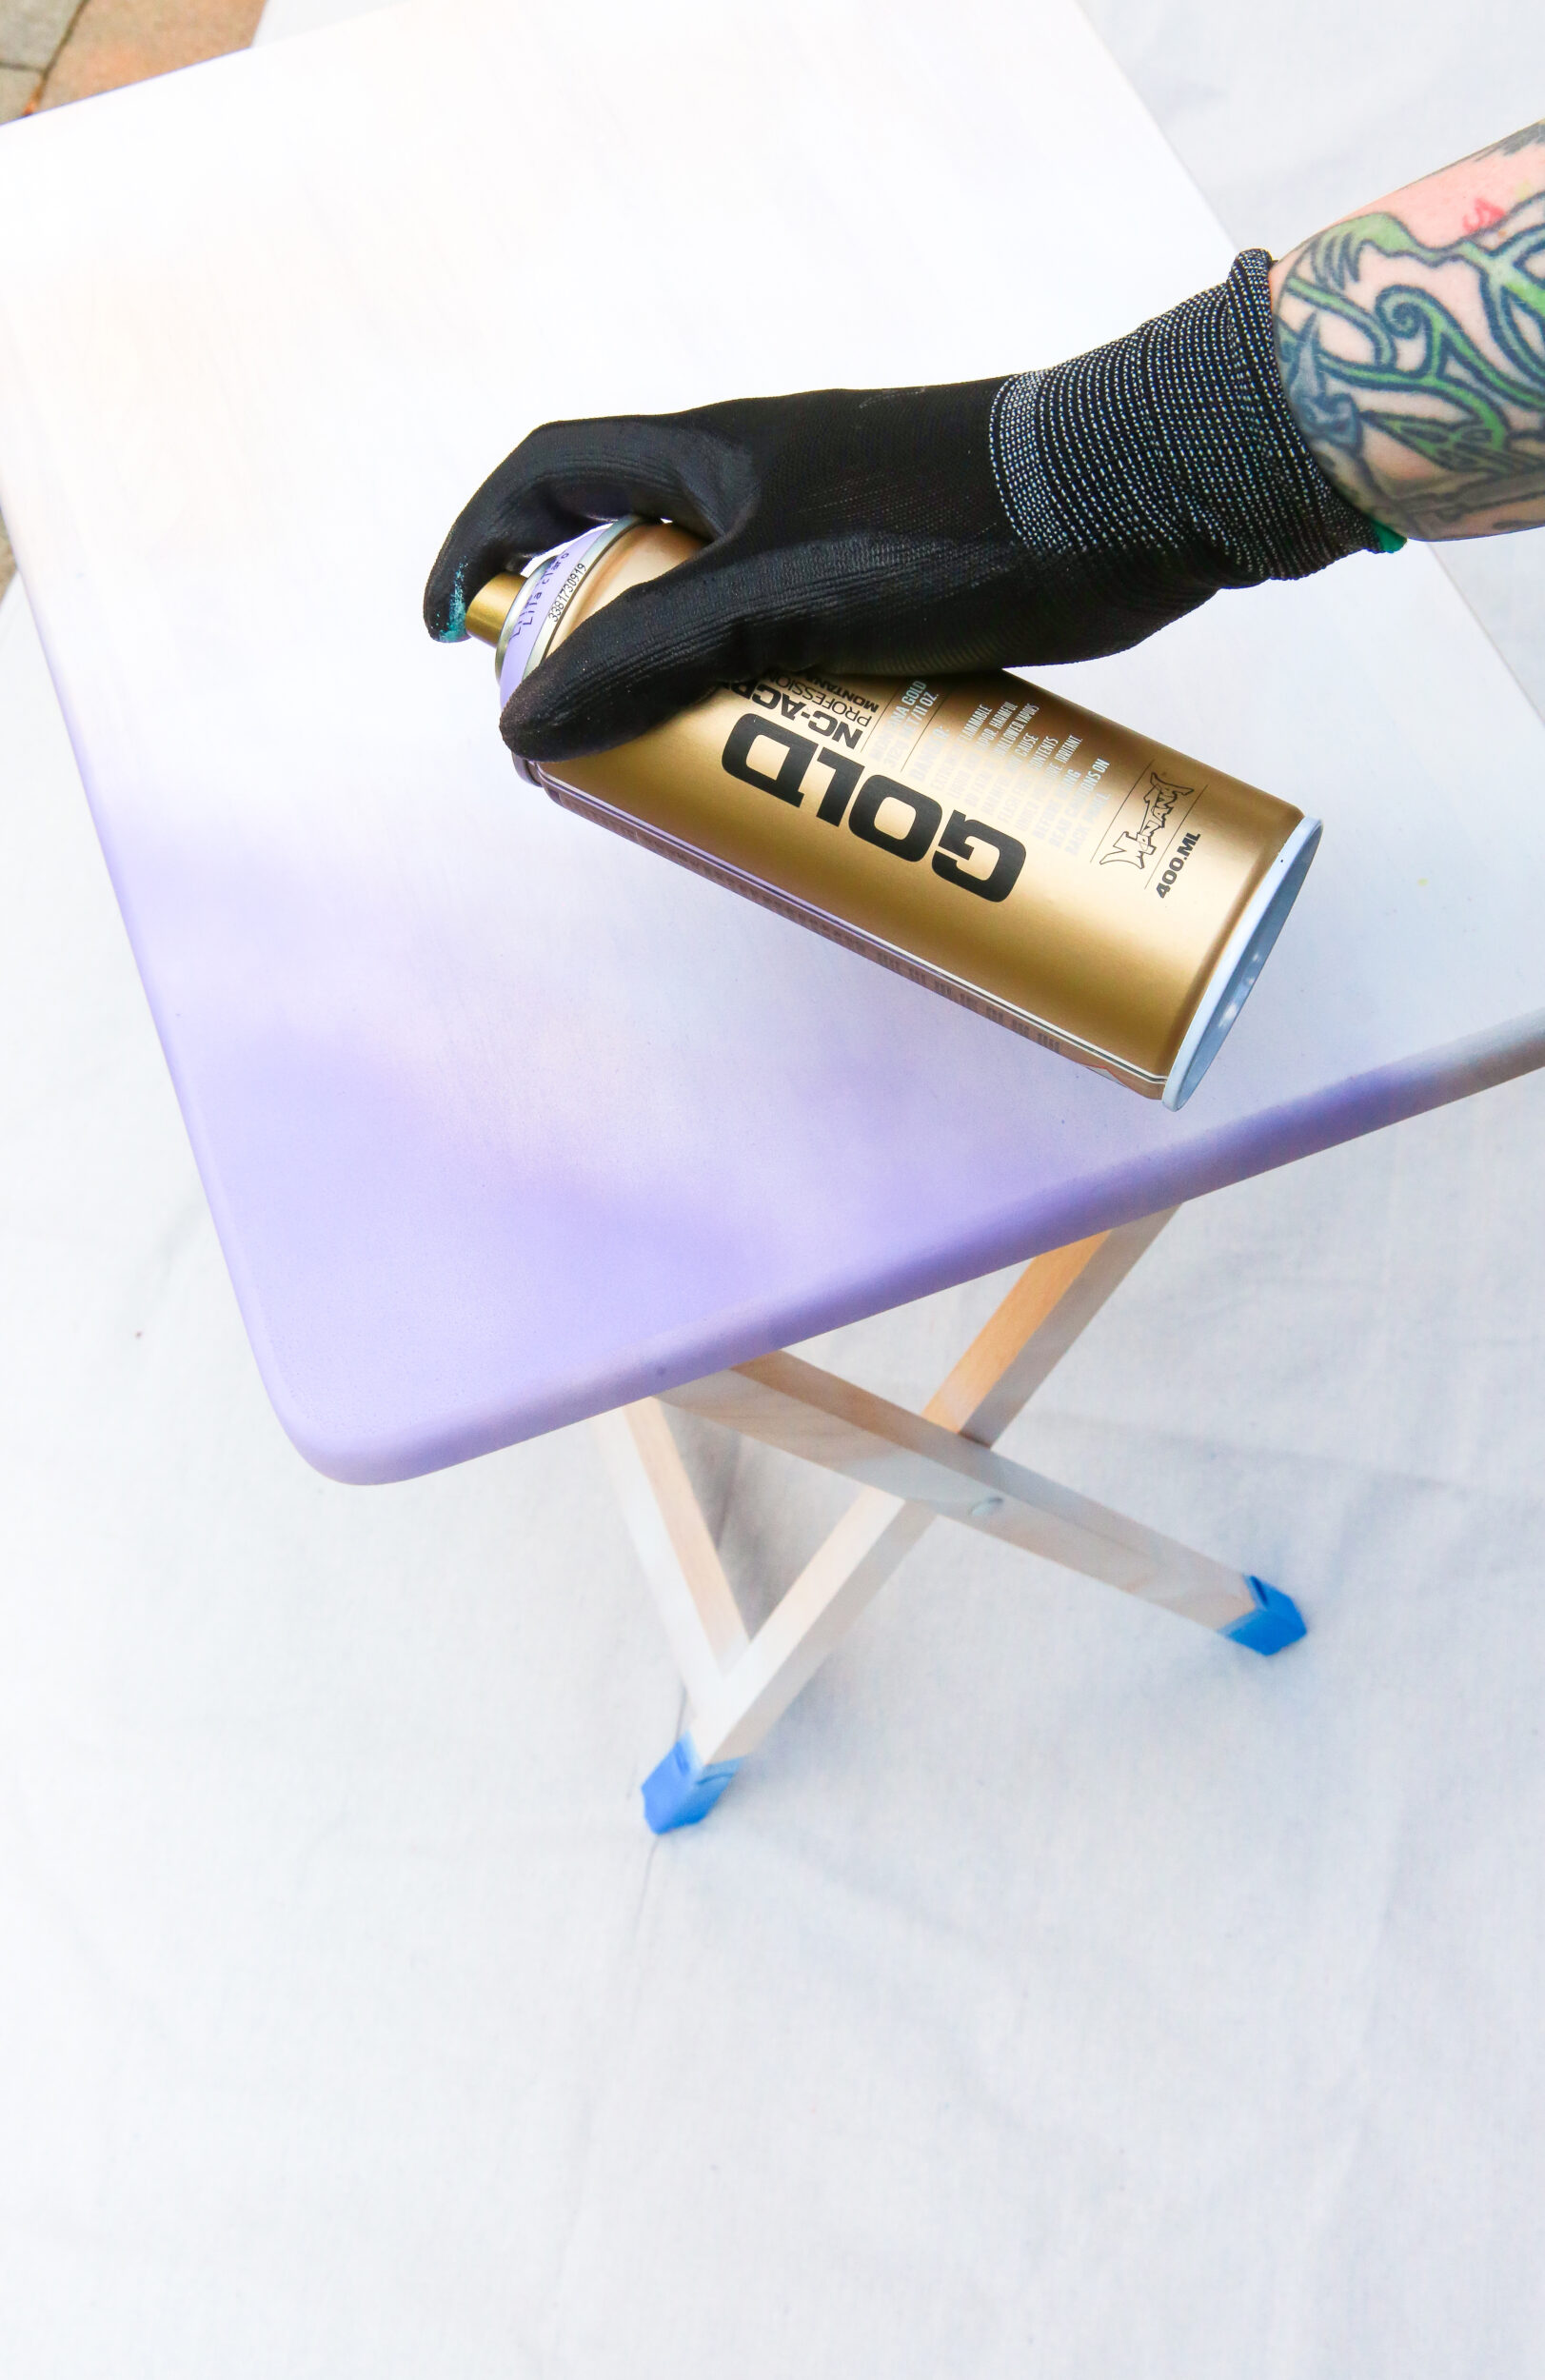

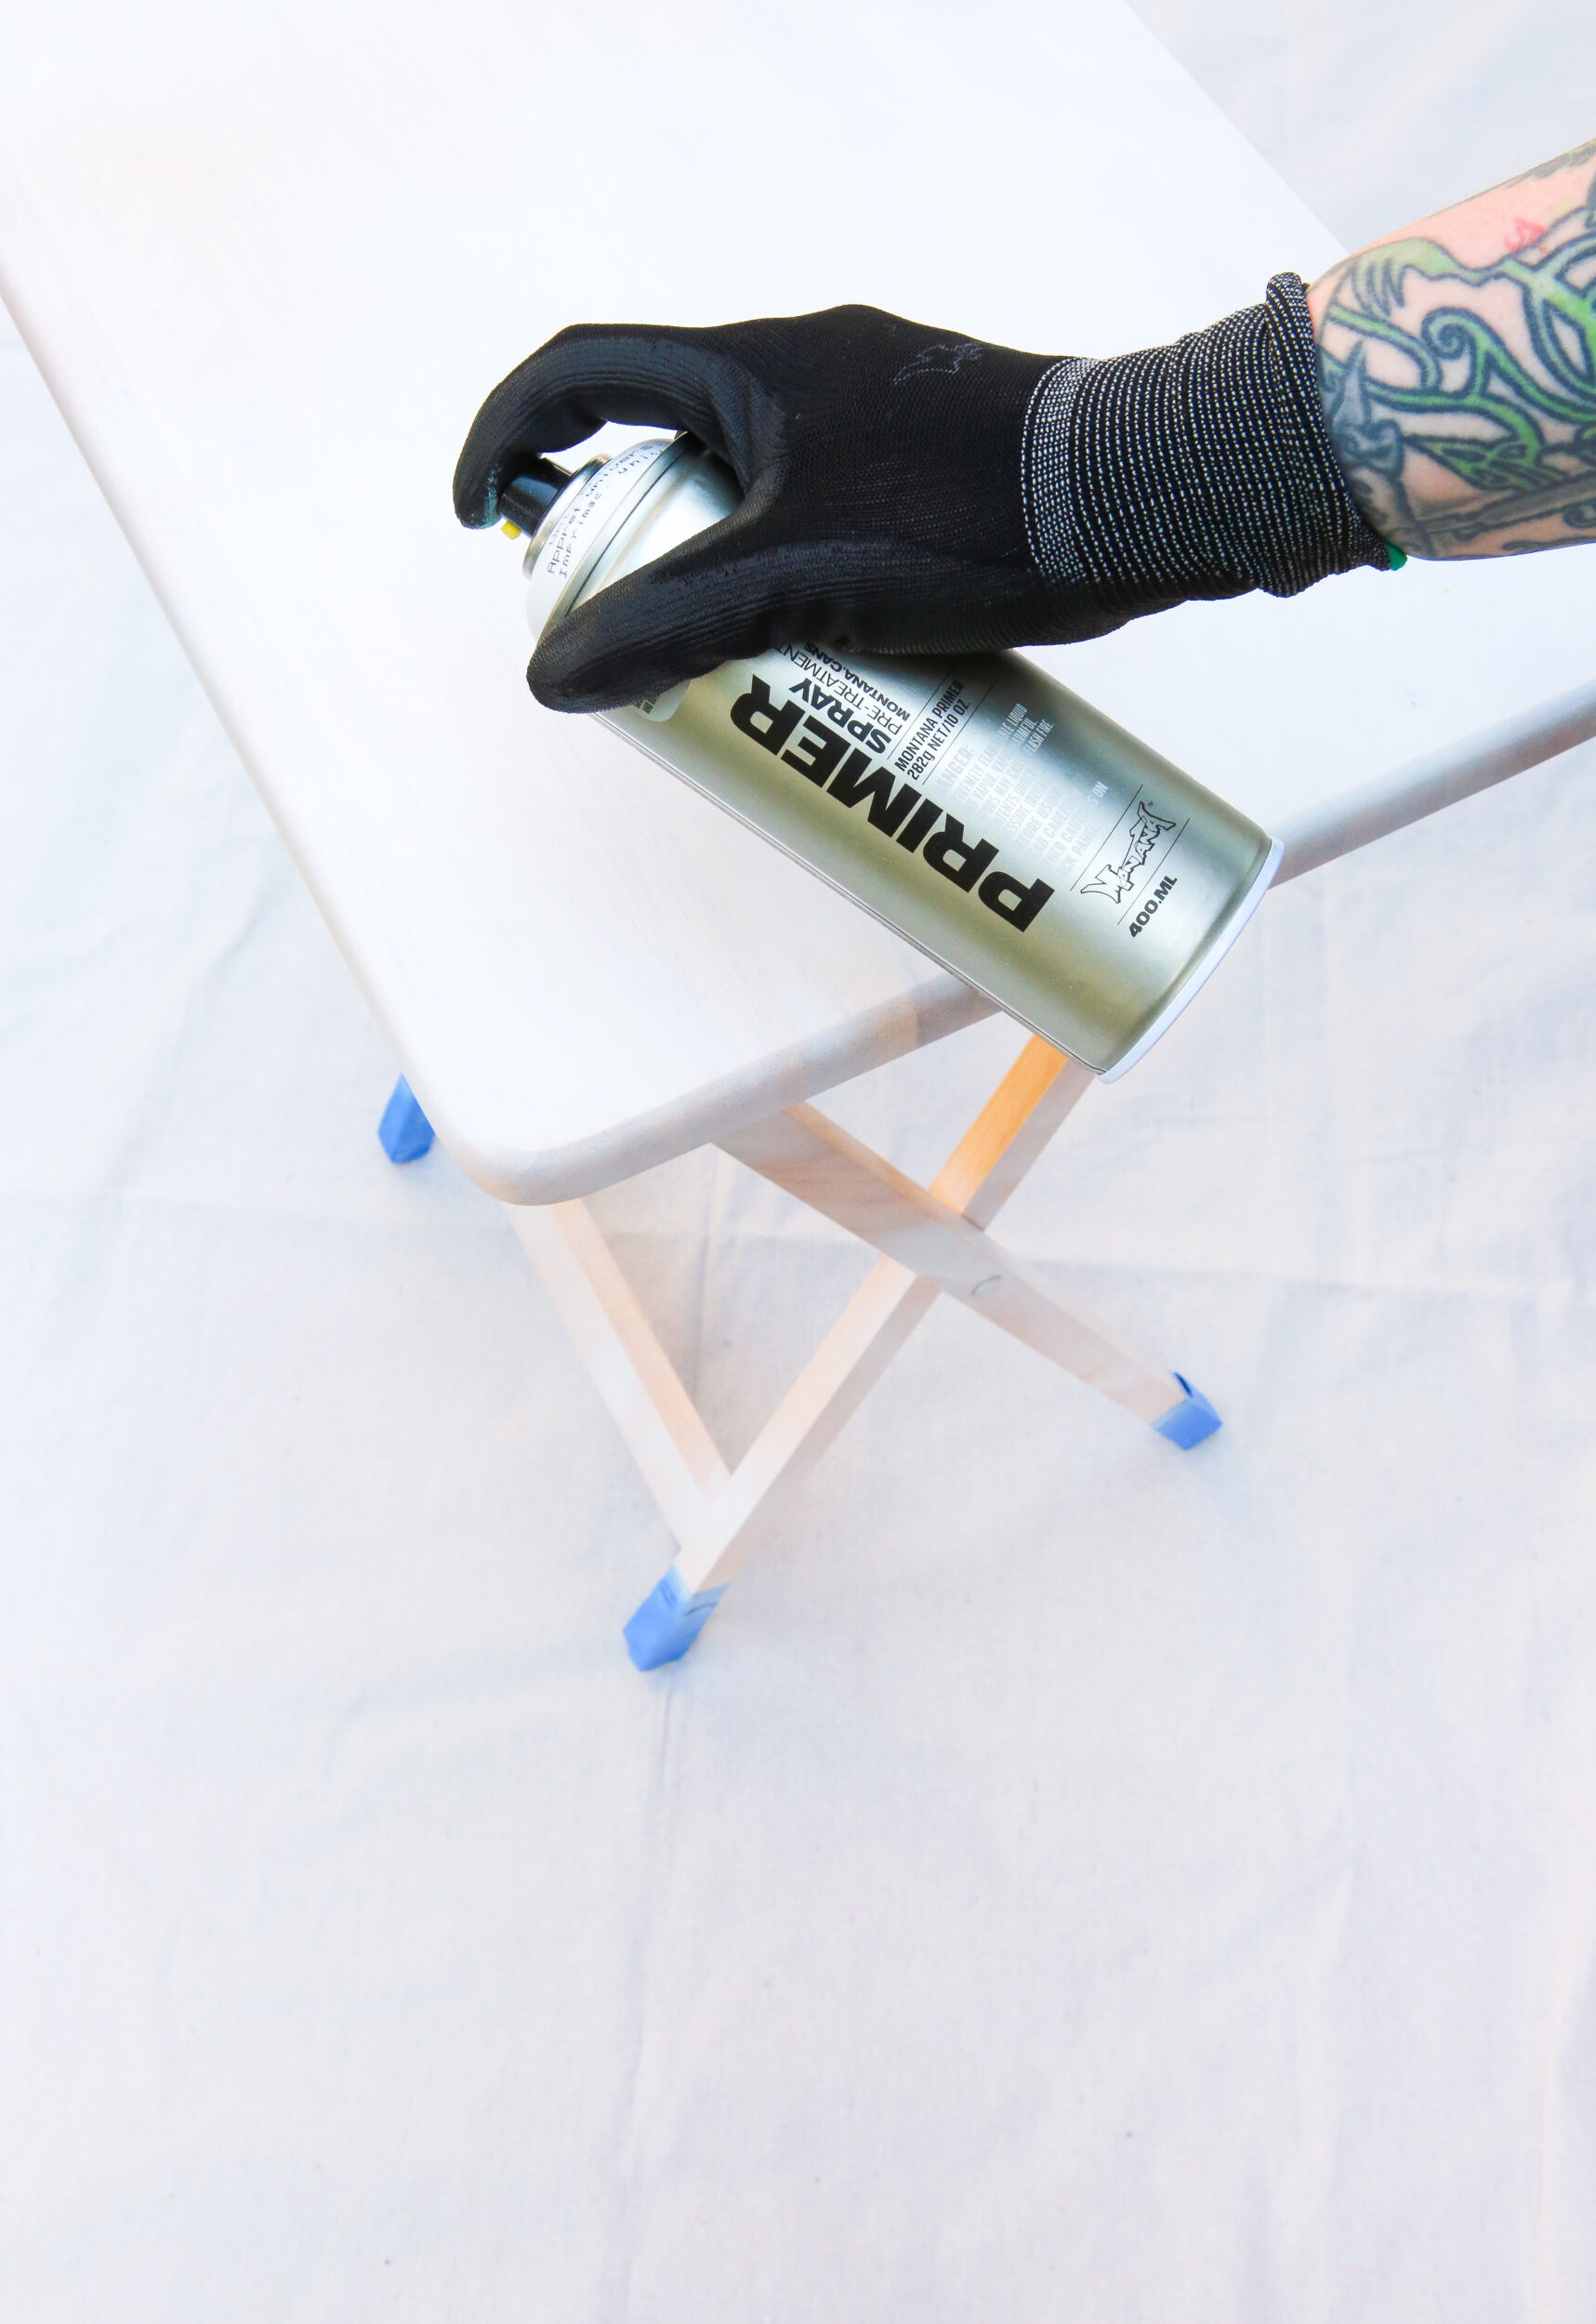
With your painting space prepared and your mask and gloves on, it is now time to get to the fun part. Painting! Having shaken your Montana GOLD cans vigorously for 2-3 minutes, you will now hear the mixing ball moving freely, telling you it is time to remove the safety ring from under the nozzle and do a test spray away from your tray when applying it. Starting with your Montana Universal PRIMER, in soft, even, side to side strokes, spray your tray from a distance of about 15-20 cm.
Allow to dry and give the tray another light sanding and clean in preparation for adding color. Then starting with the color of your choice, apply thin even coats in the same manner as before. You can apply further coats when dry apply as desired. We chose to stick to one color for the whole tray to keep things simple and to build on the feature of the natural wood on the tray‘s feet. Take a moment, step back, and admire your tray. It will already have a new lease on life. You can now remove the masking tape from the tray‘s legs before the paint is completely dried, peeling downward away from the color you have just applied.
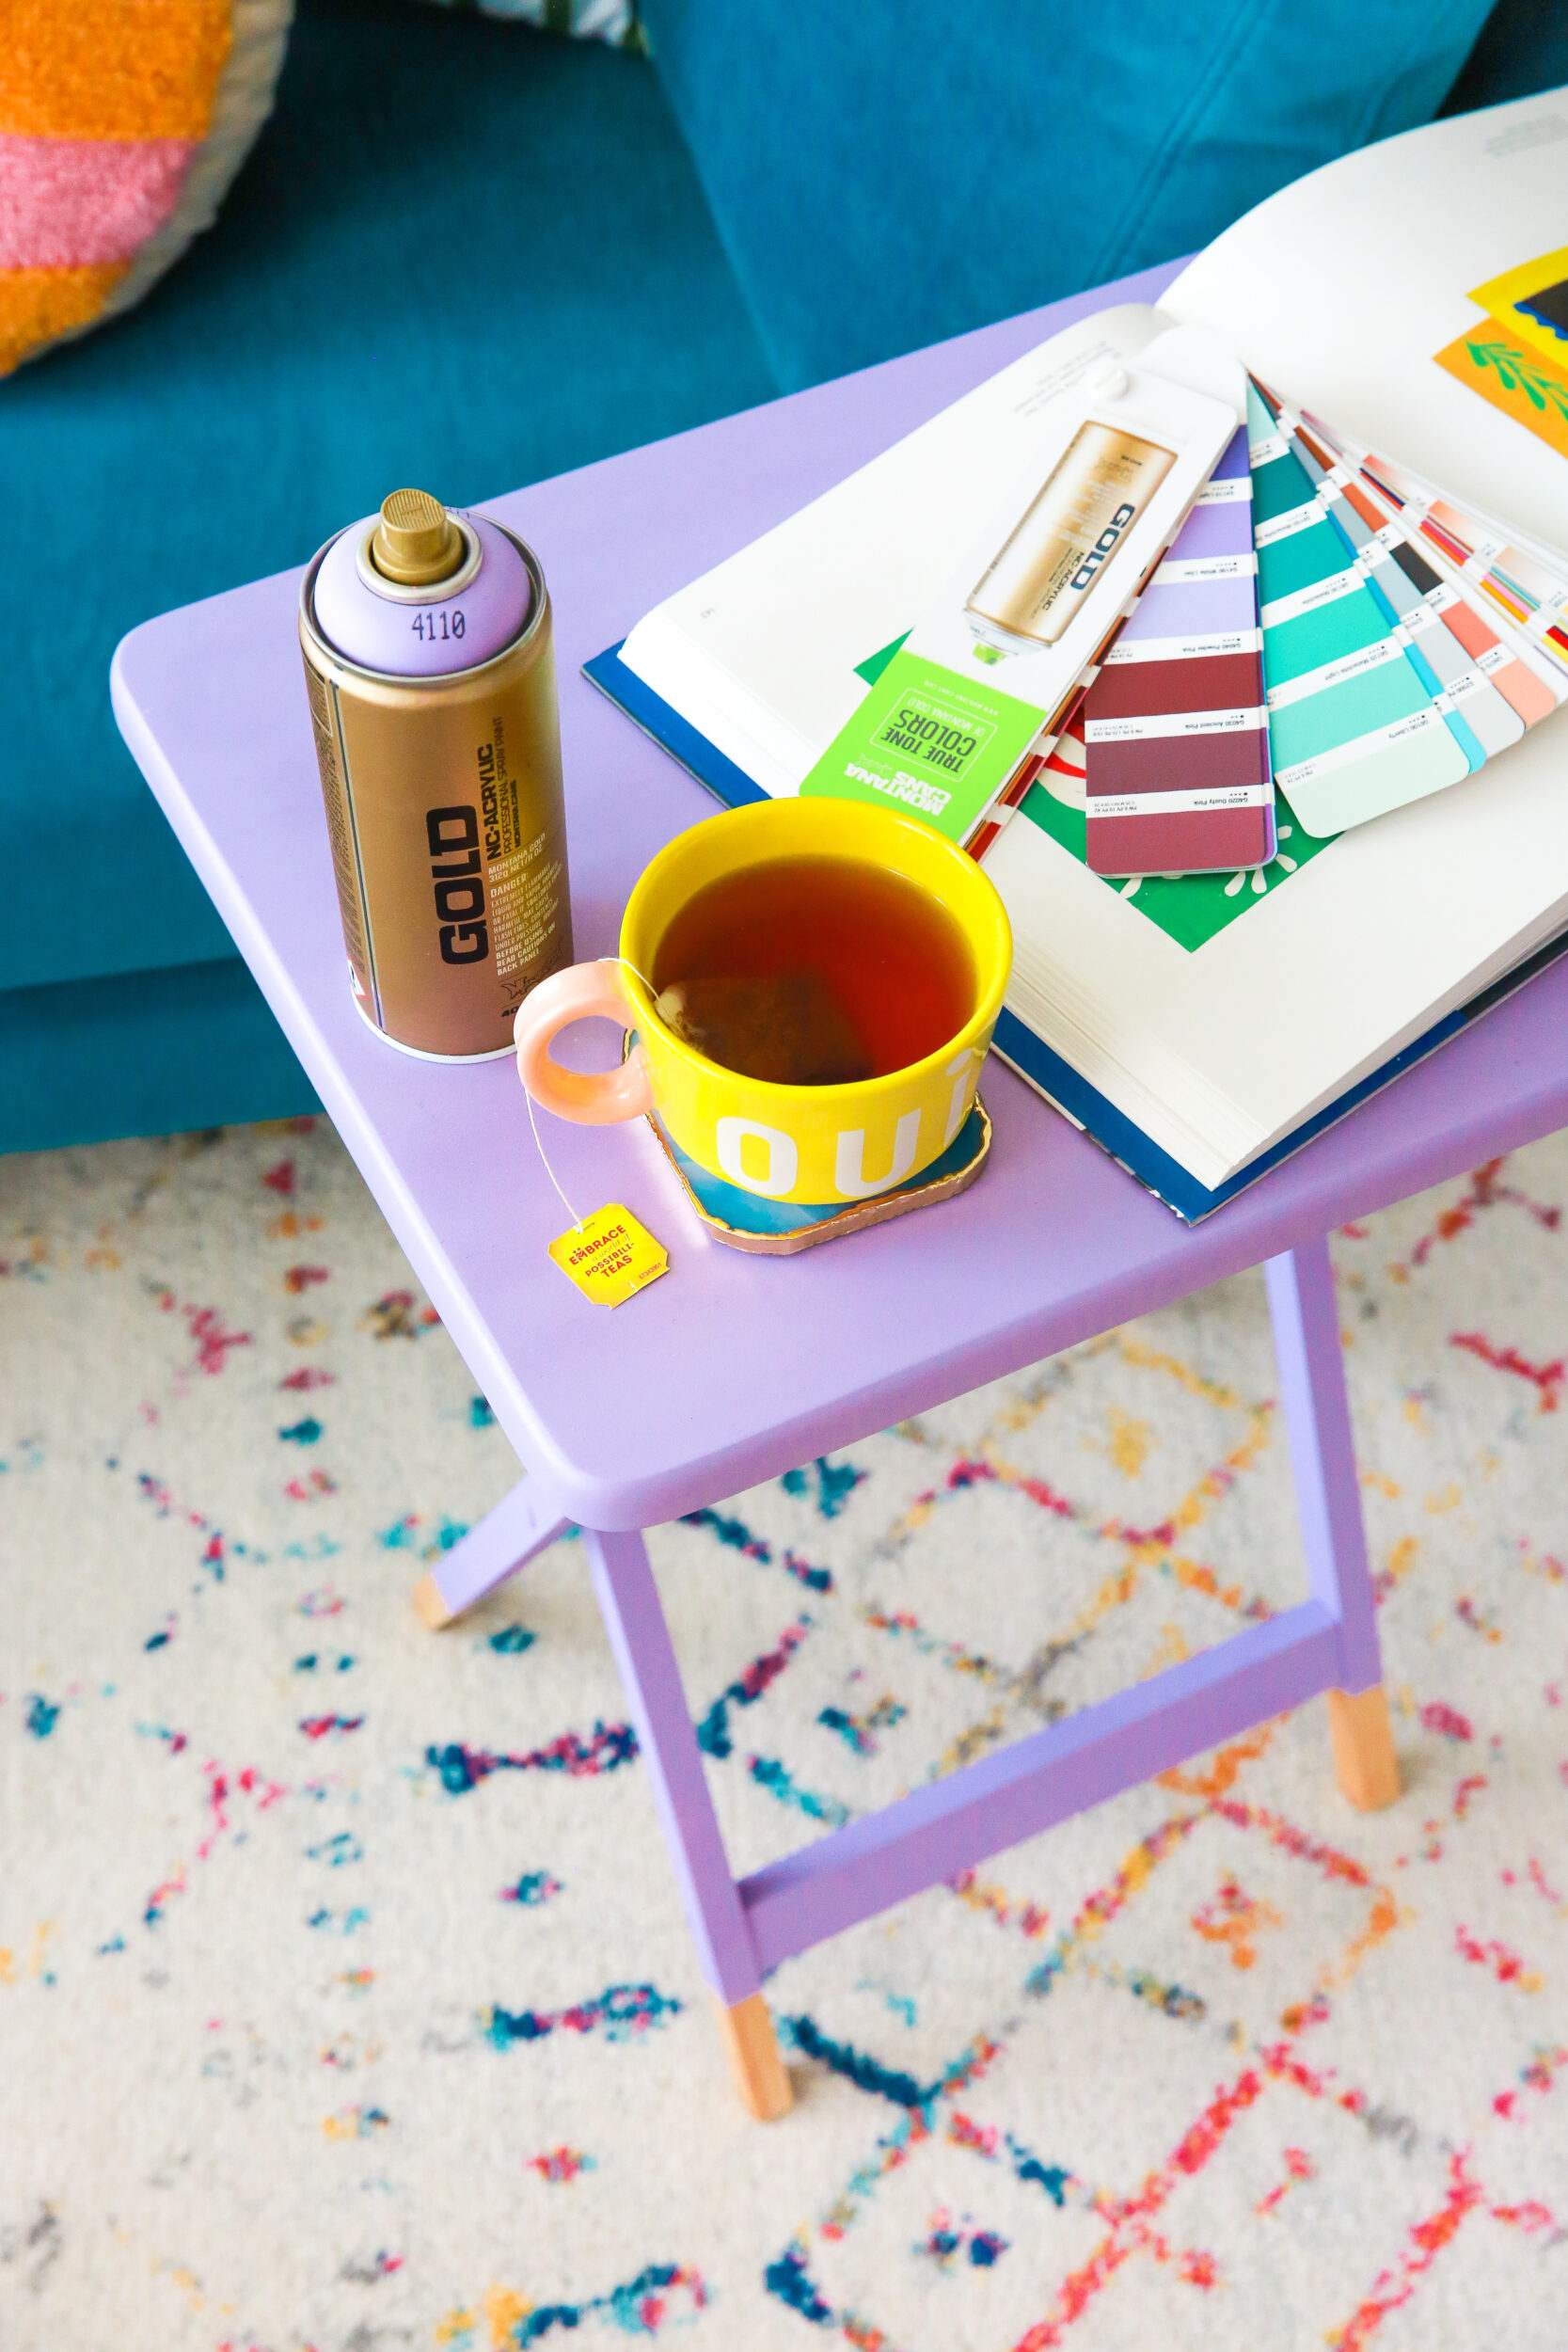
Once the tray has had the chance to dry overnight, you will know which Montana VARNISH finish is right for you. We chose Gloss, not just as it looks classy, but it also made the tray more durable against things like stains from the bottoms of coffee cups. Applying varnish on the pink and purple trays is done in the same technique as your color. Slow, sweeping strokes, from side to side, applying the paint evenly and thinly.
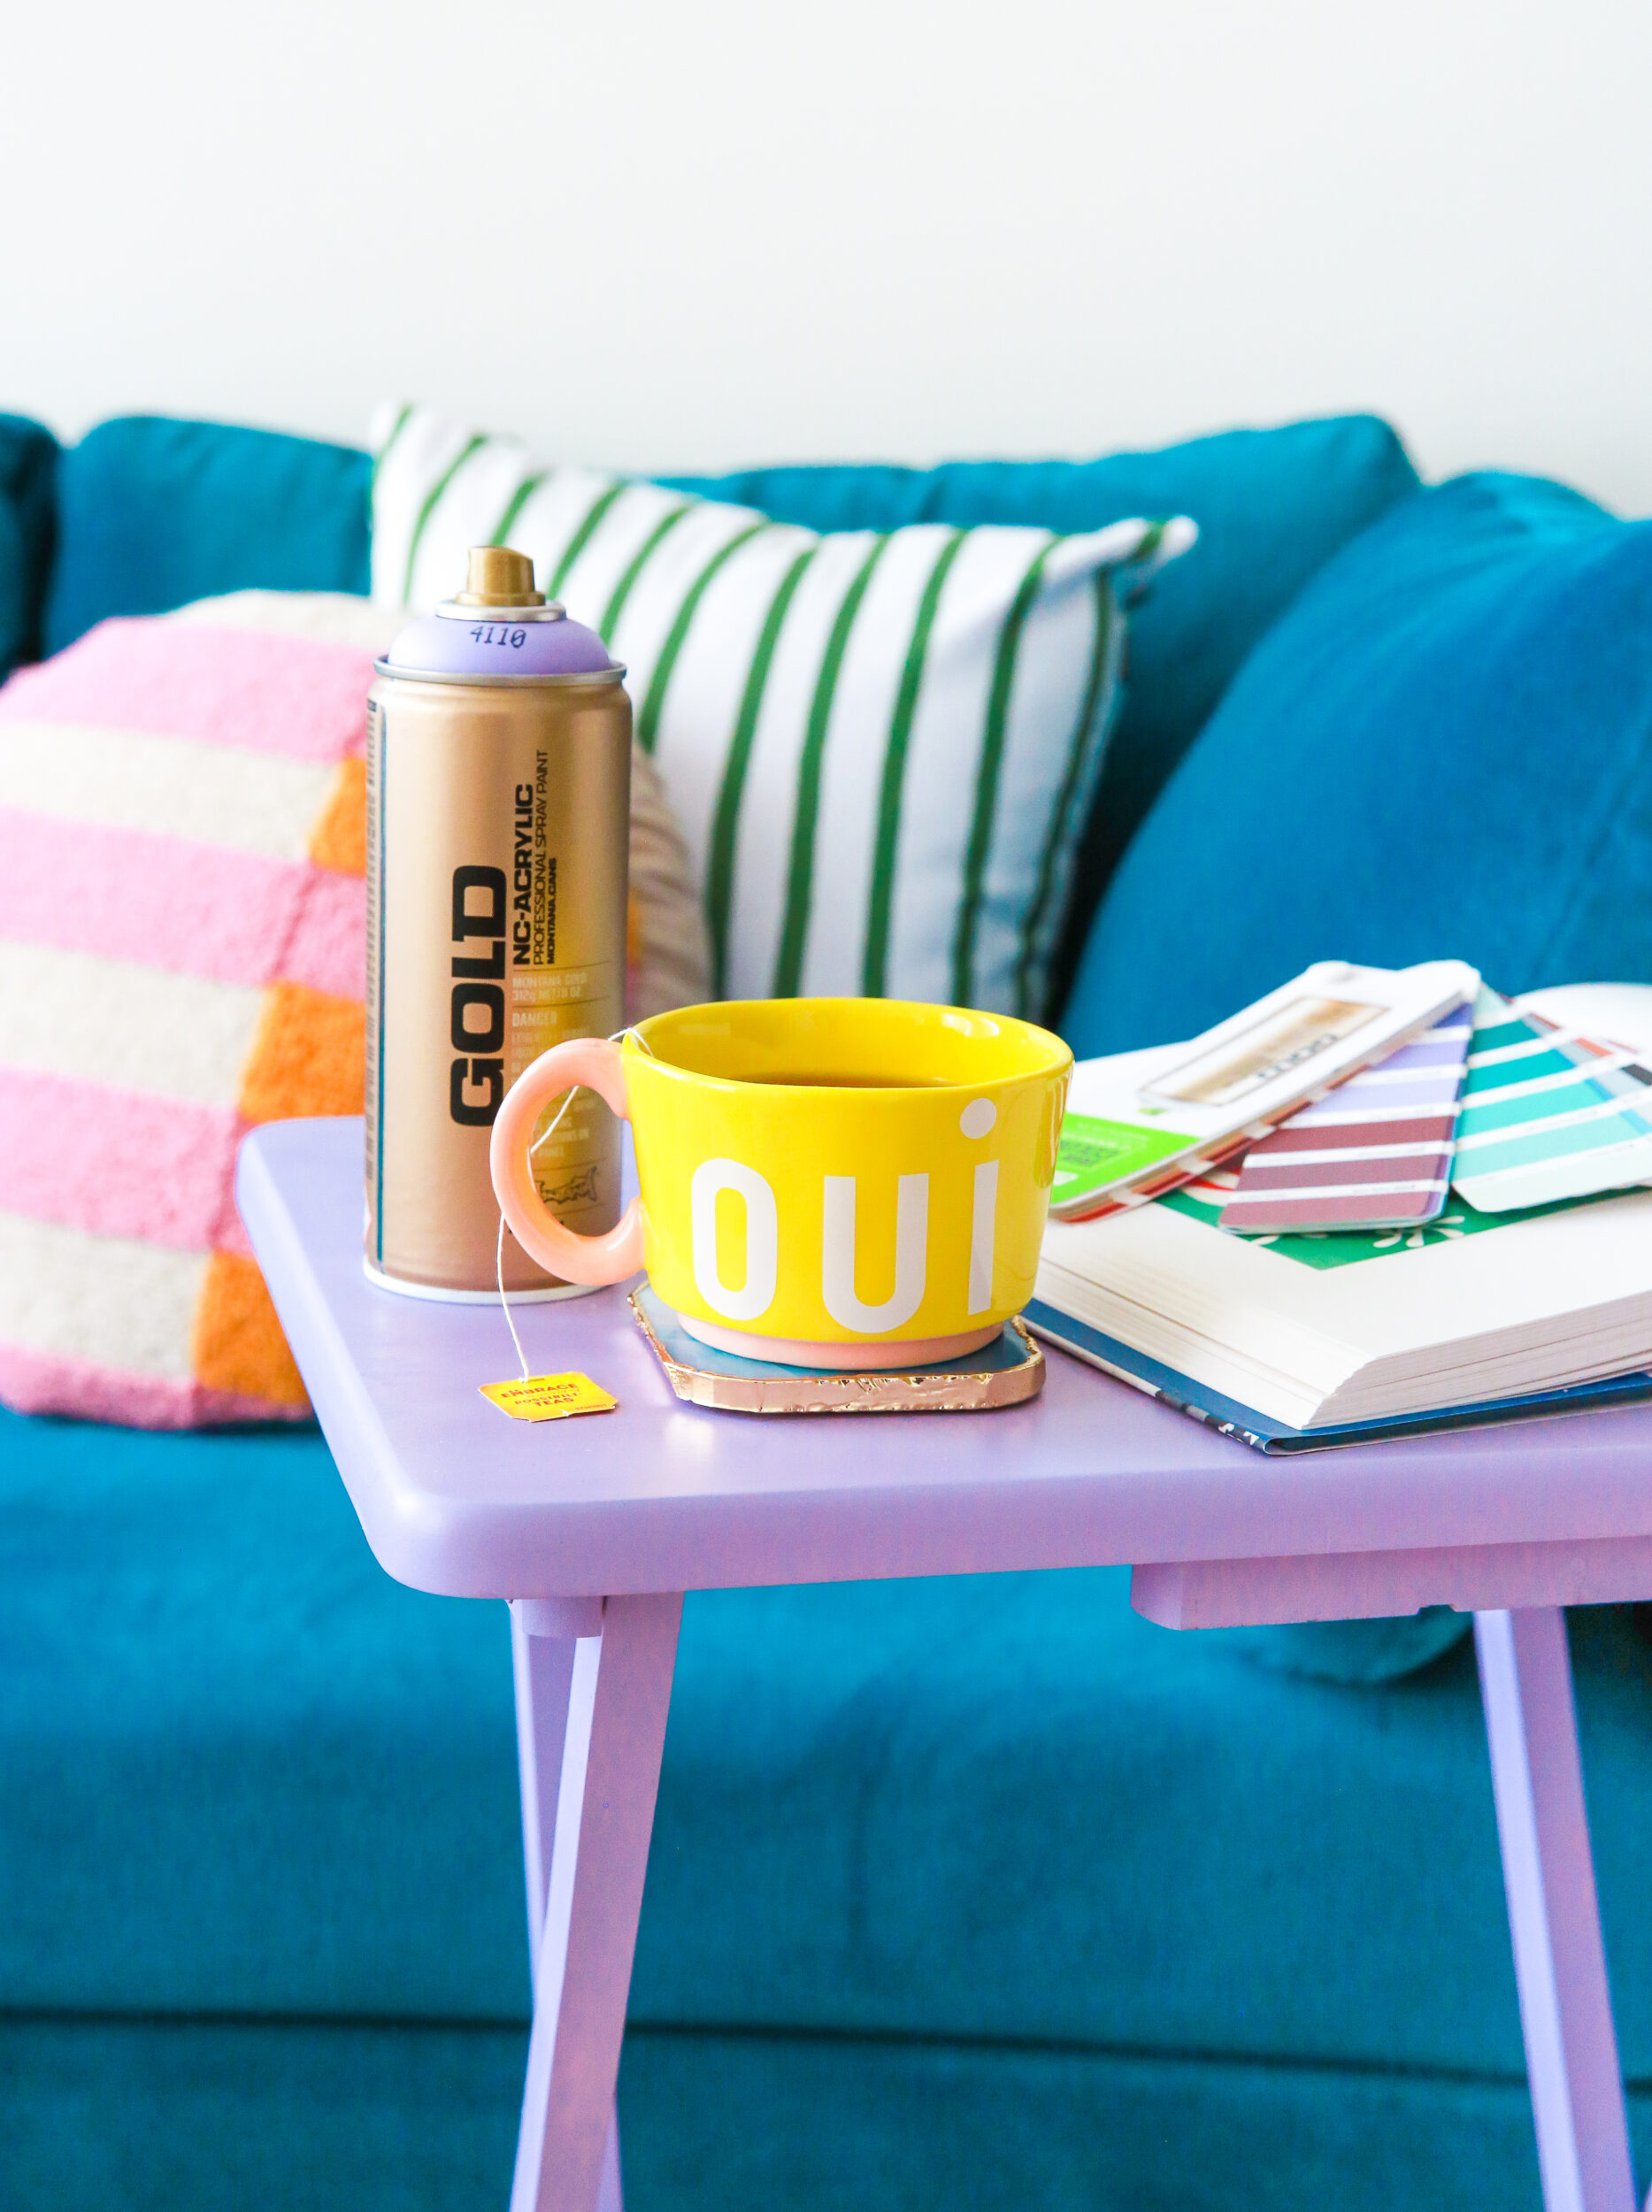
The word that comes to mind is STUNNING! Simple, beautiful, and even more practical than before. Obviously, you may want to choose another color to match the decor in your home. Or if you‘re feeling adventurous, a gradient color fade with seasonal colors could be ideal for your home or living space.
This project is for all skill levels. If you can trigger the nozzle of the can and move the sandpaper in the direction of the wood grain, then you‘re the right person for the job. Depending on the size of your table, we estimate 30-60 minutes of work time and recommend letting each coating dry overnight before applying the next product. Then it‘s time to place your coffee cup right back where it was before. How rewarding. Nice work with your pink and purple trays and Happy Crafting!


