


Beautiful Christmas decorations for your tree
Christmas Bauble’s are mandatory for any tree. Or at least we think so. A tree without bauble’s is like a champagne without bubbles. It got us thinking about how we could make our tree look simply divine this year, and at the same time a little more young and fresh than the years before? The key was going to be color.
Finding old baubles to upcycle, or new ones to personalise is not hard at this time of the year. And when the Christmas trees start to appear in shopfront windows, the baubles start to appear on the shelves of stores all over the world. With baubles in tow, here are three ideas you can try to make your Christmas a more colorful one.
Project 1: Montana Acrylic Marker Baubles
With a simple idea you can make grandios home decor.
Materials Used
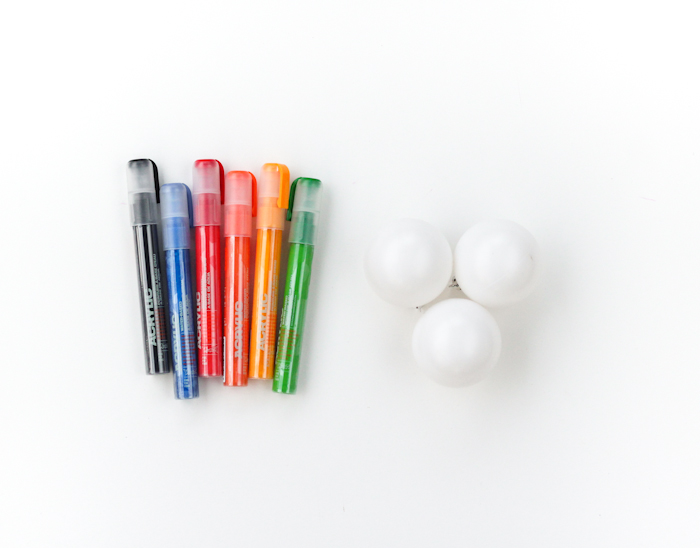
- Plain baubles (preferably white)
- Montana ACRYLIC Markers FINE in the colors of your choice
- As an alternative, consider using different sized Montana ACRYLIC Markers (eg. Extra Fine) or swap the tips for different effects
How it was done
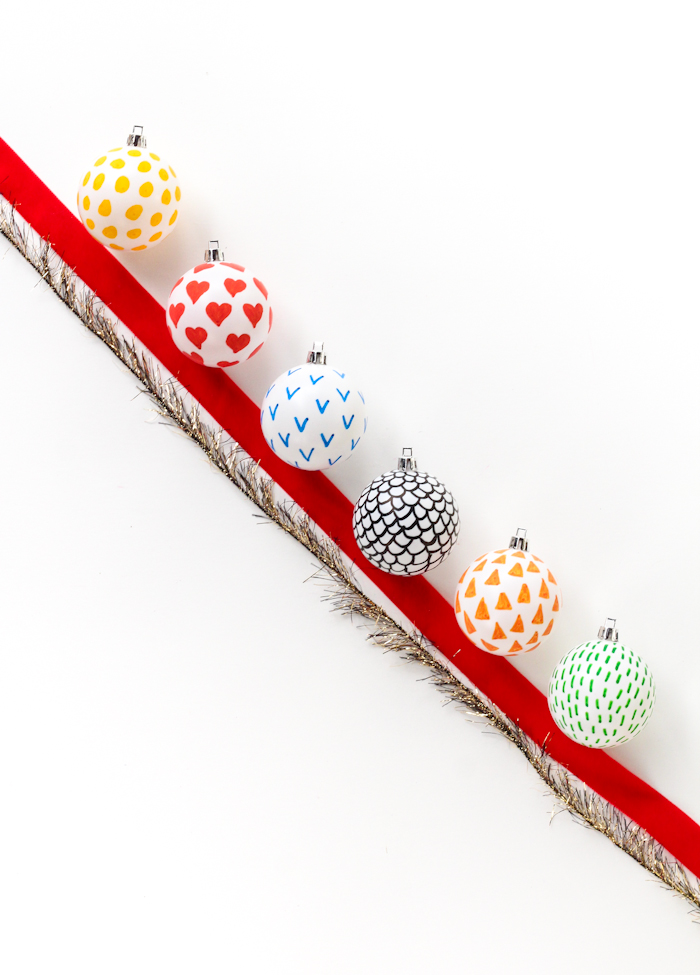
Coloring your white or plain baubles is as easy as pie. You just need a starting point. We chose to use one color Montana ACRYLIC Marker per bauble. With some nice music playing in the background and minds in the right mode to doodle, we made sure all the baubles were free of dust, clean and dry. We started with the Black ACRYLIC FINE Marker and made our first pattern. It started as semi circles and ended up looking like a series of scales. But beautiful ones that covered the whole bauble. We decided that this was how we were going to continue. One pattern and one color per bauble. You can choose any colors you like, or any variation of the colors we used. We focused on:
Orange – Repetitive triangle pattern
Blue – Repetitive V pattern
Yellow – Repetitive circle pattern
Red – Repetitive heart pattern
Green – Repetitive line pattern

This project was easy and able to be done by all skill levels. Apart from sourcing baubles you can spend as little as 5 minutes and as long as you want. Subject to how many bauble’s your decorating and how complicated you make your patterns.

Project 2: Bold Colorful Baubles
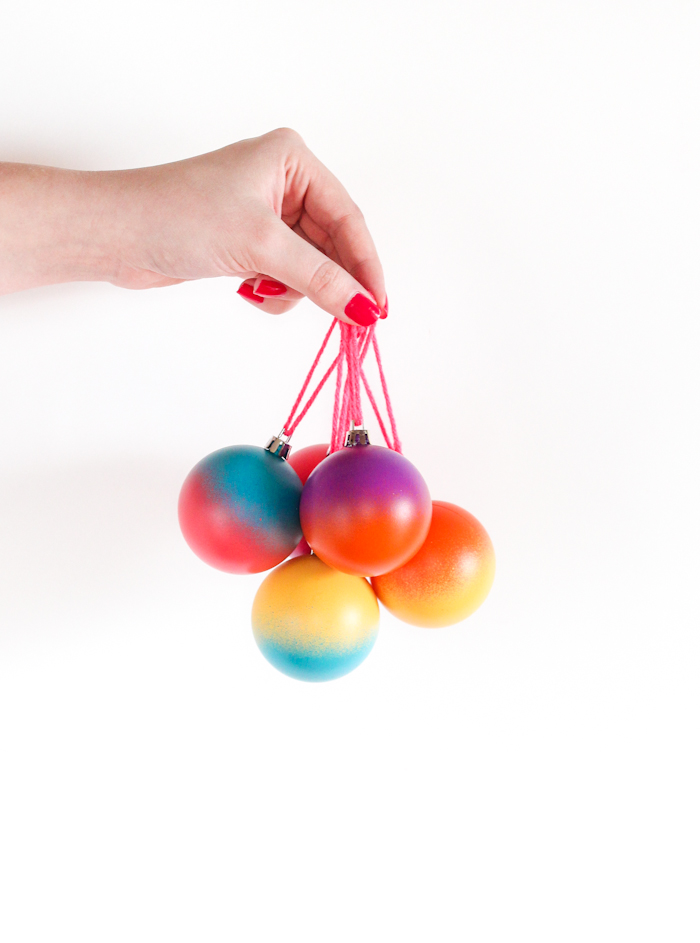
Montana GOLD Line gradient baubles.
The second project is another great idea with the “why didn’t I think of that” effect. Make baubles that radiate like rainbows.
Materials Used
- Montana GOLD Line Spray Paint (colors of your choice)
- Plain Bauble’s (white preferable)
- Old piece of foam
- Wooden Skewers
- Drop sheet or newspaper

How it was done
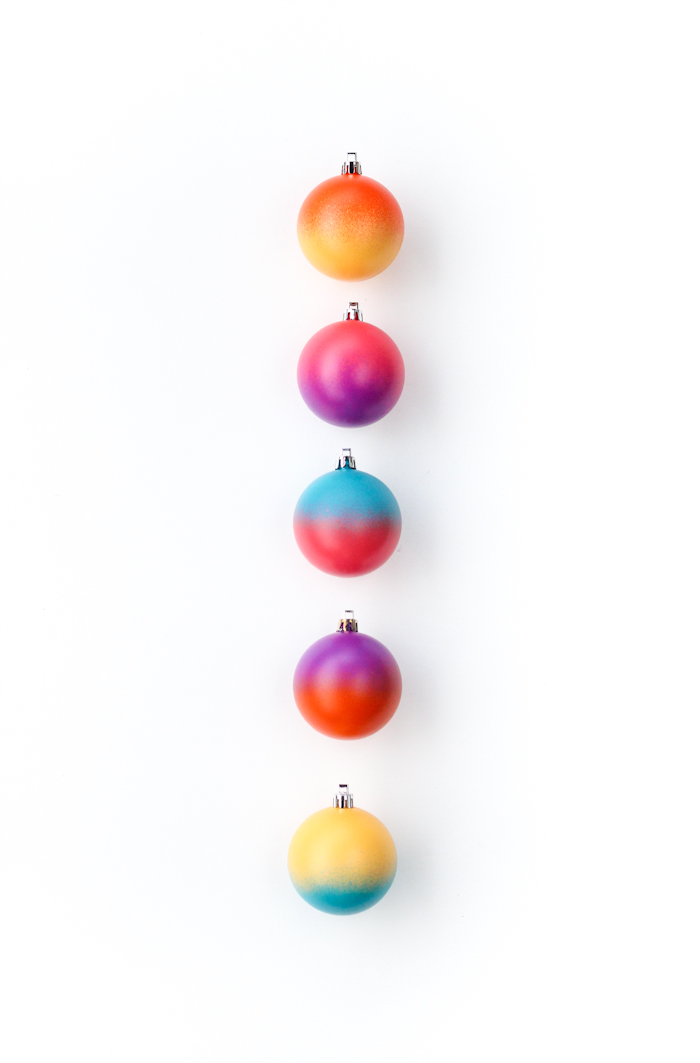
Having either collected old bauble’s that we can upcycle or bought plain ones (preferably white), the first step was to make sure they were dust free, clean and dry. Our work space was prepared with a drop sheet in the corner. Anticipation and excitement was high. Having shaken all our cans for 2-3 minutes, we removed the safety ring from under the nozzles and replaced the caps on the cans in readiness to spray. We started by using the lightest colors and spray each bauble completely which we attached to the wooden skewers so we wouldn’t spray on our hands. After all the bauble’s were coated, we stuck the skewer into an old piece of foam and waited 10 minutes for them to dry. In that time, coffee cups were topped up and some thought was given as to which luscious color would go with the existing one on each bauble. They pretty much all looked good, so off we went with the second color, only spraying the top half of the bauble’s. They looked amazing! If your painting on polystyrene bauble’s, don’t forget to pre prime them with MontanaCans POLYSTYRENE PRIMER, ensuring that there are no air holes for the paint to sneak into and agitate the foam.

This projects is possible for anyone. You can take as little as 10 minutes, or as long as you want depending on the number of bauble’s and number of colors you want to use. If you are feeling lucky, how about adding patterns from the previous project using Montana ACRYLIC Markers? Just let the bauble’s dry overnight and get creative with your patterns the next day.
Both Projects made by thecraftedlife.
Project 3: Metallic Star Bauble’s
We thought we’d save the more challenging project till last. With the materials you have already accumulated and a few extras, get ready to make timeless beauties.
Materials Used
- Montana METALLIC 400ml Spray (colors of your choice)
- Montana GOLD in Shock White (or alternative color of your choice)
- Wooden Skewers
- Drop Sheet
- Craft punch or shaped stickers
- Sticker paper
- Scissors
- Gloves (optional)

How it was done
As with all the projects, the first step is to make sure your bauble’s are dust free, clean and dry. The drop sheet was already in the work space and the cans were shaken 2-3 minutes to ensure the best possible paint mixture. We removed the safety rings from under the nozzles and re-applied the nozzles in readiness to paint. We first primed all the bauble’s that were attached to our wooden skewers so we could hold them, with the Montana GOLD, Shock White. This was to ensure the most effective results and add a little layering to our color schemes. We put the skewers into the foam and allowed them to dry for at least 30 minutes. Once they were all primed, we used a star craft punch to punch out some star stickers from our sticker paper that we would stick some of to our totally dry bauble’s later. If you have shaped stickers already, you could use them instead. And of course any shape or design could be used. Just check before starting that they peel off easily.
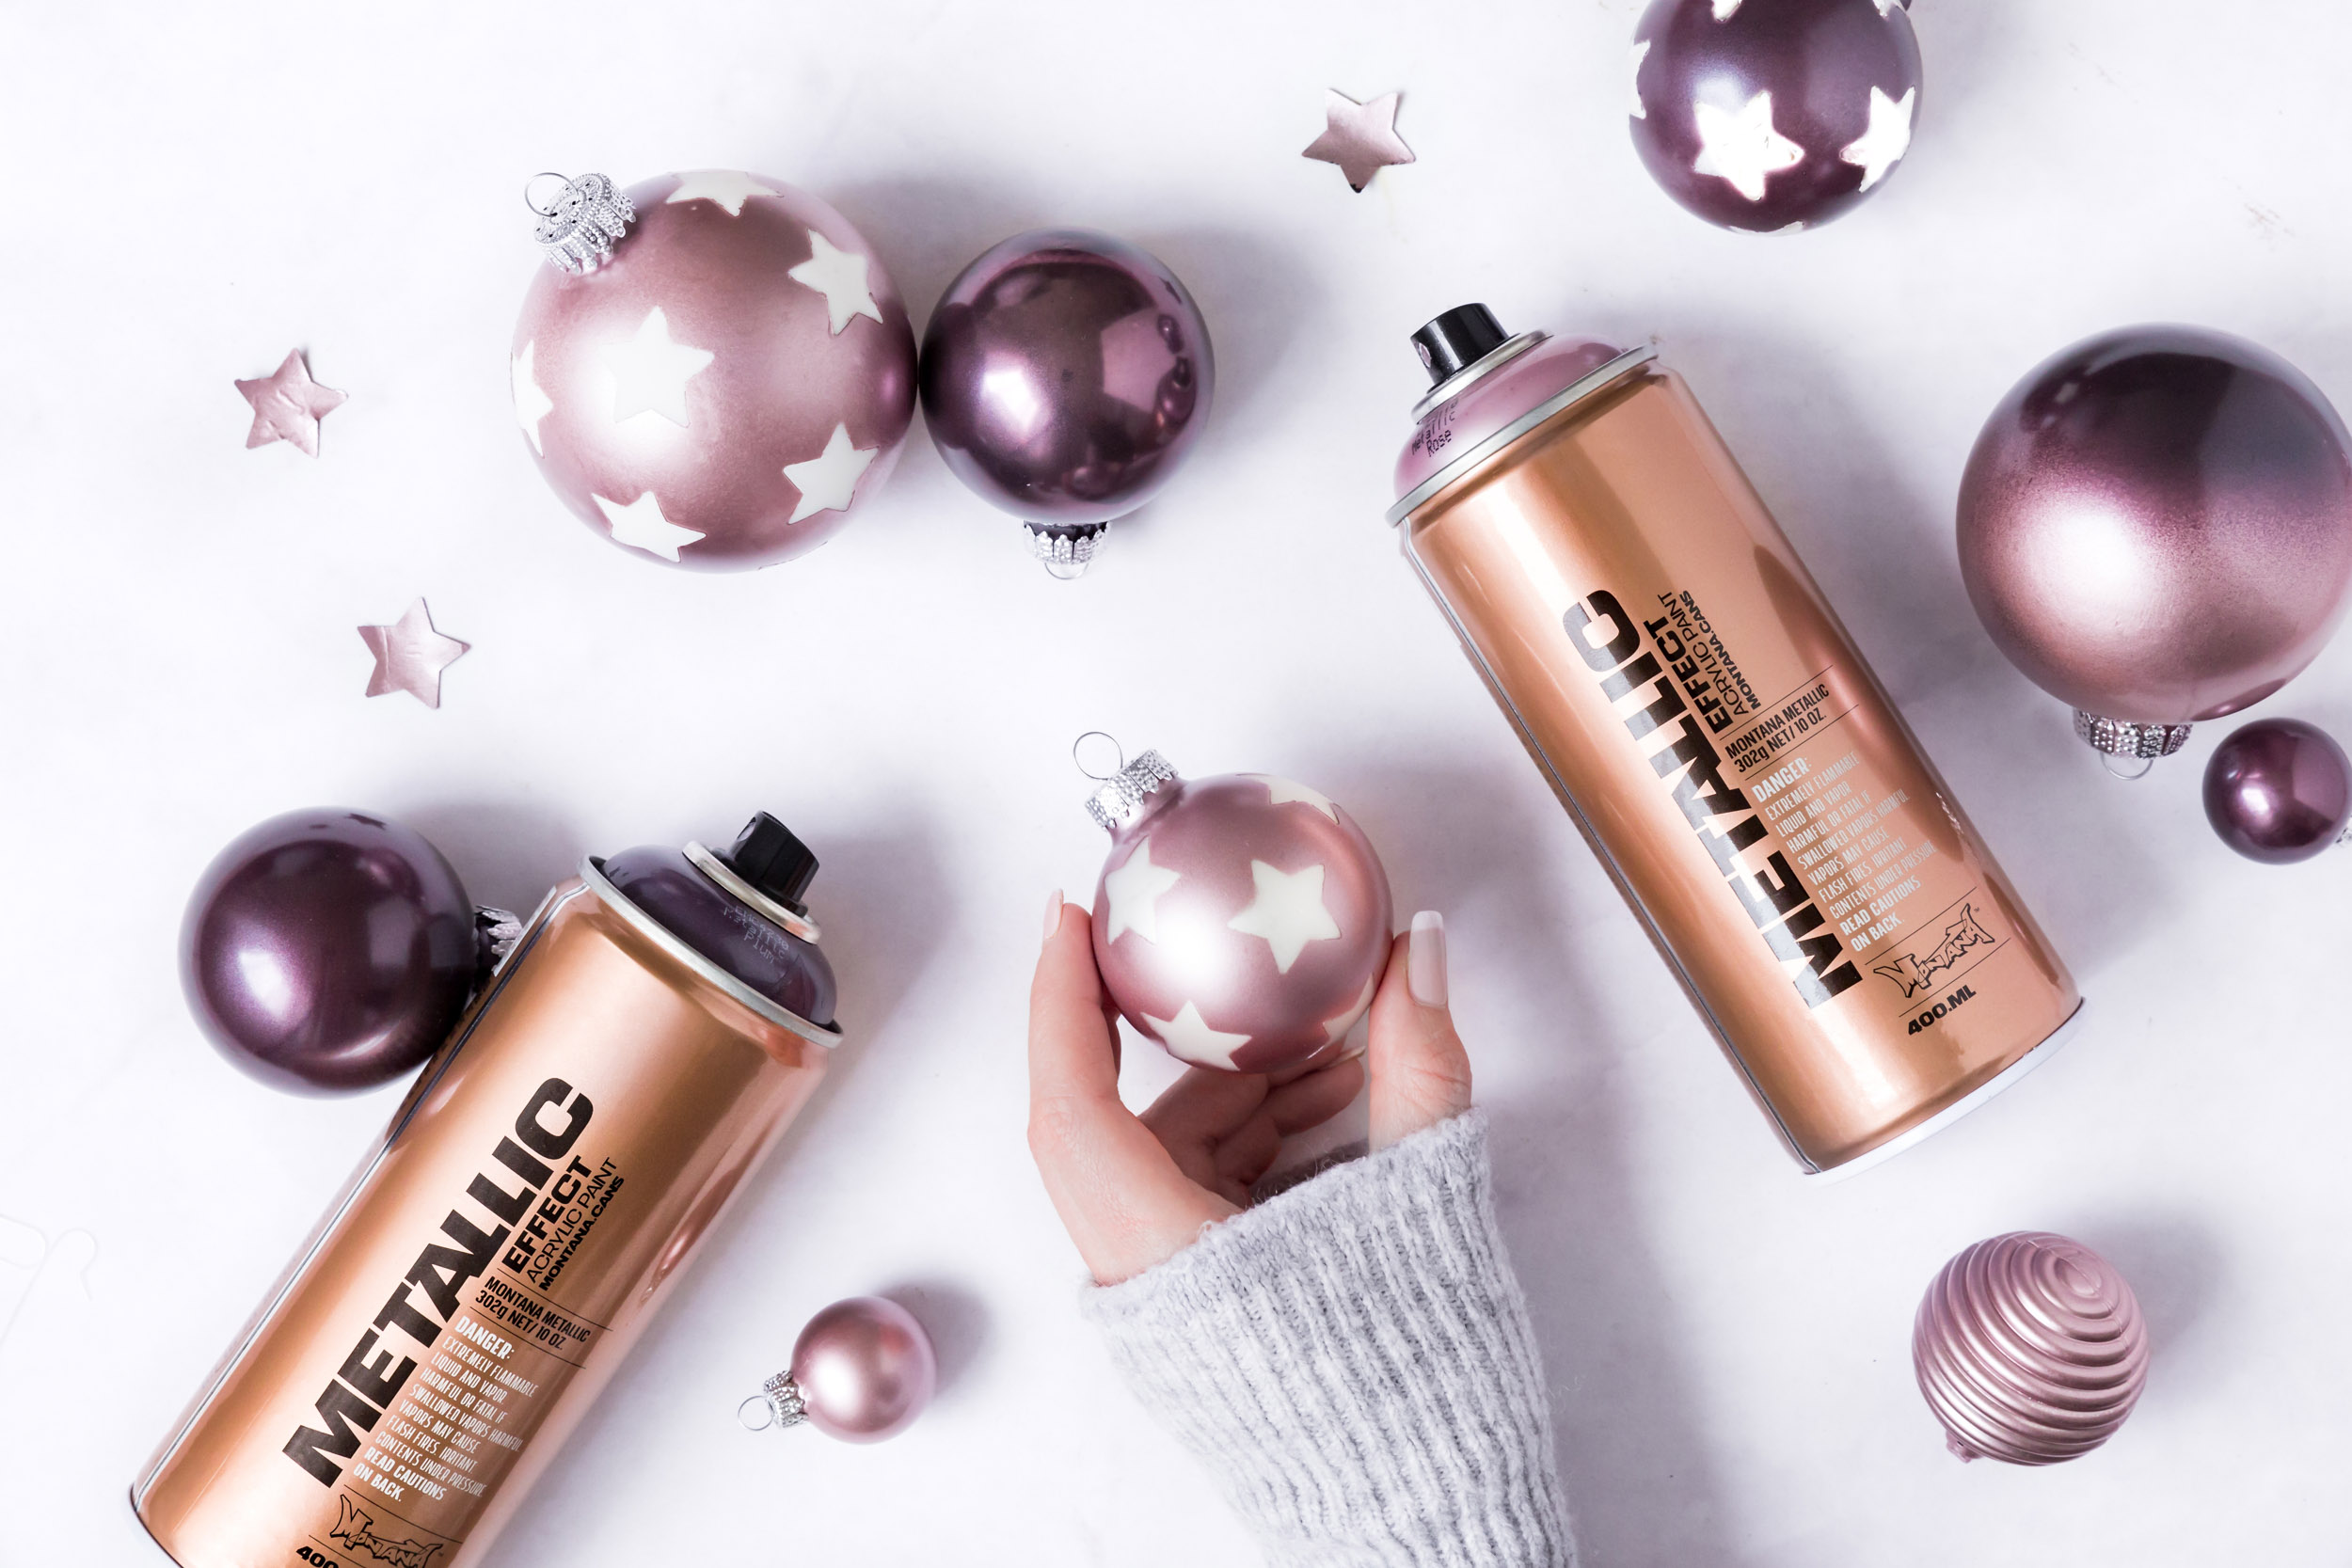
Our bauble’s came in all shapes and sizes so we decided not to put stickers on the smaller ones and some of the other larger ones, just to mix it up. When we returned, we applied the first coat of MontanaCans METALLIC Effect Spray coating to each bauble in the color of our choice coating the bauble completely. They already looked fabulous, but some could use an extra touch of something special. We removed the star stickers from the bauble’s that had them, exposing white stars. We put them aside as they were perfect as they are. We then chose a couple of smaller bauble’s that also looked finished, as they were. The remaining bauble’s we added another METALLIC 400ml color and hoped to compliment the existing color already. With all these warm luscious colors, that was easy. We left them all over night to cure. And WOW, they looked amazing.

This project could be kept simple (single or double color) for beginners. Or you could pitch it up to intermediate skill level if you wanted to add the sticker effect by making or buying pre-made stickers. But the results are stunning and professional regardless of which creative path you choose.
All these projects could be done in a day or over several days if you want to spread the fun out. A great way to reinvigorate your Christmas decor and gain some skills at the same time for other projects. Happy Crafting!


