“What’s the time” in style
OK.. Is it me, or is there no clocks anywhere anymore these days? Finding the time when you don’t have a phone with you is like finding a public toilet when you really need to go. There is nothing more rewarding than coming home and seeing a beautiful round clock, ticking away and reminding you at every turn what the time is. But when you’ve been looking at the same clock year after year, maybe it’s time for an upgrade. Or time to create your own? With three colors of Montana GOLD, a piece of wood and clock element, we did pretty-up a tried and true best friend. This is how we did it.
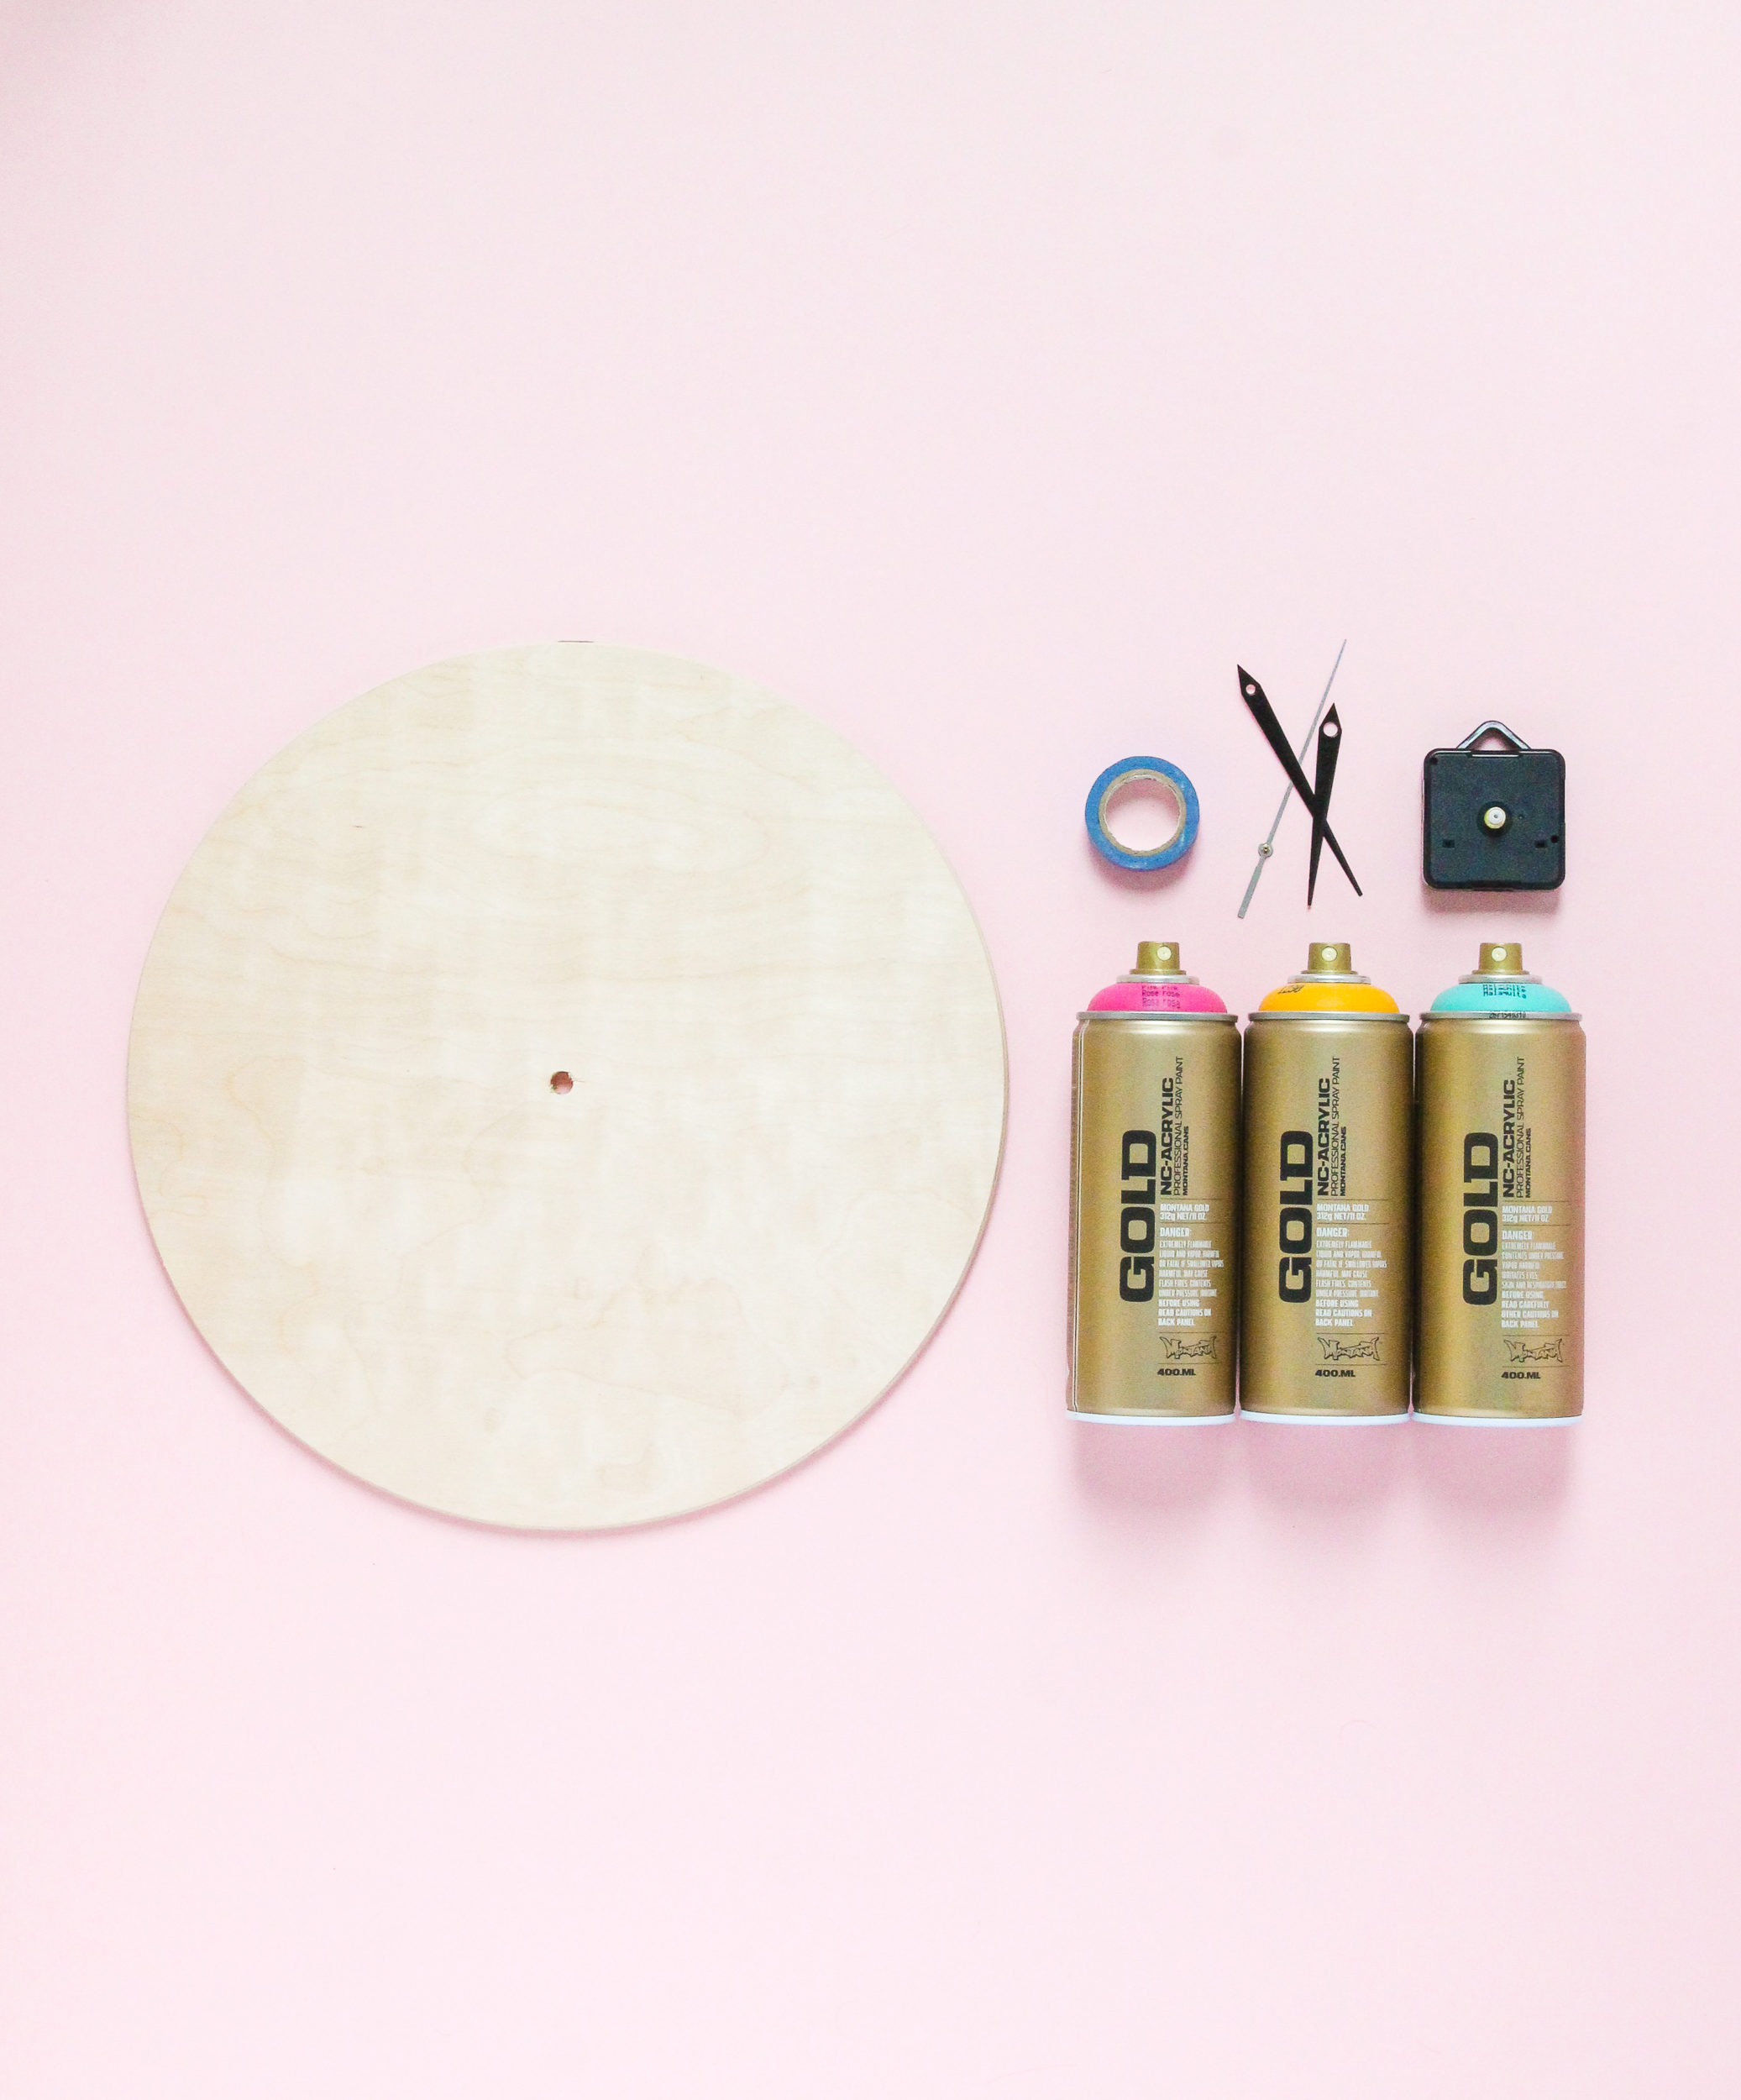
Materials Used
- Wooden circle as clock base. You could also use an existing clock, an old record or any other material that you can put a hole into
- A clock kit (the mechanical part). Or recycle one from an existing battery powered clock.
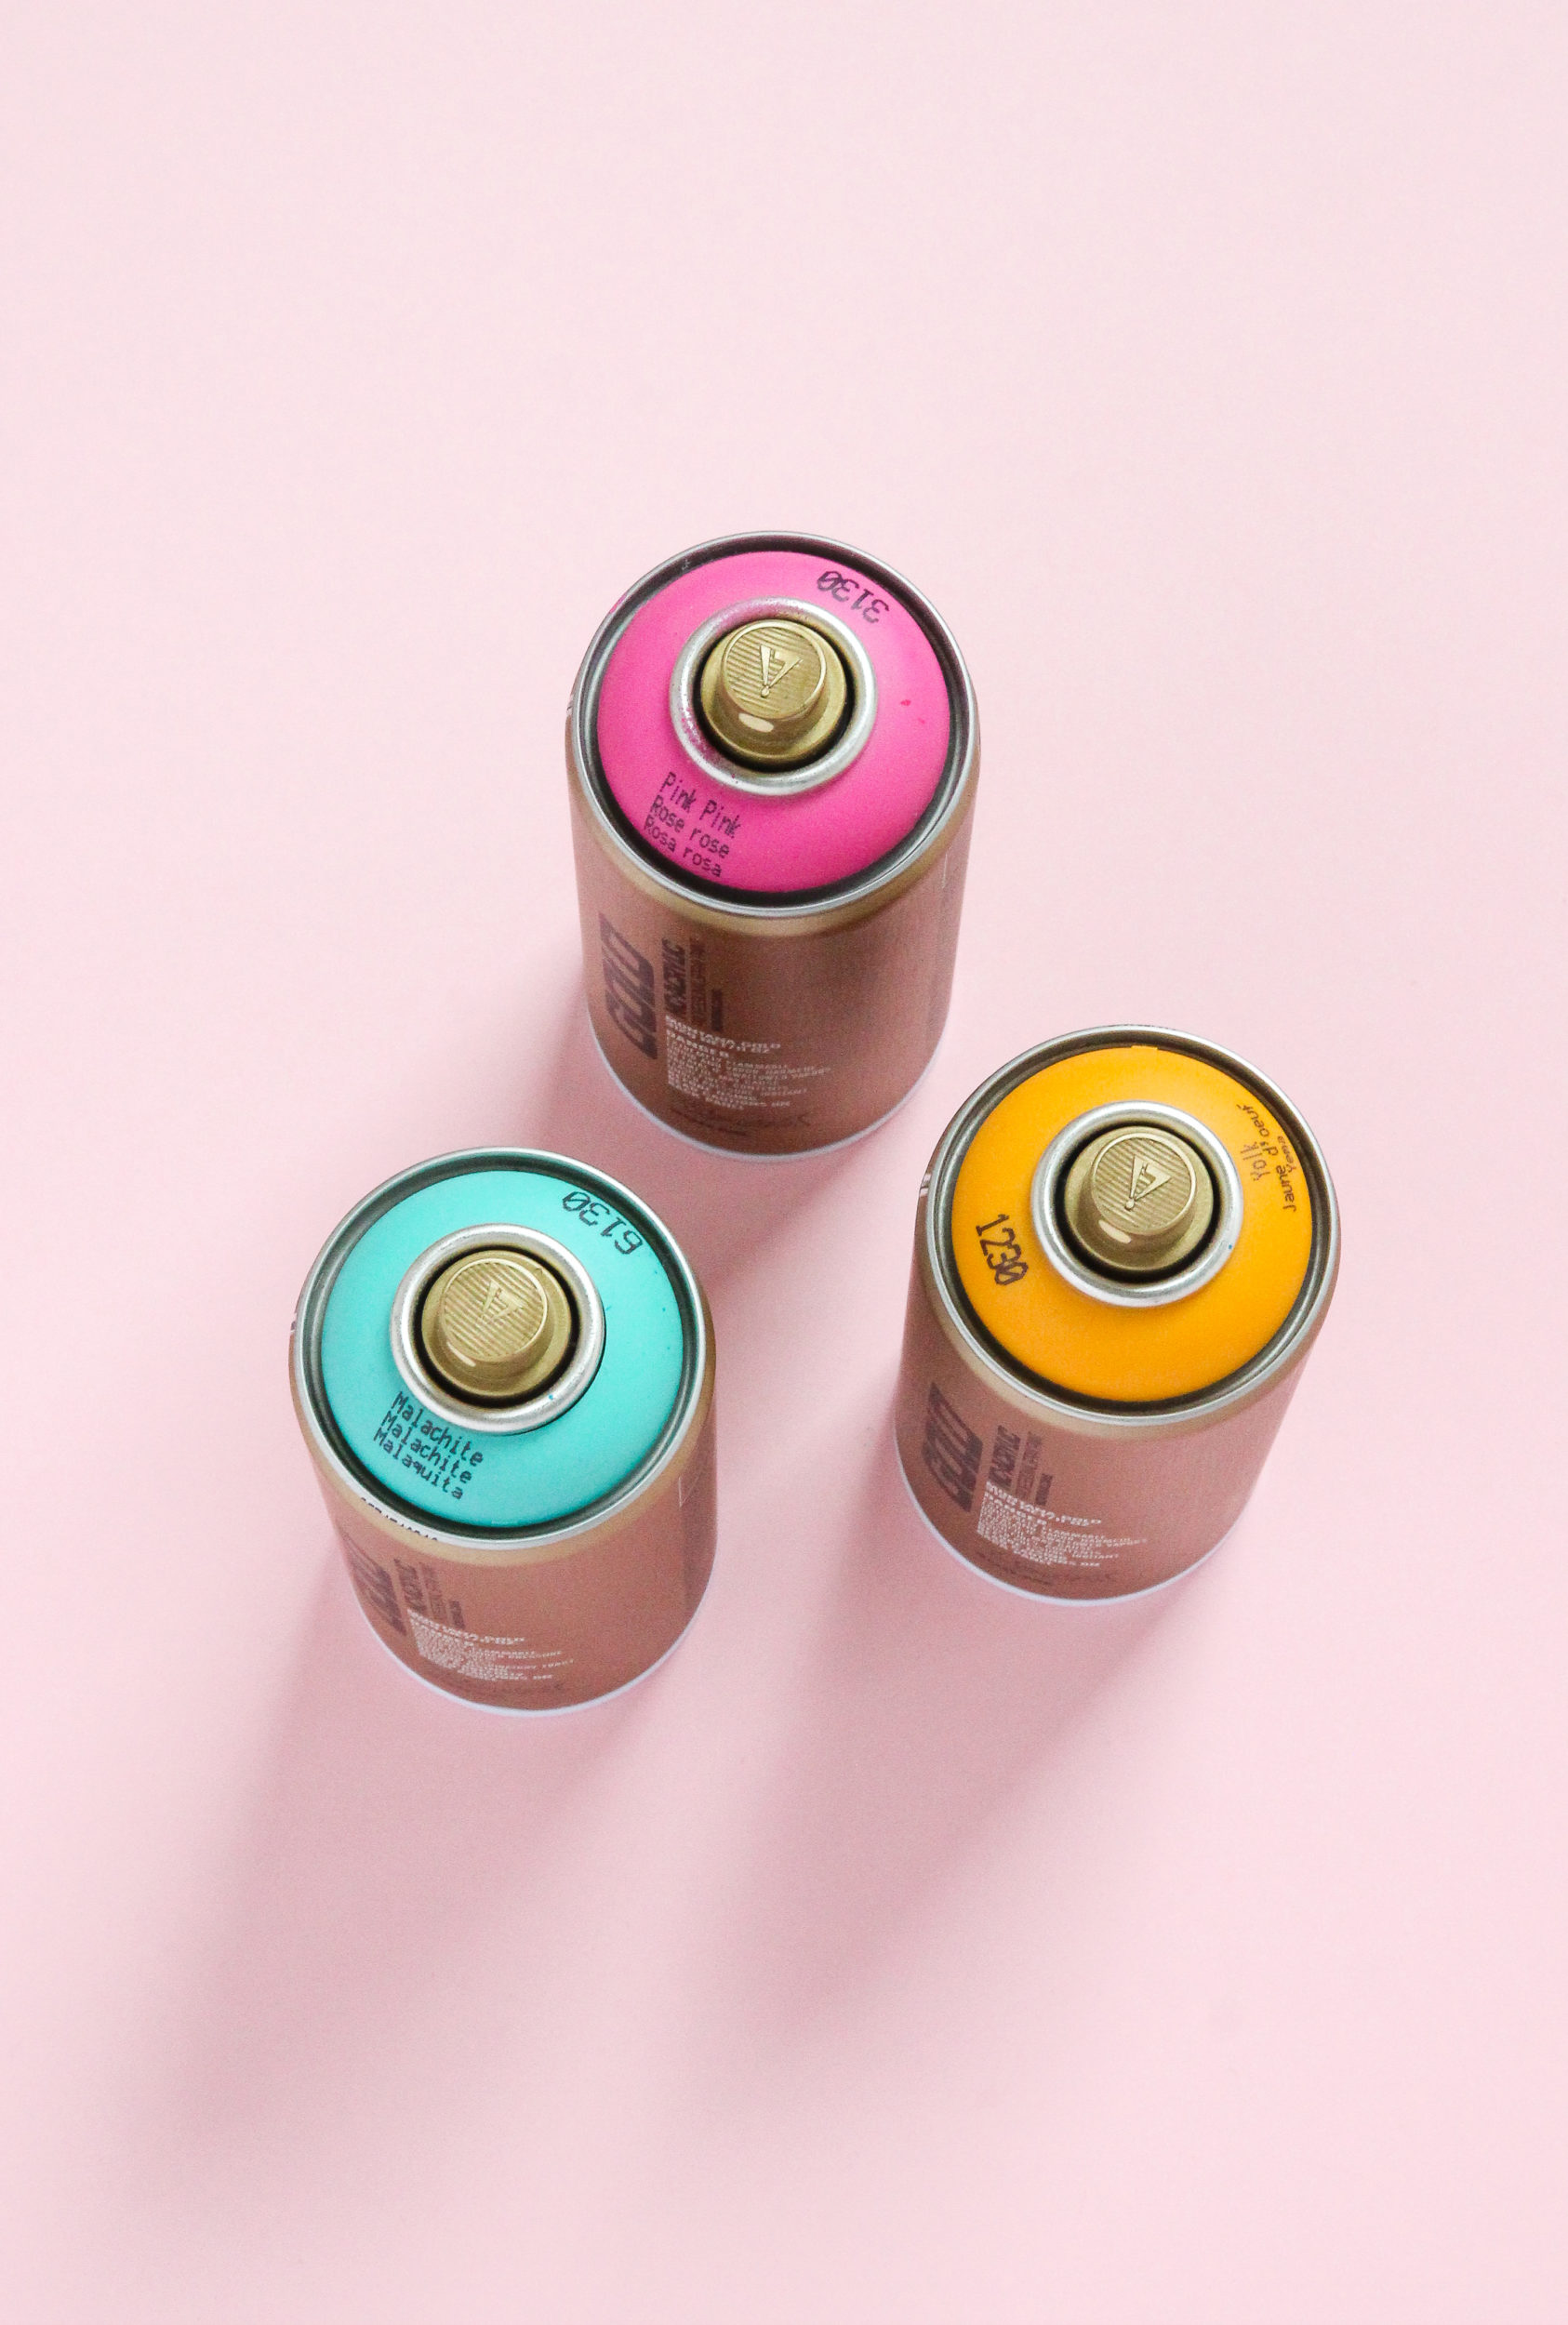
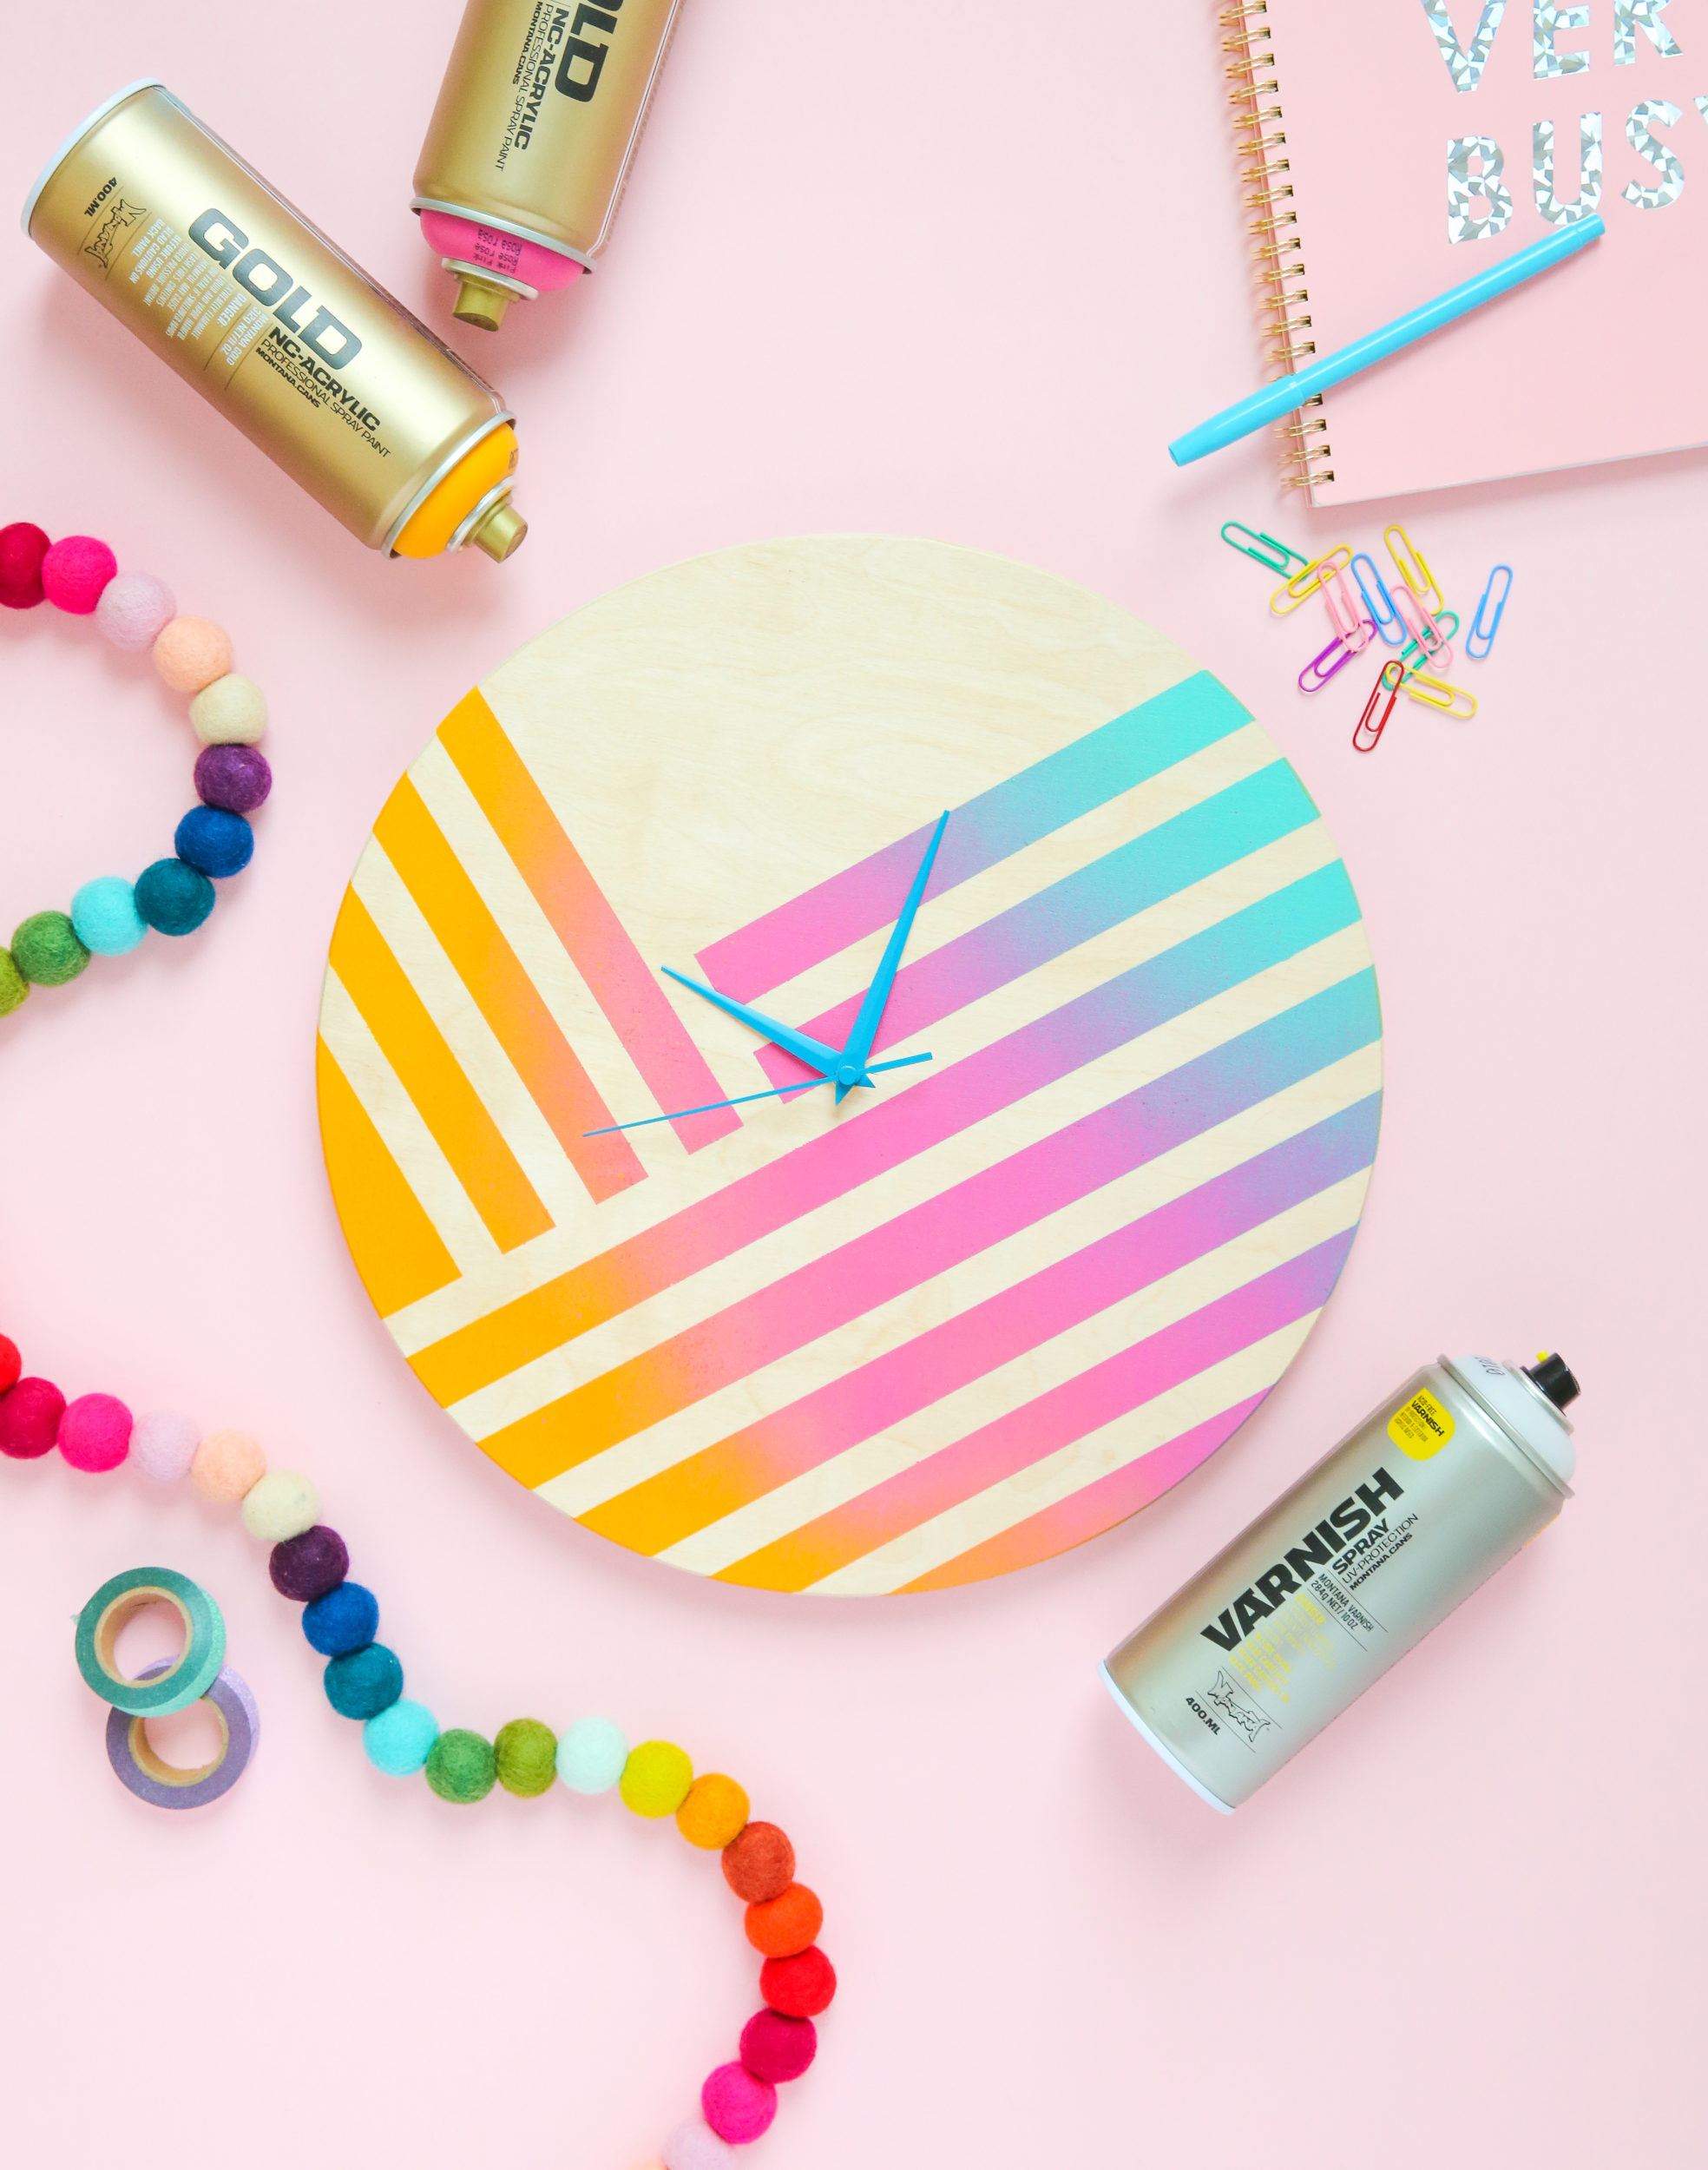
- Montana GOLD Line in colors Malachite, Yolk and Pink Pink
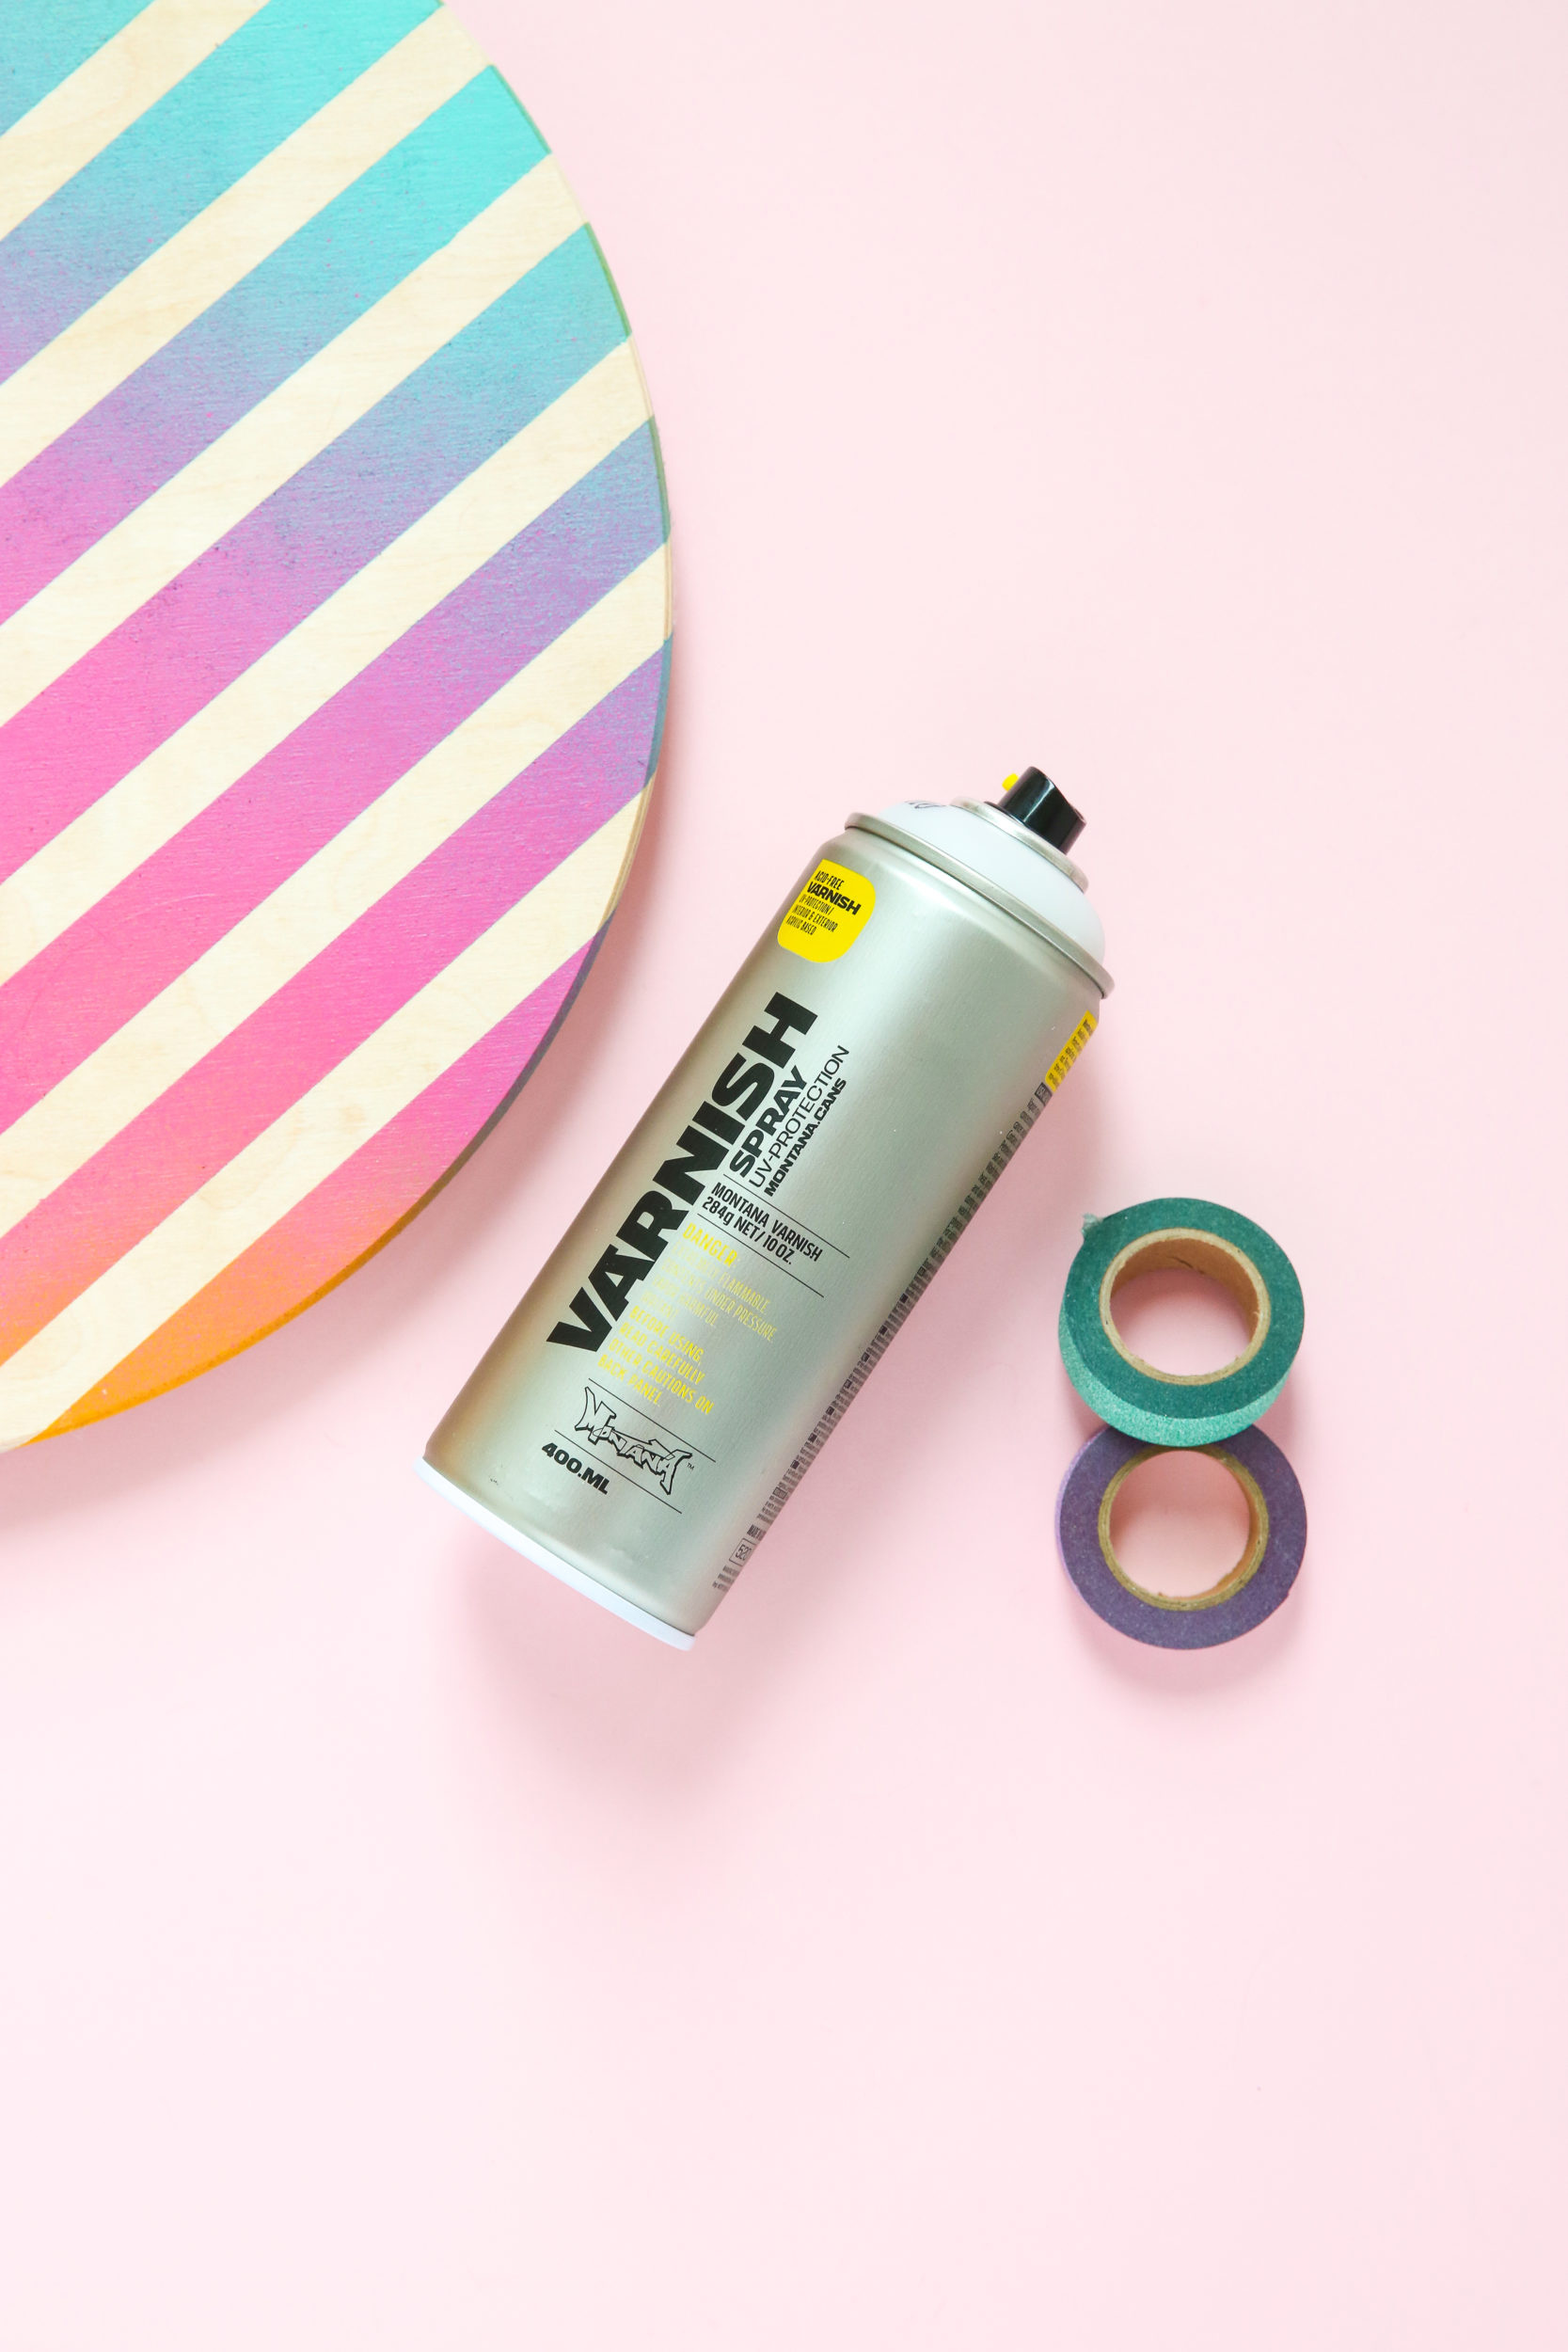
- Montana Cans VARNISH Spray in Semi-Gloss
- Painter’s tape
- Gloves
- Mask
- Drop sheet
How it was done
The largest part of your clock is the base. We found a pre-cut wooden round clock base at the craft section at our local hardware store. But if you are feeling brave, try cutting a clock base from wood yourself, recycle an existing battery powered clock or you could even try an old record. While you are there check for a battery powered clock kit as they won’t be too far away.
As ours was wood, we had a head start and simply wiped the base free of dust and stuck our painters tape on in the design of our choice. But the world is your oyster (or clock). So if your up-cycling an old clock or making one from another material, make sure it is clean and compatible to be sprayed.

After we put our gloves and mask on and our clock base on our drop sheet, we went to the magical process of shaking all our cans for 2-3 minutes. We then took off the nozzles and turned the cans upside down, allowing the little black safety ring to fall out. Nozzle back on snuggly and a short test spray away from any surfaces to see if we were ready to go. And we were..
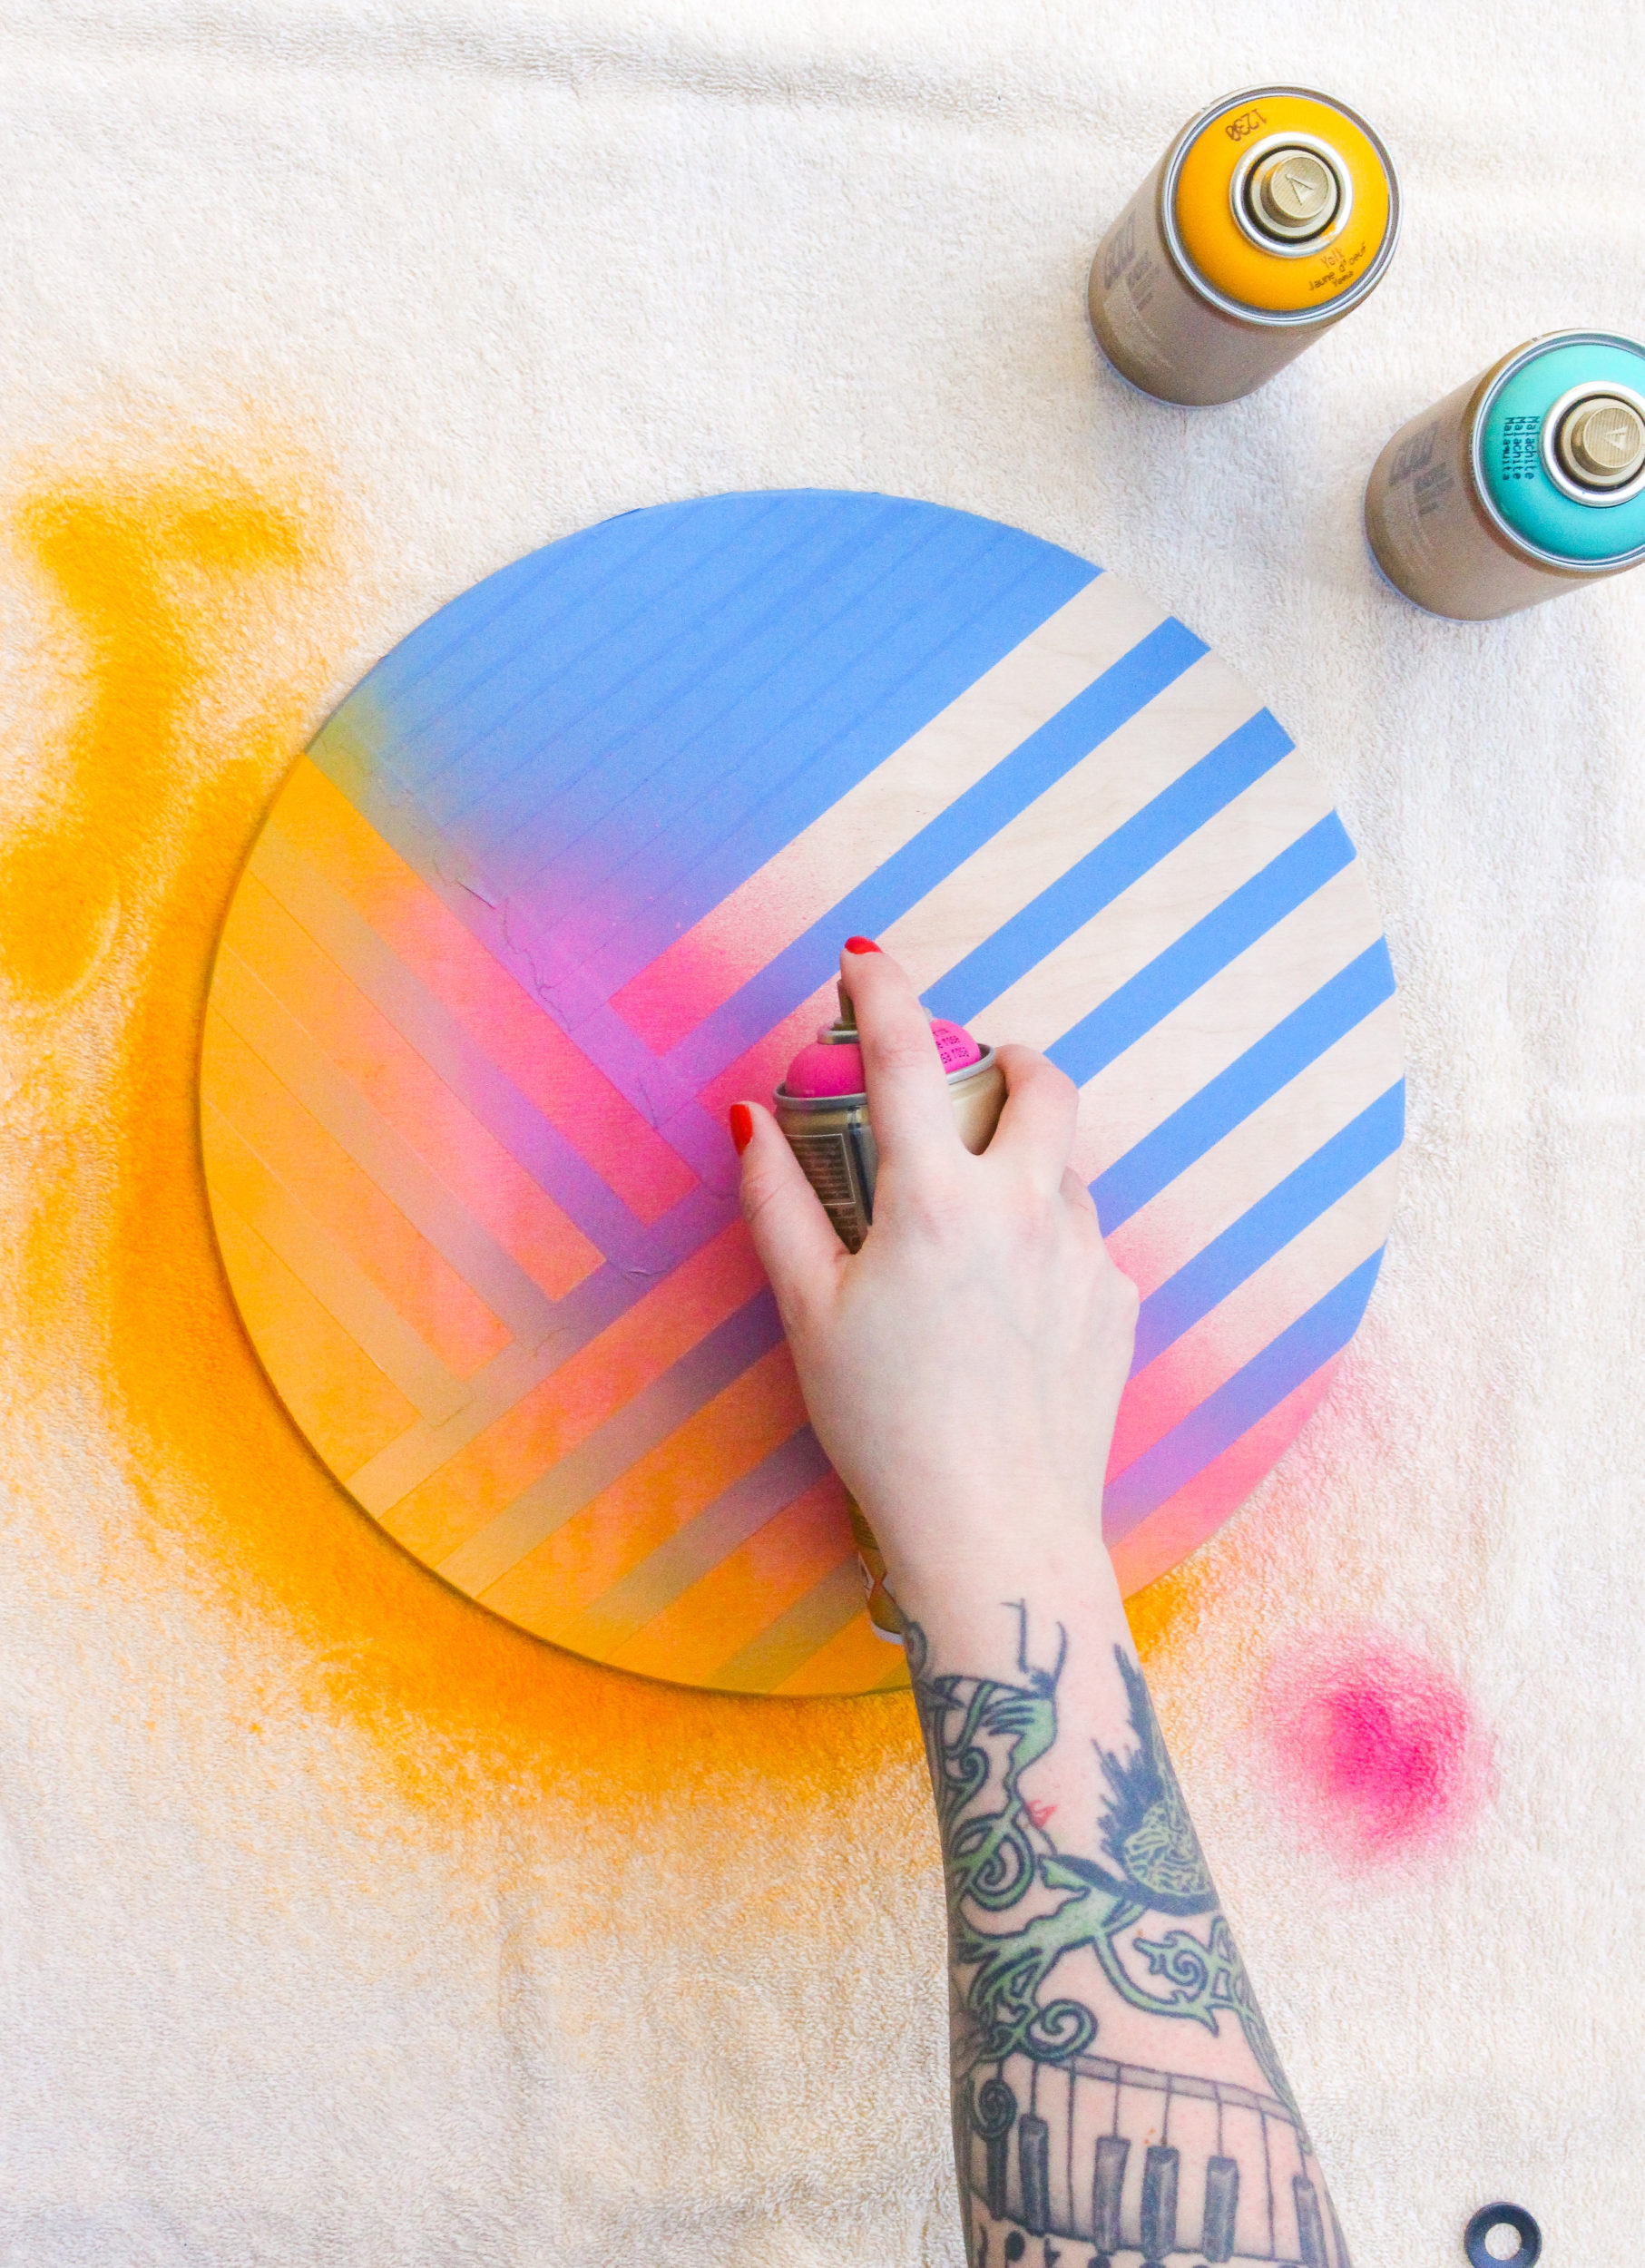
Starting with the Montana GOLD color Yolk, we sprayed an area from the left side leaving room for the next color Pink Pink. The final touch was the spritz of Malachite and already an ordinary piece of wood with a hole was looking no short of gorgeous.
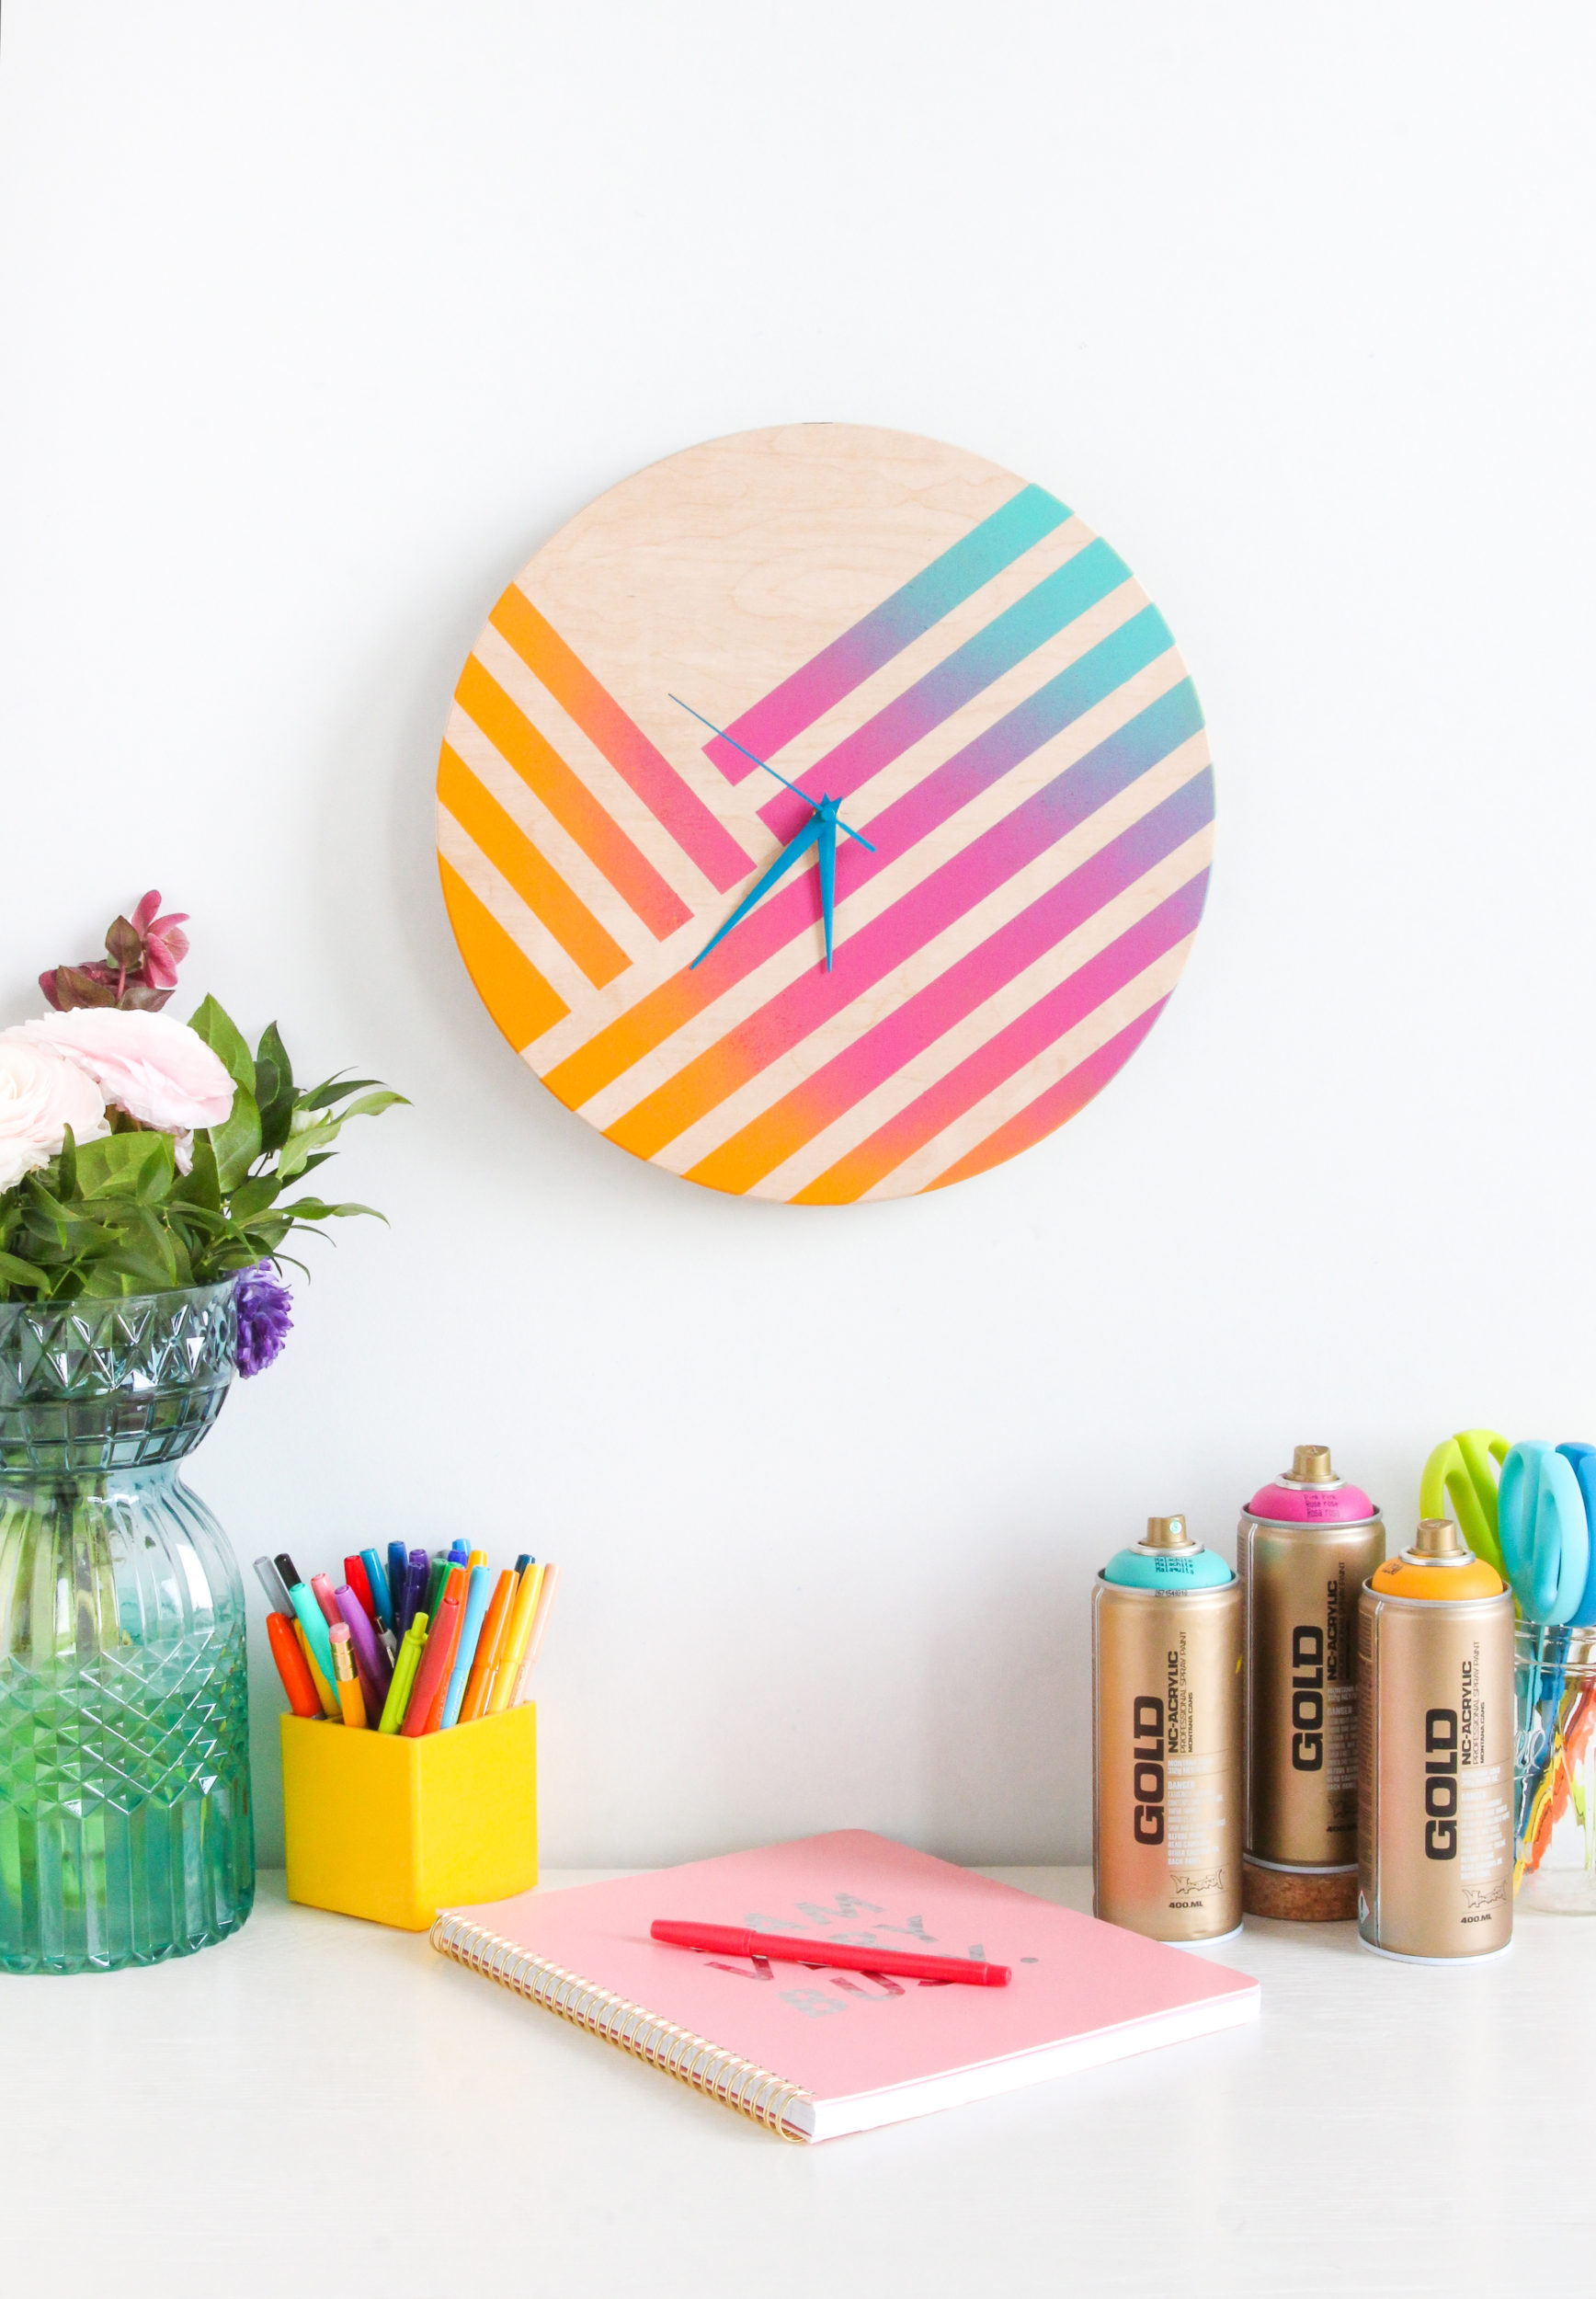
Believe it or not, you are almost done! We removed the painters tape after about 3 minutes and put on two coats of Montana Cans VARNISH Spray in Semi-Gloss to seal the paint and the wood, then left the clock base over night to dry completely. Perfect timing for a glass of wine and some time on the couch to read how we put the clock kit together in the hole. That took all of 2 minutes.
It was so easy we surprised even ourselves. Our clock kit had a little space to hang the clock on, but if yours doesn’t have this a simple little picture hanging hook or D-ring will do the job. That’s it.. And what a great result for such a useful piece of home decor.
This project is for anyone. It’s easy and fun. If you don’t use wood as your base, try and make sure that the material you use is aerosol paint compatible or properly primed so you can paint it without problems. The hardest part is deciding the colors. And even that is fun.
Good luck and happy crafting!